Having a VPS means having full control over your server. However, this full control often requires manual management of every element, such as installing and configuring NGINX from the terminal, creating virtual hosts, managing SSL certificates via Certbot, handling MySQL databases through CLI, and setting file permissions one by one. This process is not only time-consuming but also prone to configuration errors.
This complexity becomes a real barrier for developers, web designers, or small business owners who want to focus on their products rather than server administration. Control panels offer a solution, but many available options feel too heavy, packed with unnecessary features, or demand significant licensing costs.
BeAdmin emerges as a lightweight and modular alternative—a modern server control panel designed to strike a balance between configuration flexibility and interface convenience.
Introduction to BeAdmin
BeAdmin is a modern VPS control panel designed to simplify server administration without compromising flexibility. This panel is lightweight and modular, allowing you to install only the modules you truly need, eliminating overhead from irrelevant features.
As described officially, BeAdmin is "a lightweight, modular server management panel for IT professionals and entrepreneurs who value convenience, reliability, and flexibility." This panel helps configure the right web services according to your business needs, ranging from NGINX web servers, MariaDB databases, email servers, to VPN servers.
Advantages of BeAdmin
BeAdmin offers several advantages that distinguish it from other control panels:
- Clean and intuitive interface. The dashboard is designed to be easily understood without needing to read lengthy documentation first.
- Modular architecture. Choose and install only the modules you need. If your server is used solely as a mail server, you don't need to install NGINX or WordPress.
- Start free, pay as needed. The free version includes NGINX, MariaDB, multi-version PHP, CRON scheduler, email server, and user management—sufficient for most common needs.
- Multi-server management. Manage multiple servers from a single centralized interface, suitable for teams or small-to-medium-scale infrastructure managers.
- Automatic SSL. SSL certificates are issued automatically as long as the domain is pointed to the server IP before installation.
Who Is BeAdmin For?
BeAdmin is suitable for:
- Developers and DevOps engineers seeking higher productivity in server management.
- Small and medium business owners who need infrastructure control without dedicated IT staff.
- Web hosting providers requiring automated and scalable solutions.
- Individuals running personal projects or portfolios on a VPS.
BeAdmin Pricing Packages
BeAdmin is available in three package options:
| Package | Price | Contents |
|---|---|---|
| FREE | $0 / month | NGINX, multi-version PHP, MariaDB, CRON, Mail server, Users & Roles, 1 Xray user |
| CUSTOM | Starting at $1 / month | All FREE features + additional Xray modules as selected |
| XRAY FAMILY | $4 / month | All FREE features + 5 additional Xray users (total 6 VPN users) |
The free version has no time limit and continues to receive updates. Account registration is not required for using the free version but is recommended to access paid modules and multi-server management features.
Installation Prerequisites
System Requirements
Ensure your server meets the following minimum specifications before starting installation:
- Operating System: Ubuntu 22.04 LTS or 24.04 LTS; or Debian 12 / 13. The server must be a clean installation (blank server) and not one already configured with other web servers.
- RAM: Minimum 2 GB.
- Storage: Minimum 20 GB.
- Architecture: x86_64 / amd64 or arm64 / aarch64.
BeAdmin is installed on a VPS (Virtual Private Server) or bare metal server. Shared hosting servers are incompatible because BeAdmin requires root access to the system.
Domain and DNS Preparation
Automatic SSL can only be issued if the domain is pointed to the server IP before the installation process begins. BeAdmin can still be installed and accessed via the server IP if a domain hasn't been set up, but browsers will display a warning about an insecure connection due to the use of a self-signed certificate.
DNS preparation steps:
- Log in to your registrar or DNS provider dashboard.
- Create an A record with the name @ or your chosen subdomain (e.g., panel.yourdomain.com).
- Point this record to your server's IP address.
- Wait for DNS propagation, which typically takes 5 to 30 minutes.
Propagation verification can be done via terminal:
dig +short A panel.yourdomain.comThe domain is ready for use if the output displays the correct server IP.
SSH Access to Server
BeAdmin installation is performed via terminal through SSH. Ensure:
- You can log in to the server as
root, or as a user withsudoprivileges and runsudo -ito switch to root. - The SSH connection is active and stable throughout the installation process.
BeAdmin Installation Steps
BeAdmin installation uses an interactive method, guiding you through basic configuration during installation: entering your domain name and admin email address. This is the recommended approach for new users.
Step 1. Log in to your server via SSH as root:
ssh root@your_server_ipIf using a sudo user, run:
sudo -iStep 2. Run the following installation command in the terminal:
wget -O /etc/apt/trusted.gpg.d/beadmin-nexus-public.gpg \
  "https://nexus.beadmin.com/repository/public-keys/beadmin-nexus-public.gpg" && \
chmod 644 /etc/apt/trusted.gpg.d/beadmin-nexus-public.gpg && \
echo "deb [signed-by=/etc/apt/trusted.gpg.d/beadmin-nexus-public.gpg] \
  https://nexus.beadmin.com/repository/beadmin/ stable main" \
  > /etc/apt/sources.list.d/beadmin.list && \
apt update && apt install -y --no-install-recommends beadmin && \
systemctl enable --now beadmin
The command above performs three tasks sequentially: adding the official BeAdmin repository to your system, installing the beadmin package via apt, then enabling the service as a systemd service that runs automatically on server restart. This process typically completes within 15–30 seconds.
Step 3. Follow the interactive installation prompts:
- Domain name (optional): Enter your domain name, e.g., panel.yourdomain.com. Leave blank if you don't have a domain yet; SSL will be issued later once the domain is ready.
- Admin email address: Enter a valid email to be used as the primary login. If left blank, the default is [email protected].
Note: If a domain is entered but the email is invalid, the automatic SSL issuance process will fail, and BeAdmin will use a self-signed certificate. The server remains accessible, but browsers will display a security warning.
Step 4. Press Enter and wait for installation to complete.
First-Time Dashboard Access
After installation completes, BeAdmin can be accessed via browser:
- Via server IP: https://your_server_ip:8080
- Via domain: https://panel.yourdomain.com:8080
Log in using the email entered during installation. If using the default, use [email protected] as the username and the auto-generated password displayed at the end of the installation process in the terminal.
Info: If accessing via IP without a domain, your browser may display a "Your connection is not private" warning. This is normal because a self-signed certificate is used. Click Advanced, then Proceed to [your_server_ip] (unsafe) to continue.
Exploring the Dashboard and Core Modules
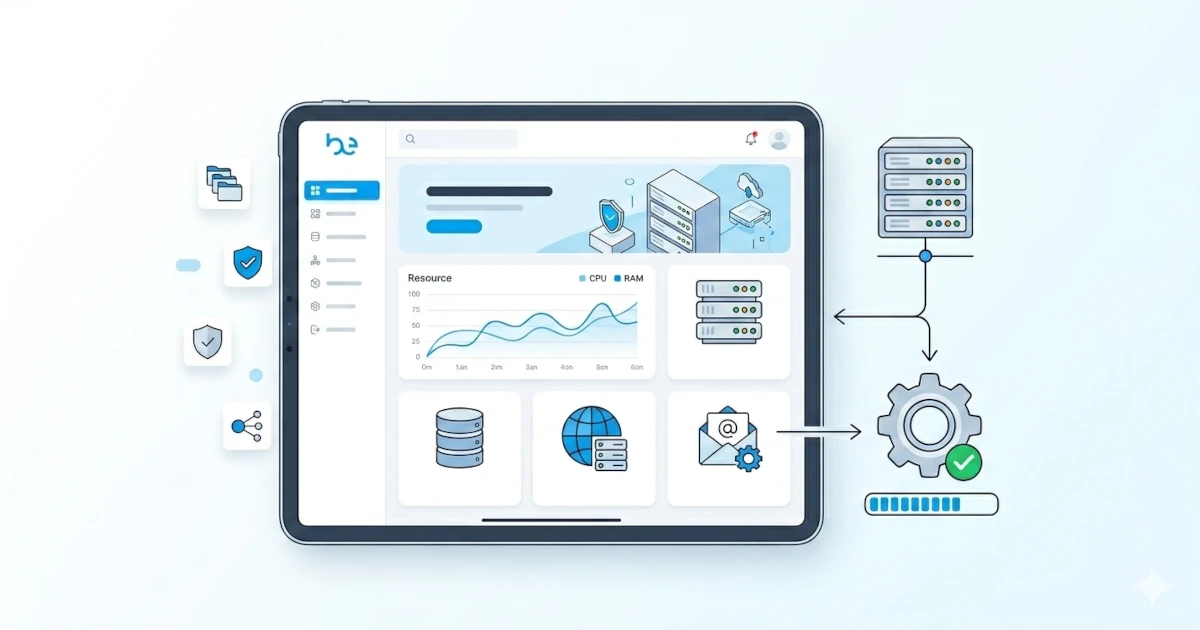
Main Dashboard: Real-Time Monitoring
The main BeAdmin page displays real-time server health status, such as CPU, RAM, and disk usage. This information helps identify performance issues before they impact running services.
You can also access the module installation wizard from the dashboard, which provides a step-by-step guide for setting up specific stacks, such as NGINX + PHP + MySQL for dynamic websites or NGINX + PHP alone for static sites.
NGINX Module: Web Server Management
The NGINX module in BeAdmin enables creation and management of server blocks without directly editing configuration files. You can perform the following via the graphical interface:
- Create new server blocks for each domain or subdomain.
- Select protocols (HTTP or HTTPS) and ports to use.
- Choose the PHP version to be used by that server block.
- Enable or disable hosts without deleting configurations.
Each created server block can be further configured through the panel interface or accessed manually via SSH if advanced adjustments are needed.
PHP Module: Multi-Version Management
BeAdmin supports installing multiple PHP versions simultaneously. Each server block can use a different PHP version, which is useful when running multiple applications with differing PHP version requirements. PHP-FPM configuration can also be adjusted directly from the panel.
MariaDB Module: Database Management
The MariaDB module provides an interface for:
- Creating new databases with charset and collation settings.
- Creating database users and setting their access privileges to specific databases.
- Importing SQL dumps directly from the File Manager.
- Accessing phpMyAdmin for more detailed GUI-based database management.
File Manager Module: Integrated File Management
BeAdmin's built-in File Manager enables website file management without needing external FTP clients. Available features include:
- File upload and download.
- Archive extraction (zip, tar.gz) directly within the panel.
- Simple text file editing from the browser.
- File and folder permission settings.
- FTP connection configuration for external access.
- Database import from SQL dump files via right-click.
Email Module: Private Mail Server
BeAdmin includes a complete email server module. You can run a mail server on your own domain, create email accounts, add additional email domains, and configure aliases through this module. Roundcube is available as the built-in webmail client.
Xray Module: VPN and Private Connections
The Xray module simplifies creating private connection configurations for various devices. Configurations can be generated in a few clicks and shared with other users via email. BeAdmin also supports other VPN modules such as Outline, WireGuard, OpenVPN, and Amnezia.
CRON Module: Automated Task Scheduling
The CRON module enables creation of scheduled tasks (cron jobs) via a graphical interface. You can set execution times, upload scripts, and monitor execution results directly from the panel without manually editing crontab files.
User Management and Access Control
BeAdmin supports creating users with different roles without limits on the number of users. Each user can be granted customized access, which is highly useful for teams or external contractors requiring limited panel access.
Basic Usage Guide
Deploying a Static Website (NGINX + PHP Without Database)
Steps to deploy a static website or a simple PHP website that doesn't require a database:
- Install modules. Select the static site installation wizard (NGINX + PHP) from the dashboard. Click start; NGINX will install in about 15 seconds, and PHP will follow automatically.
- Create a server block. Go to the NGINX module, then click Create → Server Block. Fill in the domain name, select HTTPS, add index.php at the front of the index file list, then choose the PHP version. Click Create.
- Upload files. Open the Files module and ensure the folder named after your domain exists. Right-click in an empty area, select Upload, then upload your website archive file. Double-click the archive to extract it after the upload completes.
- Verify. The installation wizard will provide a link to verify that your website is accessible. Open that link and ensure the page displays correctly.
Deploying a Dynamic Website (NGINX + PHP + MySQL)
Follow these additional steps after creating a server block for applications requiring a database, such as WordPress, Laravel, or custom PHP applications:
- Create database and user. Open the MariaDB module, then click Create → Database. Create a new user after the database is created and link it to that database. Note down the database name, username, and password.
- Import database dump. Open the Files module, then upload the .sql dump file. Right-click the uploaded dump file, select Restore, then specify the target database.
- Configure database connection in your application. Adjust your application's configuration file, such as wp-config.php for WordPress or .env for Laravel, with the newly created database credentials.
Tip: Some SQL dump files include CREATE DATABASE commands. It's advisable to remove those lines from the dump file before importing to avoid errors if the database was already manually created in BeAdmin.
Migrating a Website from Another Server
BeAdmin simplifies the process of migrating a website from old hosting to a new server through three main stages:
Stage 1: Prepare the web server in BeAdmin.
Create an NGINX server block matching the domain of the website to be migrated. Also create the database and user in the MariaDB module if the website uses a database.
Stage 2: Transfer files and database.
Three methods can be used:
- Via File Manager (easiest): Upload website file archives and database dumps to the File Manager, extract the archives, then import the dump.
- Via FTP: Use an FTP client like FileZilla to transfer files from the old server to the new server.
- Via SSH: Use
rsyncfor faster and more reliable file transfer:
# Copy files from old server to new server
rsync -avP root@OLD_SERVER_IP:/path/to/site/folder/ /home/www/yourdomain.com/

#Fix file ownership
chown beadmin:beadmin -R /home/www/yourdomain.com/

#Import database
mysql -u username -p database_name < /home/www/path/dump.sql
Stage 3: Configuration and testing.
Update the database connection configuration in your application with the new credentials after files and database have been transferred. Test website access via the domain. Check file permissions if you encounter a 403 error:
# Correct permissions
Directories: 755, Files: 644
find /home/www/yourdomain.com -type d -exec chmod 755 {} ;
find /home/www/yourdomain.com -type f -exec chmod 644 {} ;
User Management and Panel Security
Changing the Admin Password
Immediately change the default password after your first login. Changes can be made via the profile settings or user management menu in the panel. Use a strong password with at least 12 characters and a combination of uppercase letters, lowercase letters, numbers, and special characters.
Creating Additional Users
BeAdmin does not limit the number of users that can be created. Follow these steps to add a new user:
- Navigate to the
Usersmenu in the panel. - Click
Create → User. - Fill in the email, name, and password for the new user.
- Assign the appropriate role and access permissions.
BeAdmin's role system allows for detailed access segmentation. This is useful for granting limited access to junior developers, external contractors, or clients who need to monitor their server status.
Panel Port Access Security
BeAdmin runs on port 8080. Use a server-level firewall to restrict panel access to specific IPs only:
# Allow port 8080 access only from your IP (UFW)
ufw allow from YOUR_IP to any port 8080

# Block port 8080 access from all other IPs
ufw deny 8080
Ensure firewall rules are correctly applied before closing your SSH session to avoid locking yourself out of your own server.
Troubleshooting and Tips
SSL Issuance Failure
Check the following if SSL certificates fail to be issued automatically during installation:
- DNS records haven't propagated. Use the command
dig +short A yourdomain.comto verify whether the domain points to your server IP. You may need to wait a few minutes and retry if the domain hasn't propagated yet. - Invalid email. Let's Encrypt requires a valid email address to issue certificates. A self-signed certificate will be used instead if the entered email is invalid.
- Port 80 is blocked. The Let's Encrypt verification process requires internet access to port 80. Ensure your firewall doesn't block this port during certificate issuance.
Certificate re-issuance can be performed via settings in the NGINX module for the relevant server block once issues are resolved.
403 Forbidden Error After File Upload
A 403 error is usually caused by incorrect file permissions. Run the following commands via SSH to fix it:
find /home/www/yourdomain.com -type d -exec chmod 755 {} ;
find /home/www/yourdomain.com -type f -exec chmod 644 {} ;
chown beadmin:beadmin -R /home/www/yourdomain.com/
Checking BeAdmin Service Status
Check the BeAdmin service status via SSH if the panel becomes inaccessible:
systemctl status beadminUse the following command to restart the service:
systemctl restart beadminCheck logs if further diagnosis is needed:
journalctl -u beadmin -n 100 --no-pagerUpdating BeAdmin to the Latest Version
BeAdmin is installed as a standard APT package, so updates are performed using regular apt commands:
apt update && apt upgrade beadminRun this command periodically to receive security patches and new features. Updates can also be performed directly from the panel interface if that feature is available in your current version.
Closing Thoughts
BeAdmin proves that managing a server doesn't always have to equate to complex terminal configurations. Its modular approach allows every user to build a server environment precisely tailored to their needs without paying for unused features or being burdened by unnecessary complexity. Installation completed in seconds, automatic SSL, database and email management from a single dashboard, and even VPN support are available in its free package. This makes BeAdmin a sensible choice for anyone looking to maximize server administration productivity without a steep learning curve.