Every developer has surely experienced this moment: a local application is running smoothly on localhost, but you are confused about how to show the work to a client or team without deploying it to a VPS first. This article covers how to enable public access directly from your own laptop using Cloudflare Tunnel, starting from installing cloudflared, configuring routing, to tips for keeping the tunnel running even when the laptop restarts.
1. Introduction
As sysadmins or developers, we have all faced this classic dilemma. There is a small completed project, or a home lab experiment that you want to access from outside the house, but renting a VPS feels excessive just for a quick demo or testing. Your laptop itself is powerful enough to run the application; the only problem is: how can visitors from the internet access it?
The traditional method of opening access to a local network is usually through port forwarding on the router. This method comes with many practical drawbacks. A sysadmin has to log in to the router, open specific ports to the public, and hope that the home's public IP does not change. Opening ports to the internet also expands the attack surface, as attackers can directly probe those ports looking for vulnerabilities. Not to mention if the ISP implements CGNAT (Carrier-Grade NAT), a condition where a single public IP is shared among many customers simultaneously. If your ISP uses CGNAT, your laptop never truly has its own public IP, so port forwarding will not work at all.
The solution lies in Cloudflare Tunnel, a free tool from Cloudflare that creates a virtual bridge between your laptop and the Cloudflare network. You don't need to open any ports on your router, don't need a static public IP, and still get a domain with active HTTPS. All visitor traffic goes through an encrypted path initiated from the laptop's side, so even the strictest router and ISP firewalls are no longer an obstacle.
2. Basic Concept: How Does cloudflared Work?
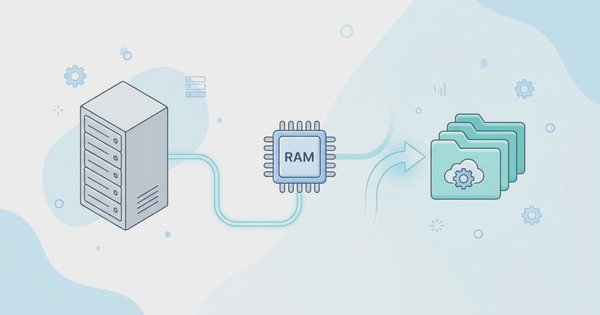
The easiest way to visualize how Cloudflare Tunnel works is like establishing a secure, private connection path (secure tunnel) directly from your laptop to Cloudflare's servers. This path is created by cloudflared, a small daemon running on your laptop. Once this connection is established, the laptop initiates an outbound connection to Cloudflare, rather than the other way around. Because the connection flows outward, your home router and firewall do not need to open any inbound ports at all. When a visitor accesses your domain, the request enters the Cloudflare network, travels through this encrypted tunnel to the local application on your laptop, and the response is sent back through the exact same path.
There are three main benefits that are immediately noticeable once this tunnel is active:
- Automatic HTTPS: Cloudflare provides SSL certificates for your domain without needing to manage certificates yourself through Let's Encrypt or other tools.
- Laptop's public IP remains hidden: Visitors only see Cloudflare's IP, not your laptop's real IP. This makes the laptop far safer from direct DDoS attempts, because attackers don't know where to target.
- Bypasses the strictest ISP firewalls: Because the tunnel is created from the laptop's side (an outbound connection), this method still works even if the laptop is behind CGNAT or campus/office firewalls that normally block incoming connections.
3. Prerequisites Before Getting Started
Before diving into the technical steps, make sure the following three items are ready:
- A local web application already running on your laptop, for example at
localhost:8080. This application can be a Node.js, PHP, or Python app, or a Docker container—anything accessible via a browser on the local network. - A Cloudflare account. The free tier is sufficient for all steps in this article; no paid plan is required.
- A personal domain whose nameservers are already pointed to Cloudflare. This domain must already be active as a zone in the Cloudflare dashboard before we start creating the tunnel.
4. Step-by-Step Cloudflared Configuration
Step 1: Installing cloudflared CLI
Installing cloudflared varies depending on your laptop's operating system. Here are the commands for the three main platforms.
macOS, via Homebrew:
brew install cloudflaredLinux (Ubuntu/Debian), via the official Cloudflare repository at pkg.cloudflare.com:
sudo mkdir -p --mode=0755 /usr/share/keyrings
curl -fsSL https://pkg.cloudflare.com/cloudflare-main.gpg | sudo tee /usr/share/keyrings/cloudflare-main.gpg >/dev/null
echo 'deb [signed-by=/usr/share/keyrings/cloudflare-main.gpg] https://pkg.cloudflare.com/cloudflared any main' | sudo tee /etc/apt/sources.list.d/cloudflared.list
sudo apt-get update && sudo apt-get install cloudflared
Note: Cloudflare rotated this repository's public key in late 2025. If you copy commands from old tutorials that still use the old key, installation may fail with a GPG verification error. Always use the keyring generation command as shown above, not previously saved keys.
Windows, via winget:
winget install --id Cloudflare.cloudflared -eAlternatively, download the .msi or .exe file directly from the official cloudflared Releases page on GitHub, and run the installer like any standard Windows application.
After installation is complete, verify the installed version:
cloudflared --versionStep 2: Account Authentication
Connect cloudflared on your laptop with your Cloudflare account using the following command:
cloudflared tunnel loginThis command automatically opens a browser window. Log in to your Cloudflare account, then select the domain (zone) you want to use for the tunnel. Once confirmed, Cloudflare saves a cert.pem certificate file in the ~/.cloudflared/ directory. This file serves as proof that your laptop has permission to create tunnels and configure DNS for that domain.
Step 3: Creating a New Tunnel
Create a new tunnel identity via the terminal. Give it an easily recognizable name, for example laptop-server:
cloudflared tunnel create laptop-serverThis command generates a Tunnel ID in the form of a unique UUID, and creates a JSON credentials file at ~/.cloudflared/<TUNNEL-ID>.json. Note down this Tunnel ID because we will use it in the next step. If you forget it, check it again anytime with:
cloudflared tunnel listStep 4: Configuring the Route File config.yml
Create a config.yml file in the ~/.cloudflared/ directory. This file contains ingress rules, which map each hostname to a specific local service on your laptop.
tunnel: <TUNNEL-ID>
credentials-file: /home/user/.cloudflared/<TUNNEL-ID>.json

ingress:
  - hostname: app.example.com
    service: http://localhost:8080
  - service: http_status:404
Mentor Tip: Replace<TUNNEL-ID>with the UUID from Step 3, and adjustcredentials-fileto the actual path on your laptop. Thehostnameline is the domain visitors will type in their browser, whileserviceis the local application address you want to expose. The last lineservice: http_status:404is mandatory as a catch-all rule to handle traffic that doesn't match any hostname above it. If you have multiple applications, simply add newhostnamelines before this catch-all rule.
Step 5: Routing DNS
Route your subdomain to the created tunnel directly via the CLI without needing to open the Cloudflare web dashboard:
cloudflared tunnel route dns laptop-server app.example.comThis command automatically creates a CNAME record in your domain zone, pointing to the <TUNNEL-ID>.cfargotunnel.com subdomain belonging to the laptop-server tunnel. This record only forwards traffic when the tunnel is running, so you can proceed to the final step.
Step 6: Testing
Start the tunnel with the command:
cloudflared tunnel run laptop-serverIf configured correctly, the terminal will display connection logs to Cloudflare servers without errors. Open https://app.example.com in your browser, and your local application on your laptop is now accessible to visitors from anywhere, complete with active HTTPS.
5. Pro-Tips for Sysadmins: Elevating to Production Level
Automation
Running the tunnel manually via the terminal carries risks: as soon as the terminal is closed or the laptop reboots, the tunnel stops as well. The solution is to register cloudflared as a system service so it runs automatically in the background.
On Linux, ensure config.yml is present in ~/.cloudflared/, then run:
sudo cloudflared --config /home/user/.cloudflared/config.yml service install
sudo systemctl start cloudflared
sudo systemctl status cloudflared
The service install command registers the cloudflared.service unit in systemd. Monitor its logs anytime via journalctl -u cloudflared -f.
On Windows, run Command Prompt as Administrator, then execute cloudflared.exe service install from the directory where cloudflared.exe is located. This command registers a Windows Service named Cloudflared, whose status can be checked via Windows' built-in Services application or via sc query Cloudflared.
Extra Security (Zero Trust)
If the local website is private—such as an internal dashboard or a team-specific tool—do not allow anyone to access it simply because they know the domain. Secure this access using Cloudflare Access, part of Cloudflare's Zero Trust platform.
Here is how to set it up via the Zero Trust dashboard:
- Go to Access controls → Applications, then click Add an application.
- Select the type Self-hosted and private → Public DNS, then click Continue.
- Fill in the subdomain and domain according to your tunnel hostname, for example
app.example.com. - Under Access policies, click Create new policy.
- In Policy rules with the Include rule, select Login Methods: One-time PIN.
- Then, click Add require (AND), select Emails: email address to restrict access to specific email addresses, preventing unauthorized users from requesting OTP codes.
- Enter a Policy name and set Action = Allow. Then click Save policy.
- Then click Create to create application.
This layer ensures that even if your domain is leaked to the public, only users with authorized email addresses can log in. The combination of Cloudflare Tunnel and Access gives private applications on your laptop enterprise-grade security without additional costs.
6. Conclusion
Cloudflare Tunnel turns an ordinary laptop into a publicly accessible server without VPS rental fees, without opening ports on your router, and while staying secure from public IP exposure. Simply install cloudflared, authenticate, create a tunnel, configure config.yml, route the DNS, and run it. For production or serious use cases, register it as a system service and add Cloudflare Access to keep access strictly controlled.
All of the steps above can be tried right now directly from the laptop you are currently using. Start with small projects, experiments, or a personal home lab, and don't hesitate to experiment further once you get comfortable with the workflow.