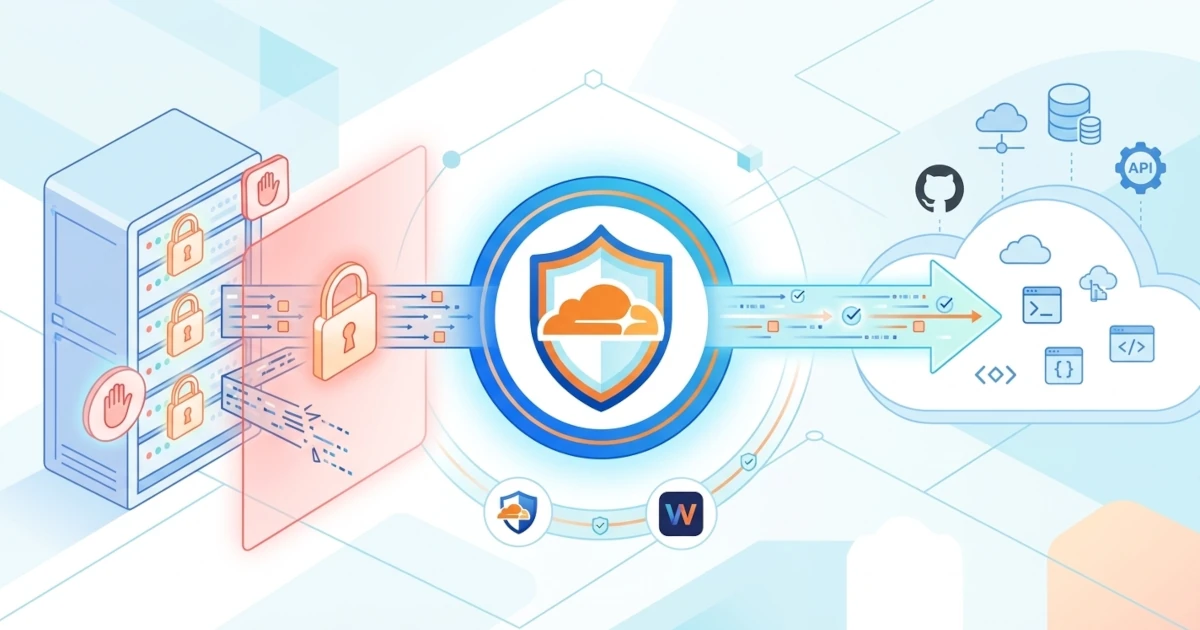
Have you ever experienced a deployment process suddenly stalling because requests to the package registry never complete? Or found that the new staging subdomain you just set up ended up on the same blocklist as thousands of other domains on the same shared server?
Complaints like these have become part of daily life for developers in Indonesia. The root cause lies in how the DNS filtering system implemented by the government works. Fortunately, you can take advantage of Cloudflare One Client, more commonly known as WARP. This application is available as a free and official solution to overcome these issues without slowing down your internet connection.
Introduction
The Reality of DNS Filtering in Indonesia: Often Misguided
The Indonesian government, through the Trust+ Positive system (formerly known as Internet Positif), enforces blocking using DNS filtering mechanisms. In practice, any domain or subdomain that ends up in the Trust+ Positive blacklist database is immediately rejected by the ISP's DNS resolver. As a result, the site becomes completely inaccessible.
The program's intention is actually good: to combat online gambling, pornography, and other legal violations. However, its execution on the ground has repeatedly missed the mark. Blocks are often applied at the main domain level rather than only on the specific problematic subdomain. Consequently, a single shared hosting platform or shared subdomain that hosts thousands of sites can be entirely blocked just because a handful of subdomains within it violate the rules.
For us as developers, this is clearly very disruptive. Project subdomains, API documentation, or staging pages that are completely clean can get caught in the crossfire. Another equally frustrating case occurs when offending sites hide behind CDN or reverse proxy services like Cloudflare. Because domain-based blocking is often ineffective, the government sometimes resorts to extreme measures by threatening to block the infrastructure directly.
Let's look at some real cases that have caused headaches and directly impacted developers' work:
- July 2022: The Ministry of Communication and Informatics (Kominfo) temporarily blocked Steam, Epic Games Store, and PayPal due to administrative issues with Electronic System Providers (PSE). Other popular services such as Dota 2, Counter-Strike, and even the Yahoo search engine were also affected. Fellow game developers who were testing Steamworks API integration or trying to cash out royalties via PayPal suddenly lost access. Worse, platforms like Epic Games Store remained blocked for quite a while, even though other services were eventually unblocked.
- October 2024: The official domain of the Indonesian Chamber of Commerce and Industry (kadin.id) became inaccessible because it was still stuck in the Trust+ Positive list. This case is a prime example that even official institutional sites are not immune to mistaken blocking.
- November 2025: The Ministry of Communication and Digital Affairs (Komdigi) threatened to block all Cloudflare services in Indonesia. This step was taken because the government found many online gambling sites hiding behind their network. Yet we all know that Cloudflare is a go-to provider of DNS resolver, CDN, and reverse proxy services for thousands of legitimate sites. From educational portals, banking platforms, to local startups, many rely on it. Cybersecurity observers immediately warned of the risk of mass disruption to national digital services if that threat were actually carried out.
- Recurring small-scale cases: Community users reported that the Brizy website builder was blocked by a major ISP in Indonesia in September 2023. As a result, all client sites hosted using the
brizy.clouddomain suddenly became inaccessible, even though their content did not violate any rules at all.
This pattern of mistaken blocking is nothing new. A report from ICT Watch as far back as 2014 had already questioned the accountability of the Trust+ Positive system. The main criticism was directed at the non‑transparent audit process when adding a domain to the blocklist. More than a decade later, the same gaps and issues continue to recur around us.
Technical Problems We Often Experience
- Slow DNS resolution speed from local ISP resolvers. Most default ISP DNS resolvers in Indonesia are not optimized for low latency. As a result, every time your device makes a request to a new domain, the process feels sluggish. This is most noticeable when you are installing packages or fetching third‑party APIs.
- Long propagation time when reading DNS record changes. Another obstacle arises when you have just updated an A record or CNAME for your project domain. The ISP's resolver often still holds old cache entries, so changes do not become visible immediately. This is highly disruptive, especially when deployment testing requires fast, reliable feedback.
A Practical Solution: Cloudflare One Client (WARP)
Cloudflare One Client, better known as WARP, is a free GUI‑based application from Cloudflare. It works by encrypting your internet traffic and securing your device's DNS queries through Cloudflare's global network. This service is completely legal and official. WARP is also very different from commercial VPNs typically used to bypass geoblocking restrictions.
The application serves a purely technical purpose: speeding up DNS resolution, avoiding collateral damage from ISP filtering systems on legitimate domains, and keeping your internet connection fast without noticeable degradation.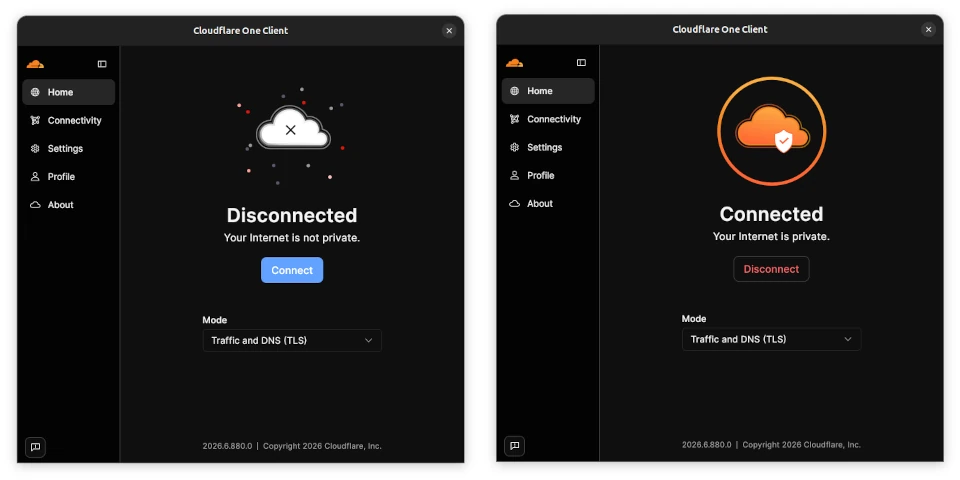
How Cloudflare One Client (WARP) Works
Encrypted Tunnelling
WARP wraps all your internet traffic using the WireGuard protocol. This modern tunnelling protocol is much lighter and faster compared to older OpenVPN or IPsec implementations. All data from your device is encrypted before leaving your computer. The data is then sent through a secure tunnel to the nearest Cloudflare data center, and from there it is forwarded to its final destination. The ISP sitting in the middle can only see encrypted packets heading to Cloudflare's IP addresses, not the contents or the actual destination of your traffic.
Bypassing Deep Packet Inspection (DPI)
ISP filtering systems typically work using a technique known as Deep Packet Inspection (DPI). They read DNS request metadata and HTTP headers that pass through in plain text. WARP hides this metadata inside an encrypted tunnel, so the ISP's DPI system does not have enough information to match your traffic against the blocklist.
DNS queries are also sent via DNS‑over‑HTTPS (DoH) or DNS‑over‑TLS (DoT) through the same tunnel. This replaces the usual port 53 path, which is very easy to intercept and manipulate by the ISP's resolver.
Anycast Network
Cloudflare operates an Anycast network with hundreds of data centers distributed around the world, including several locations in Indonesia. Your internet traffic is automatically routed to the geographically closest point. This smart approach reduces latency and speeds up domain resolution, compared to taking the ISP's default route that sometimes meanders far before reaching the destination DNS resolver.
Cloudflare One Client Modes
Cloudflare One Client has five operational modes that you can choose from. Understanding the function of each mode is important so you can determine the most suitable configuration for your working environment. This also ensures that connections to your office's private DNS server or other development tools running in the background remain safe and uninterrupted.
| Mode | How It Works | Use for Developers |
|---|---|---|
| A. Traffic and DNS (default) | Routes all application traffic (all ports and protocols) as well as DNS queries through the Cloudflare network. | Most complete protection. This mode is ideal when you need to browse documentation or download package libraries that are currently blocked. |
| B. DNS Only | Only encrypts and redirects DNS queries via DoH, while other data traffic remains on the normal ISP path. | Very lightweight and does not change your device's public IP. Useful for speeding up DNS record propagation reads when setting up new domains or subdomains. |
| C. Traffic Only | All internet data is routed through the WARP tunnel, but DNS resolution is still handled by your local or OS configuration. | The right choice if your office or project has its own private DNS server that should not be interfered with by other systems. |
| D. Local Proxy | WARP acts as a local SOCKS5 or HTTPS proxy server. Internet traffic will not be redirected unless your application is manually configured to use that proxy. | Very flexible for testing a single browser or a specific application without affecting your database connections or other development tools. |
| E. Posture Only | Does not redirect traffic or DNS at all. The application only checks the security posture of your device (such as disk encryption status, antivirus, etc.). | Zero impact on internet speed. This mode is generally required by corporate DevOps teams that enforce Zero Trust policies before allowing developer laptops to access internal repositories. |
Practical recommendation: For daily use in overcoming ISP DNS filtering, DNS Only mode is usually the most suitable choice for developers. It is lightweight, does not change your public IP (which could trigger rate limits on some APIs), and is already effective enough to bypass the majority of DNS‑based mistaken‑block cases.
Installing Cloudflare One Client on Various Operating Systems
a. Windows
- Download the official installer directly from 1.1.1.1 or via the Cloudflare One Client Download documentation page.
- Run the downloaded
.msifile. Click Next several times until the installation finishes, then click Finish. - Activate the service by clicking the Cloudflare cloud icon that appears in the system tray (bottom‑right corner of your taskbar).
b. macOS
- Download the
.pkgfile for macOS from Cloudflare's official download page. - Open the installer, follow the on‑screen instructions, and grant permission for Network Extension or VPN Configuration when prompted by System Settings → Privacy & Security.
- Quick activation can be done anytime via the application icon in the menu bar at the top of your MacBook screen.
c. Linux (Desktop GUI)
Cloudflare provides official package repositories at pkg.cloudflareclient.com for four major distributions: Ubuntu, Debian, RHEL, and Fedora. The good news is that you only need to run the terminal commands below once to add the repository and install the package. Once installed, everyday operation of WARP can be done through a user‑friendly GUI application, so you do not need to keep returning to the terminal.
Ubuntu
Add the GPG key and the official Cloudflare repository to your system:
curl -fsSL https://pkg.cloudflareclient.com/pubkey.gpg | sudo gpg --yes --dearmor --output /usr/share/keyrings/cloudflare-warp-archive-keyring.gpg

echo "deb [signed-by=/usr/share/keyrings/cloudflare-warp-archive-keyring.gpg] https://pkg.cloudflareclient.com/ $(lsb_release -cs) main" | sudo tee /etc/apt/sources.list.d/cloudflare-client.list
Update your package list, then install the cloudflare-warp package:
sudo apt update
sudo apt install cloudflare-warp
Debian
The steps for Debian are exactly the same as Ubuntu because both use the same APT package manager:
curl -fsSL https://pkg.cloudflareclient.com/pubkey.gpg | sudo gpg --yes --dearmor --output /usr/share/keyrings/cloudflare-warp-archive-keyring.gpg

echo "deb [signed-by=/usr/share/keyrings/cloudflare-warp-archive-keyring.gpg] https://pkg.cloudflareclient.com/ $(lsb_release -cs) main" | sudo tee /etc/apt/sources.list.d/cloudflare-client.list

sudo apt update
sudo apt install cloudflare-warp
RHEL
Make sure you have enabled the EPEL (Extra Packages for Enterprise Linux) repository first. RHEL 9 and above require this repository to provide tray icon support and handle captive portal windows in GUI applications:
sudo dnf install epel-releaseImport the official GPG key, add the Cloudflare repository, and install the application package:
sudo rpm --import https://pkg.cloudflareclient.com/pubkey.gpg

curl -fsSl https://pkg.cloudflareclient.com/cloudflare-warp-ascii.repo | sudo tee /etc/yum.repos.d/cloudflare-warp.repo

sudo yum update
sudo yum install cloudflare-warp
Fedora
The installation process for Fedora is very similar to RHEL, but you do not need to enable the EPEL repository:
sudo rpm --import https://pkg.cloudflareclient.com/pubkey.gpg

curl -fsSl https://pkg.cloudflareclient.com/cloudflare-warp-ascii.repo | sudo tee /etc/yum.repos.d/cloudflare-warp.repo

sudo dnf update
sudo dnf install cloudflare-warp
After installation on your favourite distribution is complete, launch the application from your Linux desktop's main application menu. It usually appears as Cloudflare WARP. The GUI window will open, showing a large toggle switch similar to the Windows and macOS versions. Just click the toggle once to activate the internet connection.
d. Mobile Devices (Android & iOS)
- Open the Google Play Store or Apple App Store on your phone, and search for the official app named "Cloudflare One Agent".
- Install the app, then grant VPN profile creation permission when the operating system displays a confirmation prompt.
- Tap the large circular button in the centre of the app's main screen to start your secure connection.
Testing and Verifying Your Connection
Verification via Browser
The easiest way without touching the terminal is to open your favourite browser and visit this page:
https://1.1.1.1/helpThis official page will automatically run a system scan. The result is a summary of your device's connection status to the Cloudflare network, including information about the nearest data center currently serving you.
Verification via Terminal (curl)
If you prefer a more "hacker‑style" approach, you can check the Cloudflare header trace status directly from the terminal using this command:
curl https://www.cloudflare.com/cdn-cgi/traceSuccess Indicators to Check
- The output line
warp=onorwarp=plusindicates that the WARP tunnel is active and successfully securing your connection. - The output line
warp=offmeans your internet traffic is still travelling through the normal ISP path. Please check the toggle switch in the application again. - The visual indicator in the GUI application window (whether on Windows, macOS, or Linux) will also immediately show a bright green "Connected" status along with the active mode name.
Sometimes the propagation of your project domain's DNS records may still feel slow even when WARP is active. You can perform a local DNS cache flush as an additional step using the following commands:
# Linux (systemd-resolved)
sudo resolvectl flush-caches

# macOS
sudo dscacheutil -flushcache; sudo killall -HUP mDNSResponder

# Windows (run Command Prompt as Administrator)
ipconfig /flushdns
Conclusion
DNS filtering policy in Indonesia appears to be here to stay. Looking back at various mass‑blocking incidents since 2022, and even the recent threat to block Cloudflare at the end of 2025, the risk of collateral damage to important domains that we rely on as developers will always be present.
Fortunately, Cloudflare One Client (WARP) offers a very practical way out. This service is completely free, official, and uses the extremely fast WireGuard protocol. The availability of five operational modes gives us the flexibility to adjust it to the specific needs of our working environment. You can use it for everything from browsing documentation, accelerating new DNS record propagation, to meeting your office's Zero Trust security policy requirements.
Freedom to access domains, package registries, and third‑party APIs stably and accurately is a key factor in a developer's daily efficiency. Using this free tool from Cloudflare has proven more than sufficient to remove all those network obstacles, without slowing down your internet performance.