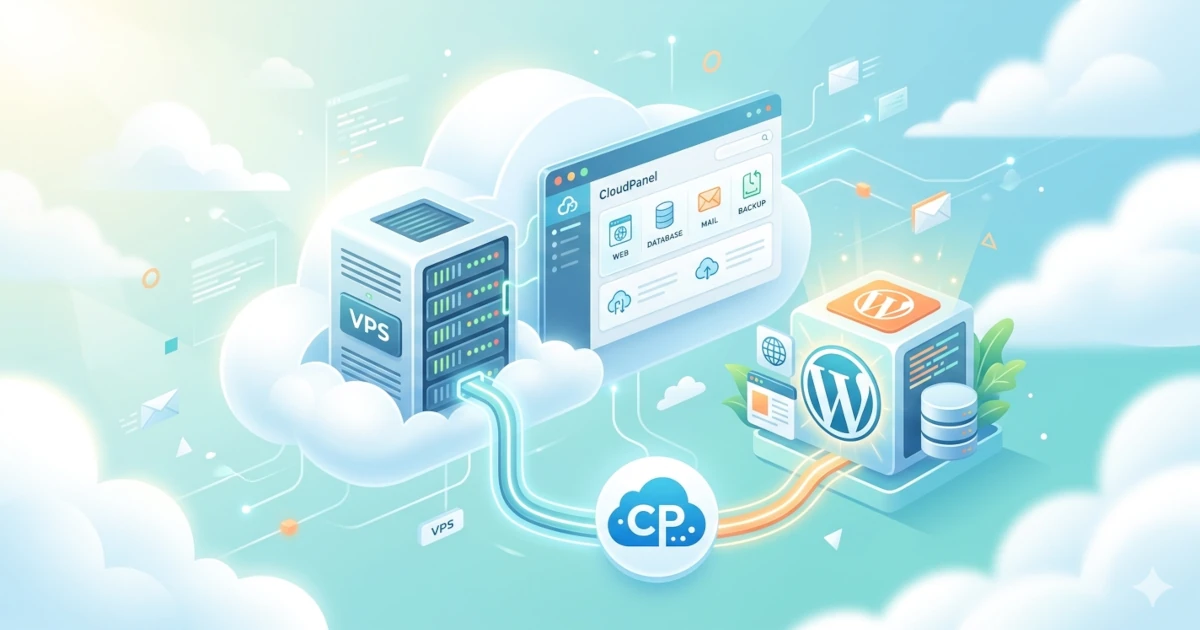
CloudPanel is a free and open-source server control panel designed with a primary focus on simplicity without compromising performance. CloudPanel can be used entirely without licensing costs; users only need to pay for the VPS they use.
Technically, CloudPanel runs on a stack of NGINX, PHP-FPM, MariaDB/MySQL, and Redis, all of which have been configured and optimized from the start. You will get a production-ready web server after installation.
Why Choose CloudPanel?
CloudPanel offers the best balance between full control and operational ease for developers and sysadmins managing their own VPS. Here are several reasons to choose CloudPanel:
- Completely free: no licensing fees and no features locked behind a paywall.
- Lightweight: minimum requirements are only 1 core, 2 GB RAM, and 10 GB disk, making it suitable for entry-level VPS.
- Multi-site support: manage multiple domains from a single panel with site isolation per user.
- WordPress-first: includes a one-click WordPress installation wizard complete with optimized NGINX configuration.
- ARM Ready: supports ARM64 architecture, delivering up to 40% higher performance at 20% lower cost.
CloudPanel Key Features
| Category | Feature |
|---|---|
| Applications | WordPress, PHP, Node.js, Python, Static HTML, Reverse Proxy |
| Web Server | NGINX with 30+ pre-configured vhost templates |
| Database | MariaDB 10.11 / 11.4, MySQL 8.0 / 8.4 |
| Cache | Redis, OPcache |
| PHP | Multiple PHP versions (7.4 to 8.3), easily switchable per site |
| SSL/TLS | Free Let's Encrypt, Cloudflare Certificate, Manual Import |
| Security | Firewall (UFW), IP & Bot Blocker, Two-Factor Authentication, Site Isolation |
| Backup | Remote backup to S3, Wasabi, Dropbox, Google Drive, SFTP, Hetzner Storage Box |
| Cloud Support | AWS, DigitalOcean, Hetzner, GCP, Azure, Vultr, and other servers |
Performance
CloudPanel uses lightweight and well-configured components: NGINX as the web server, which outperforms Apache in concurrency; PHP-FPM for PHP process management; and Redis as an in-memory cache. This combination enables WordPress pages to load up to 250x faster compared to a default simple LAMP stack configuration. CloudPanel's own resource consumption is minimal, ensuring that resources intended for your website are not wasted.
Security
CloudPanel implements site isolation, ensuring each site runs under a different system user. Attackers cannot access files of other sites on the same server if one site is successfully exploited. This mechanism is a security standard often unavailable on conventional shared hosting.
Additional security layers include dashboard access restriction by IP, Two-Factor Authentication (2FA), integrated IP & Bot Blocker, and Cloudflare integration for DDoS protection and WAF.
System Prerequisites
Ensure all the following prerequisites are met before starting the installation. Failure to meet any prerequisite is the most common cause of installation failure or issues arising after the server is running.
Minimum VPS Specifications
The minimum specifications required according to official CloudPanel documentation are as follows:
| Component | Minimum | Recommended (Production WordPress) |
|---|---|---|
| CPU | 1 Core (x86 or ARM64) | 2+ Cores |
| RAM | 2 GB | 4 GB or more |
| Disk | 10 GB | 40 GB+ SSD (NVMe preferred) |
| OS | Ubuntu 22.04 / Debian 11 | Ubuntu 24.04 LTS (recommended) |
| Architecture | x86 or ARM64 | ARM64 for cost efficiency |
Supported Operating Systems
CloudPanel v2 supports the following OSes in fresh install condition, not as an upgrade:
- Ubuntu 24.04 LTS (Noble Numbat).
- Ubuntu 22.04 LTS (Jammy Jellyfish).
- Debian 13 (Trixie).
- Debian 12 (Bookworm).
- Debian 11 (Bullseye).
Important: The CloudPanel installer must be run on a clean or fresh OS install. Avoid running the installer on a server that already has Apache, NGINX, or another control panel, as service conflicts are the most frequent cause of installation failure.
Access and Networking
- Root access to the server via SSH: the installer requires superuser privileges.
- Stable internet connection from the server: the installer will download packages from official repositories.
- A public IP already assigned to the VPS.
- Ports that must be open on the cloud provider's firewall:
- Port 22 (SSH)
- Port 80 (HTTP)
- Port 443 (HTTPS)
- Port 8443 (CloudPanel dashboard)
Domain Name
Ensure you have the following if your end goal is hosting WordPress with your own domain:
- An active domain (e.g., myblog.com).
- Access to the domain's DNS panel at your registrar.
- An A DNS record already pointing to the VPS public IP before starting SSL installation.
Database Engine
CloudPanel supports several database engine options. This guide uses MariaDB 11.4, the latest LTS version. This version is recommended for WordPress due to full compatibility and proven performance.
| Database Engine | Installer Variable | Description |
|---|---|---|
| MariaDB 11.4 | DB_ENGINE=MARIADB_11.4 | Latest LTS, recommended |
| MariaDB 10.11 | DB_ENGINE=MARIADB_10.11 | Previous LTS, stable |
| MySQL 8.4 | DB_ENGINE=MYSQL_8.4 | Latest MySQL LTS |
| MySQL 8.0 | DB_ENGINE=MYSQL_8.0 | Proven MySQL version |
CloudPanel Installation Steps
CloudPanel installation is performed entirely via command line (SSH). The process runs automatically and typically completes within 5 to 10 minutes, depending on your server's connection speed.
Step 1: Login to Server via SSH
Open a terminal and login to your VPS as root. Use the following command if your provider uses a private key:
ssh -i /path/to/private_key.pem root@SERVER_IPUse the following command if using a password:
ssh root@SERVER_IPStep 2: Update System and Install Supporting Packages
Ensure the system is up to date before running the installer. This step is mandatory to avoid dependency conflicts:
apt update && apt -y upgrade && apt -y install curl wget sudo
Wait for the process to complete. Choose default options or confirm as needed if any prompts appear, for example, to replace configuration files.
Step 3: Run the CloudPanel Installer
Below is the installation command for Ubuntu 24.04 LTS with MariaDB 11.4 database engine. This command performs three actions simultaneously: downloading the installer script, verifying the SHA-256 checksum to ensure file integrity, and then running the installation:
curl -sS https://installer.cloudpanel.io/ce/v2/install.sh -o install.sh; \
echo "19cfa702e7936a79e47812ff57d9859175ea902c62a68b2c15ccd1ebaf36caeb install.sh" | \
sha256sum -c && sudo DB_ENGINE=MARIADB_11.4 bash install.sh
The sha256sum verification in the command above ensures you are running the official script from CloudPanel and not a modified version. This is a standard security practice when downloading and executing scripts from the internet. Always check the latest checksum in the official documentation before running the command.
Step 4: Monitor the Installation Process
The installer will display process logs in real-time. The installation process includes:
- Installing NGINX as the web server.
- Installing MariaDB 11.4 and initial database configuration.
- Installing PHP-FPM for various PHP versions.
- Installing Redis for caching.
- Configuring the firewall (UFW).
- Installing the CloudPanel dashboard.
You will see a message informing you of the URL to access CloudPanel and instructions for the next steps once the process is complete.
The installation of CloudPanel is complete!
CloudPanel can be accessed now: https://SERVER_IP:8443
Step 5: Access the CloudPanel Dashboard
Open a browser and access CloudPanel via the following URL after installation is complete (replace with your server IP):
https://SERVER_IP:8443The browser will display a self-signed certificate warning. This is normal behavior because an official SSL certificate has not yet been configured. Click Advanced then select Proceed to [IP address] (unsafe) to continue.
Security Warning: Immediately create an admin user after accessing CloudPanel. There is a brief window between installation completion and admin account creation during which bots may attempt to create accounts. If possible, restrict port 8443 access to only your IP via your cloud provider's firewall before starting installation.
Initial CloudPanel Configuration
Creating the First Admin User
You will be greeted with an admin account creation form when first accessing CloudPanel at https://IP:8443. Fill in the form with the following details:
- Username: choose a unique username and avoid words like "admin" or "root".
- Email: your active email address.
- Password: use a strong password with a combination of uppercase, lowercase, numbers, and symbols, minimum 16 characters.
- Timezone: select the timezone matching your location, as this is important for log accuracy and backup scheduling.
Click Create User to create the account, and you will be immediately redirected to the login page.
Login to the CloudPanel Dashboard
Enter the username and password you just created. Upon successful login, you will enter the CloudPanel dashboard, which is the main interface for managing all server operations.
Enabling Two-Factor Authentication (2FA) should be done immediately for security. Go to the Account menu, select Two-Factor Authentication, and follow the instructions using an authenticator app like Google Authenticator.
CloudPanel Interface Overview
CloudPanel has two main areas accessible from the sidebar:
| Area | Function |
|---|---|
| Frontend Area | Site management: add sites, databases, file manager, SSL/TLS, logs, PHP settings |
| Admin Area | Server management: users, vhost templates, instance settings, remote backups, security |
Main navigation in the left sidebar includes:
- Sites: list of all managed sites and the main pivot for daily operations.
- Databases: visual management of MariaDB/MySQL databases.
- File Manager: web-based file browser for uploading, editing, and managing site files.
- Cron Jobs: automated task scheduling per site.
- SSH Users: management of SSH access per user or site.
- Logs: NGINX access and error logs per site.
- Users (Admin Area): add admins, site managers, or limited users.
- Remote Backups (Admin Area): configure automated backups to cloud storage.
How to Install WordPress on CloudPanel
CloudPanel provides an integrated WordPress installation wizard. This process will automatically create a database, download the latest WordPress version, configure the NGINX vhost, and install WordPress in a single step.
1. Adding a New Site
Click the + Add Site button from the CloudPanel dashboard or navigate to the Sites menu and select Add Site. Choose "WordPress" on the application type selection screen.
2. Filling in WordPress Site Details
The WordPress Site creation form requests the following information:
- Domain Name: your site's primary domain, e.g., myblog.com. CloudPanel will automatically create a redirect from non-www to www or vice versa if you enter a domain with www. All HTTP requests are also automatically redirected to HTTPS.
- Site Title: your WordPress website title.
- Admin User: username for the WordPress administrator account (not the system).
- Admin Password: password for the WordPress admin account.
- Admin Email: WordPress administrator email.
Click Create after all fields are filled. CloudPanel will run the installation process automatically within a few seconds.
Save Credentials: CloudPanel will display a summary of credentials such as database name, database user, database password, WordPress admin URL, and Site User (SSH user) after installation is complete. Save all this information in a password manager before closing the page.
3. NGINX Vhost Configuration (Optional: Optimization)
CloudPanel automatically uses an NGINX vhost template optimized for WordPress. However, some modifications can be made for specific needs. Access vhost configuration via the Sites menu, select your site name, then click Vhost.
Adding security headers like X-Content-Type-Options, X-Frame-Options, and Content-Security-Policy:
add_header X-Content-Type-Options "nosniff" always;
add_header X-Frame-Options "SAMEORIGIN" always;
add_header X-XSS-Protection "1; mode=block" always;
add_header Referrer-Policy "strict-origin-when-cross-origin" always;
Enabling Gzip compression to speed up text file transfers, which is usually active by default in CloudPanel:
gzip on;
gzip_types text/plain text/css application/json application/javascript text/xml application/xml image/svg+xml;
gzip_min_length 1000;
4. Free SSL Installation with Let's Encrypt
HTTPS is a minimum requirement for production websites because Google uses it as a ranking factor, and modern browsers will display a "Not Secure" warning without SSL. CloudPanel integrates Let's Encrypt, making this process require only a few clicks.
Prerequisites before installing SSL:
- The A DNS record for your domain already points to the server's public IP.
- DNS propagation is complete, which can be checked via dig myblog.com A or dnschecker.org.
- Ports 80 and 443 are open on the firewall.
SSL installation steps:
- Go to your site dashboard via Sites, select your site name, then click SSL/TLS.
- Click the Actions button, then select New Let's Encrypt Certificate.
- Confirm the domain(s) for which you want a certificate, including www variants if needed.
- Click Create and Install.
CloudPanel will handle the entire process from domain validation, certificate issuance from Let's Encrypt, installation to NGINX, to configuring automatic renewal. The entire process completes within seconds.
Verify SSL success by accessing https://myblog.com in a browser. A green lock icon in the address bar confirms that SSL is active.
WordPress Performance Optimization on CloudPanel
A newly installed WordPress site already runs well, but there are several additional configurations that can significantly improve performance, especially for websites with medium to high traffic.
1. Enabling Redis Object Cache
Redis is an in-memory data store that serves as an object cache for WordPress. Frequently called database query results are stored in memory via Redis, so subsequent requests do not need to access the database again. This is highly effective for WordPress sites with many posts, users, or complex queries.
Redis is already installed with CloudPanel, and you only need to connect it to WordPress with the following steps:
- Install the Redis Object Cache plugin in WordPress via the Plugins menu, select Add New, then search for "Redis Object Cache".
- Activate the plugin, go to Settings, select Redis, and click Enable Object Cache.
- Verify the status via the plugin, which will display a Connected status if Redis is successfully connected.
Also enable Page Cache to store already-rendered HTML pages if using a cache plugin like W3 Total Cache. This will drastically reduce PHP-FPM load for non-logged-in visitors.
2. Choosing the Latest PHP Version
Each new PHP version generally brings significant performance improvements. PHP 8.3 outperforms PHP 7.4 in benchmarks by an average of 30% to 40% for WordPress workloads.
Steps to change or verify the PHP version per site in CloudPanel are as follows:
- Go to the Sites menu, select your site name, then click Settings → PHP Settings.
- Select version 8.3 or the highest available version in the PHP Version dropdown.
- Click Save so CloudPanel immediately changes the PHP-FPM configuration without requiring a server restart.
You can verify the active PHP version by temporarily adding a phpinfo.php file in the WordPress root or simply by checking the site sidebar in CloudPanel.
3. Configuring File Upload Limits in PHP Settings
Default PHP values for upload size are often too small for WordPress media such as video uploads, themes, or large plugins. Adjust these settings in CloudPanel with the following steps:
- Go to the Sites menu, select your site name, then click Settings → PHP Settings.
- Change the following values as needed:
| PHP Directive | Default Value | Recommended Value |
|---|---|---|
upload_max_filesize | 2M | 64M or 128M |
post_max_size | 8M | 128M or 256M |
memory_limit | 128M | 256M |
max_execution_time | 30 | 120 |
max_input_time | 60 | 120 |
Click Save after changing these values for the changes to take effect immediately without restarting the server. Verify the changes in WordPress via the Media menu, then select Add New. The maximum upload size displayed there will reflect the new configuration.
Additional Security Tips
CloudPanel includes many security layers by default. However, there are several additional steps highly recommended for production servers.
1. Changing the Default SSH Port
The default SSH port 22 is a primary target for brute-force bots that continuously scan the internet. Changing to a non-standard port does not guarantee full security, but it significantly reduces "noise" in logs and load from automated scanning.
Edit the SSH configuration with the following command:
nano /etc/ssh/sshd_configFind the line #Port 22 and change it to your chosen port, for example 2222:
Port 2222Ensure the new port is already open on the firewall and in your cloud provider's panel (such as Security Group if using AWS, GCP, or Azure) before restarting SSH:
ufw allow 2222/tcp
ufw reload
systemctl restart sshd
Avoid closing the currently running SSH session before verifying that you can login in a new session with the new port. Carelessness at this stage could result in you being locked out of the server.
2. Enabling and Configuring the Firewall in CloudPanel
CloudPanel uses UFW (Uncomplicated Firewall) and provides an easy-to-use graphical interface. Access this feature via the Admin Area, then select Security.
Recommended firewall configuration is as follows:
- Restrict port 8443 (CloudPanel dashboard) access to only your IP or VPN IP to prevent direct brute-force attacks on the admin panel.
- Enable Bot Blocker via Security, then select Bot Blocker to block known malicious bot user-agents across all sites simultaneously.
- Enable IP Blocker if you see specific IPs making repeated suspicious requests in the NGINX logs.
Verify firewall status from the command line with the command:
ufw status verboseThe expected output will show Status: active with a list of rules that only allow the ports you need.
3. Importance of Regular Backups
Backups are your last line of insurance. No security configuration can replace a properly functioning backup. The recommended backup strategy follows the 3-2-1 rule: 3 copies of data, 2 different media types, and 1 copy in an off-site location.
CloudPanel supports Remote Backups to various storage providers. Steps to configure this are:
- Go to the Admin Area, then select Remote Backups.
- Select a storage provider such as Amazon S3, Wasabi, Dropbox, Google Drive, Hetzner Storage Box, or SFTP.
- Fill in your storage provider access credentials.
- Configure the backup schedule (daily is recommended for production).
- Test the first backup manually by clicking the Create Backup button and verify the file appears in your storage provider.
Ensure Timezone is configured correctly in the Admin Area: select Instance, then click Instance Settings before setting the backup schedule. An incorrect timezone can cause backups to run at undesired times or be missed entirely.
4. Additional WordPress Hardening
Some mandatory WordPress security practices to implement outside of server configuration are:
- Change the default database table prefix (wp_) to a random prefix during installation.
- Disable XML-RPC if not used by adding a rule in the NGINX vhost or using a plugin.
- Hide the WordPress version by removing the generator tag from functions.php.
- Use a security plugin like Wordfence or Solid Security for monitoring login attempts and malware scanning.
- Perform regular updates of WordPress core, themes, and plugins, as the majority of malware enters through outdated components.
Conclusion
CloudPanel is a very solid choice for anyone who wants to manage their own VPS without sacrificing ease of use or paying control panel licensing fees. You get a strong production server foundation in less than 15 minutes with an NGINX, PHP-FPM, MariaDB, and Redis stack that has been optimally configured from the start. This approach gives you full control over your server, which is far more flexible than shared hosting, with much lower complexity than configuring all components manually. CloudPanel eliminates the complicated parts without removing the ability to perform advanced configurations when you need them.