Good website decisions should be based on data rather than relying solely on intuition. Analytics tools work through tracking codes to record visitor behavior, allowing website owners to understand content effectiveness and accurately detect changing trends.
Google Analytics has long been the primary choice, but this model carries risks because data is fully managed by a third party. This is often considered a violation of privacy regulations like GDPR due to data transfers to overseas infrastructure.
Matomo serves as an open-source alternative that allows you to maintain full data ownership through a self-hosted installation. This guide explains the steps for a Matomo on-premise installation, covering Nginx configuration, MySQL database setup, and privacy settings that comply with regulations.
What Is Matomo?
Matomo is an open-source web analytics platform formerly known as Piwik. Built using PHP and MySQL, Matomo provides full control over website visitor data because all data is stored on your own server rather than third-party infrastructure. Currently, Matomo is used by over one million websites in 190 countries, including government agencies, universities, and Fortune 500 companies.
Matomo is available in two schemes: Matomo Cloud (SaaS, managed by the InnoCraft team) and Matomo On-Premise (self-hosted, free, open-source under the GPLv3 license). This guide focuses on the second option as it provides complete data ownership.
Advantages of Self-Hosted vs. Google Analytics
| Aspect | Google Analytics 4 | Matomo On-Premise |
|---|---|---|
| Data ownership | Google (third party) | 100% yours |
| Data sampling | Yes (daily hit limits) | None, full data |
| GDPR/PDP Law compliance | Requires additional configuration | Built-in, easier to verify |
| Cost | Free (your data is the product) | Free (your own server costs) |
| Visitor privacy | Data shared with Google ecosystem | Data never leaves your server |
| Raw data access | Limited via BigQuery | Direct via MySQL |
| Data history | Limited (default 14 months) | No limit |
Matomo allows organizations to prove compliance with the GDPR (General Data Protection Regulation) in the European Union and the PDP Law (Personal Data Protection Law) in Indonesia because there is no cross-border data transfer to third parties.
Prerequisites
Before starting the installation, ensure your server meets the following minimum requirements. Matomo 5.x (latest version at the time of writing: 5.9.0) requires:
- Web Server: Nginx, Apache, LiteSpeed, or IIS
- PHP: version 7.2.5 or later; PHP 8.2 or 8.3 is highly recommended
- Database: MySQL 5.5+ or MariaDB (MySQL 8+ or MariaDB 10.6+ recommended)
- PHP Extensions:
pdo,pdo_mysql,mbstring,xml,gd,curl
For personal use or small sites with traffic under 100,000 pageviews per month, a single server is sufficient. Matomo's minimum recommended specifications: 2 CPUs, 2 GB RAM, 50 GB SSD.
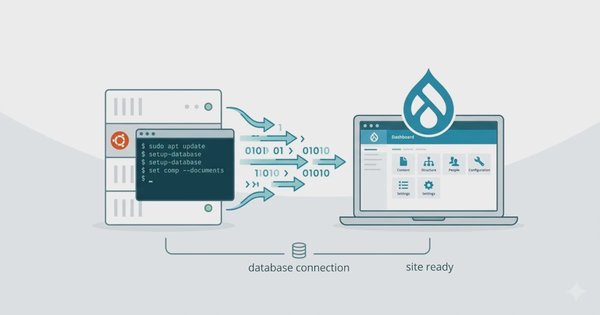
Server Preparation Steps
Installing PHP Dependencies and MariaDB
The first step is to ensure all required packages are installed. The following commands apply to Ubuntu:
sudo apt update && sudo apt upgrade -y

# Add Ondřej repository:
sudo add-apt-repository ppa:ondrej/php -y

# Install Nginx, PHP 8.3, and required extensions
sudo apt install -y nginx php8.3 php8.3-fpm php8.3-mysql php8.3-xml \
  php8.3-mbstring php8.3-gd php8.3-curl php8.3-cli php8.3-zip

# Install MySQL Server
sudo apt install -y mariadb-server

# Enable and start services
sudo systemctl enable --now nginx php8.3-fpm mariadb
Database Setup: Creating MariaDB Database and User
Matomo requires its own MariaDB database and user. Do not use the root user for application purposes as it violates the principle of least privilege.
sudo mariadbOnce at the MariaDB prompt, run the following commands sequentially:
-- Create a specific database for Matomo
CREATE DATABASE matomo_db CHARACTER SET utf8mb4 COLLATE utf8mb4_unicode_ci;

-- Create a user with a strong password
CREATE USER 'matomo_user'@'localhost' IDENTIFIED BY 'ChangeWithAStrongPassword!';

-- Grant all necessary privileges to Matomo
GRANT ALL PRIVILEGES ON matomo_db.* TO 'matomo_user'@'localhost';

-- Apply privilege changes
FLUSH PRIVILEGES;

EXIT;
Nginx Virtual Host Configuration
Create an Nginx configuration file for the Matomo domain. The example below uses analytics.example.com; adjust it to your domain.
sudo nano /etc/nginx/sites-available/analytics.example.com.confFill it with the following configuration:
server {
  listen 80;
  server_name analytics.example.com;

  root /var/www/matomo;
  index index.php;

  # Security headers
  add_header X-Frame-Options "SAMEORIGIN" always;
  add_header X-Content-Type-Options "nosniff" always;
  add_header Referrer-Policy "no-referrer-when-downgrade" always;

  # Logging
  access_log /var/log/nginx/analytics.example.com_access.log;
  error_log  /var/log/nginx/analytics.example.com_error.log;

  location / {
      try_files $uri $uri/ /index.php?$query_string;
  }

  location ~ \.php$ {
      include         snippets/fastcgi-php.conf;
      fastcgi_pass    unix:/run/php/php8.3-fpm.sock;
      fastcgi_param   SCRIPT_FILENAME $document_root$fastcgi_script_name;
      include         fastcgi_params;
  }

  # Block access to sensitive files
  location ~ /\. {
      deny all;
  }
  location ~* \.(log|conf|ini|sh)$ {
      deny all;
  }

  # Optimize static asset delivery
  location ~* \.(js|css|png|jpg|jpeg|gif|ico|svg|woff2)$ {
      expires 1y;
      add_header Cache-Control "public, immutable";
  }
}
Enable the configuration and test the Nginx syntax:
# Create a symlink to enable the site
sudo ln -s /etc/nginx/sites-available/analytics.example.com.conf /etc/nginx/sites-enabled/

# Test configuration syntax
sudo nginx -t

# Reload Nginx if there are no errors
sudo systemctl reload nginx
Installing SSL Certificate with Certbot
Matomo must be accessed via HTTPS so that visitor tracking data cannot be intercepted. Use Certbot to obtain a free SSL certificate from Let's Encrypt:
sudo apt install -y certbot python3-certbot-nginx
sudo certbot --non-interactive \
-m [email protected] \
--agree-tos \
--no-eff-email \
--nginx -d analytics.example.com \
--redirect
Once the certificate is issued, Certbot will automatically update the Nginx configuration and set up automatic renewal every 90 days.
On-Premise Installation Process
Downloading and Extracting the Matomo Package
Download the latest version of Matomo directly to the server using wget, then extract it to the web root directory:
# Change to the web root directory
cd /var/www

# Download the latest Matomo package
sudo wget https://builds.matomo.org/matomo.zip -O matomo.zip

# Extract the archive
sudo unzip matomo.zip

# Delete the zip file after completion
sudo rm matomo.zip
Folder Permission Configuration
The Matomo installation folder requires proper permission settings so the installer can write configuration files and PHP-FPM can access the necessary files.
# Set ownership to the Nginx user (www-data on Ubuntu)
sudo chown -R www-data:www-data /var/www/matomo

# Set directory and file permissions
sudo find /var/www/matomo -type d -exec chmod 755 {} \;
sudo find /var/www/matomo -type f -exec chmod 644 {} \;
Starting Installation via Browser
Once the files are uploaded and Nginx is correctly configured, open your browser and access your Matomo URL, for example, https://analytics.example.com. The Matomo installer will appear automatically.
Welcome Screen
The first page is the welcome screen. Click Next » to begin the step-by-step installation process.
System Check
Matomo will run an automatic check of all server dependencies. Every item that passes the check is marked with a green indicator. If an item fails (marked red or yellow), Matomo will provide a guide on how to fix it.
PHP modules that most often cause System Check failures are php-gd and php-mbstring. Ensure both are installed:
sudo apt install -y php8.3-gd php8.3-mbstring
sudo systemctl restart php8.3-fpm
Once all items pass, click Next » to continue.
Database Setup
Enter the database credentials created earlier into the provided form:
| Field | Value |
|---|---|
| Database Server | localhost |
| Login | matomo_user |
| Password | The password you created earlier |
| Database Name | matomo_db |
| Table Prefix | matomo_ (default, can be changed) |
Matomo will automatically create all necessary tables. Click Next » once the table creation process is successful.
Super User Creation
Create the main administrator account (Super User). This account has full access to all Matomo settings, including user management, adding websites, and plugin configuration. Use a strong password and save it in a password manager, as there is no automatic password reset mechanism for on-premise installations.
Super User Login    : your_admin
Super User Password : [min. 8 characters, combination of letters, numbers, symbols]
Super User Email    : [email protected]
Setting Up the First Website
Add the first site you want to track. Enter the website name and its URL. Ensure the URL uses the correct format including the protocol (https://) for accurate tracking. Once saved, Matomo will generate a Site ID to be used in the tracking code.
Installing the Tracking Code
Manual Method: Copy-Paste JavaScript
After installation is complete, Matomo will display a JavaScript Tracking Tag that needs to be installed on every website page you wish to track. Place this code right before the closing </head> tag:
<!-- Matomo -->
<script>
  var _paq = window._paq = window._paq || [];
  /* tracker methods like "setCustomDimension" should be called before "trackPageView" */
  _paq.push(['trackPageView']);
  _paq.push(['enableLinkTracking']);
  (function() {
    var u="//analytics.example.com/";
    _paq.push(['setTrackerUrl', u+'matomo.php']);
    _paq.push(['setSiteId', '1']);
    var d=document, g=d.createElement('script'), s=d.getElementsByTagName('script')[0];
    g.async=true; g.src=u+'matomo.js'; s.parentNode.insertBefore(g,s);
  })();
</script>
<!-- End Matomo Code -->
Replace analytics.example.com with your Matomo domain, and the number 1 in setSiteId with the Site ID provided by Matomo during website setup.
Plugin Method: CMS Integration
For CMS users, Matomo provides official integrations that do not require manual code editing:
- WordPress: Install the Matomo Analytics for WordPress plugin from the WordPress repository. This plugin includes a summary dashboard directly within the WordPress admin.
- Joomla: Use the Matomo Analytics for Joomla extension.
- Drupal: Install the Matomo Analytics module from Drupal.org.
- PrestaShop / Magento: Official modules are available in their respective marketplaces.
Verification: Checking Incoming Data on the Dashboard
Once the tracking code is installed, open the Matomo dashboard and navigate to Dashboard → Real-time. Access your website from a browser (use normal mode, not Incognito, and temporarily disable ad-blockers for initial verification). Your visit should appear in the real-time report within seconds.
Another way to verify is by checking network requests in the browser DevTools. Open the Network tab, reload the page, and look for a request to matomo.php. If you receive a 204 No Content response, tracking is working correctly.
# In the main website Nginx (not the Matomo server)
location = /js/analytics.js {
    proxy_pass https://analytics.example.com/matomo.js;
    proxy_set_header Host analytics.example.com;
}

location /tracking {
    proxy_pass https://analytics.example.com/matomo.php;
    proxy_set_header Host analytics.example.com;
}
Then, adjust the URL in the tracking code to point to those proxy endpoints.
Basic Dashboard Usage Guide
The Matomo dashboard presents analytical data in several key reports that can be used immediately without additional configuration.
Real-time Visitor Map
The Visitor Map feature (menu Visitors → Real-time Map) displays the geographic location of active visitors on the website on a world map. Each dot on the map represents one active visit. This feature is useful for monitoring traffic spikes in real-time, such as when an article goes viral or an ad campaign is running.
Acquisition Report: Traffic Sources
The Acquisition report (menu Acquisition → All Channels) shows where visitors are coming from. Matomo categorizes traffic sources into:
- Search Engines: Visitors from Google, Bing, DuckDuckGo, and other search engines. A breakdown by keyword is available (though Google limits keyword data).
- Social Networks: Visits from social media platforms like Facebook, Twitter/X, LinkedIn, and others.
- Direct: Visitors who type the URL directly or come from bookmarks.
- Referral: Visits from links on other websites.
- Campaigns: Traffic from URLs using UTM parameters or Matomo Campaign Tracking.
Behavior Report: Visitor Behavior
The Behavior report (menu Behavior → Pages) shows which pages are most frequently visited, how long visitors stay, and from which pages they leave the site (exit pages). Important metrics to note:
- Pageviews: The total number of page views.
- Unique Pageviews: The number of sessions that loaded that page (one session can load the same page more than once).
- Avg. Time on Page: The average time visitors spend on that page.
- Bounce Rate: The percentage of visitors who leave immediately after viewing one page.
- Exit Rate: The percentage of visitors who leave the site from that page.
Visitor Profile: Demographic Profile
The Visitors menu provides sub-reports to understand visitor profiles:
- Devices: The percentage of visitors from desktop, mobile, and tablet.
- Browsers & OS: The browsers and operating systems used by visitors.
- Locations: The country, region, and city of origin of visitors (requires GeoIP setup).
- Visitor Log: A log of individual visits displaying every page visited within a single session.
Goals: Conversion Tracking
Matomo supports conversion tracking through the Goals feature (menu Goals → Manage Goals). Goals can be configured based on: visits to a specific URL (e.g., a thank you page after form submission), the number of pages visited per session, or visit duration. This feature is very useful for measuring the effectiveness of landing pages or marketing campaigns.
Optimization & Privacy Tips
Anonymize IP: Visitor Data Anonymity
One of Matomo's most important privacy features is IP Anonymization. This feature masks part of the IP address octets before they are stored in the database, so visitor identities cannot be directly traced from the IP.
Enable it via: Administration → Privacy → Anonymize Data. Select Anonymize visitors' IP addresses and choose a method:
- Mask 1 byte: Example:
192.168.1.x— low level of anonymity. - Mask 2 bytes: Example:
192.168.x.x— recommended for GDPR compliance. - Mask 3 bytes: Example:
192.x.x.x— very high anonymity.
For GDPR and PDP Law compliance, choose at least Mask 2 bytes. This feature can be combined with Do not track user when they have opted-out to respect visitor preferences.
Geolocation: DBIP or GeoIP2 Setup
By default, Matomo uses a simple PHP-based geolocation method with accuracy limited to the country level. For city-level accuracy, install the DBIP or MaxMind GeoIP2 database:
# Create directory for GeoIP database
sudo mkdir -p /var/www/matomo/misc

# Download DBIP database (free, available monthly at dbip.com)
# Or use MaxMind GeoLite2 (requires free registration at maxmind.com)
# Example downloading GeoLite2-City.mmdb from MaxMind:

cd /var/www/matomo/misc
sudo wget -O GeoLite2-City.tar.gz \
  "https://download.maxmind.com/app/geoip_download?edition_id=GeoLite2-City&license_key=YOUR_KEY&suffix=tar.gz"
sudo tar -xzf GeoLite2-City.tar.gz --wildcards --no-anchored '*.mmdb' --strip-components 1
sudo chown www-data:www-data GeoLite2-City.mmdb
sudo rm GeoLite2-City.tar.gz
Once the .mmdb file is available, enable it in Matomo: Administration → System → Geolocation, then select GeoIP 2 (Php) or GeoIP 2 (PECL) if the PHP extension is installed.
Setup Cron for Auto-Archiving
For sites with traffic exceeding a few hundred visits per day, it is highly recommended to configure a cron job to process reports periodically. Without this, Matomo will re-process reports every time the dashboard is opened, which slows down loading and increases database load.
# Open crontab for the www-data user
sudo crontab -u www-data -e
Add the following line to run archiving every 5 minutes:
*/5 * * * * /usr/bin/php /var/www/matomo/console core:archive --url=https://analytics.example.com/ > /dev/null 2>&1Regular Database Backup
Analytics data collected over months or years is invaluable for long-term analysis. Set up automatic Matomo database backups using the following script:
#!/bin/bash
# /usr/local/bin/backup-matomo.sh

BACKUP_DIR="/var/backups/matomo"
DATE=$(date +%Y%m%d_%H%M%S)
DB_NAME="matomo_db"
DB_USER="matomo_user"
DB_PASS="ChangeWithAStrongPassword!"

mkdir -p "$BACKUP_DIR"

# Dump database and compress
mysqldump -u "$DB_USER" -p"$DB_PASS" "$DB_NAME" | gzip > "$BACKUP_DIR/matomo_${DATE}.sql.gz"

# Delete backups older than 30 days
find "$BACKUP_DIR" -name "matomo_*.sql.gz" -mtime +30 -delete

echo "Backup complete: matomo_${DATE}.sql.gz"
# Grant execution permission and add to cron
sudo chmod +x /usr/local/bin/backup-matomo.sh
# Run backup daily at 02:00
(sudo crontab -l 2>/dev/null; echo "0 2 * * * /usr/local/bin/backup-matomo.sh") | sudo crontab -Updating Matomo to the Latest Version
Matomo releases regular updates that include security fixes and new features. The update process can be done via the Matomo dashboard (if folder permissions allow), or manually via the command line:
# Download latest version
cd /var/www
sudo wget https://builds.matomo.org/matomo.zip -O matomo_new.zip

# Extract to temporary directory
sudo unzip matomo_new.zip -d matomo_update/

# Copy new files to Matomo directory (overwrite old files, except config/)
sudo rsync -av --exclude='config/config.ini.php' matomo_update/matomo/ matomo/

# Fix ownership
sudo chown -R www-data:www-data /var/www/matomo

# Run database update via CLI
sudo -u www-data php /var/www/matomo/console core:update

# Clean up temporary directories
sudo rm -rf matomo_update/ matomo_new.zip
Securing the Matomo Directory
After successful installation, tighten permissions on the configuration directory:
# Make config/ only readable by www-data
sudo chmod 750 /var/www/matomo/config/
sudo chmod 640 /var/www/matomo/config/config.ini.php

# Two directories that still need to be writable by PHP:
sudo chmod -R 755 /var/www/matomo/tmp/
sudo chmod 644 /var/www/matomo/js/piwik.js /var/www/matomo/js/matomo.js
The config/config.ini.php file contains database credentials in plaintext. Ensure this directory cannot be accessed directly via a web browser. The Nginx configuration created earlier already handles this via the location ~ /\. block.
Conclusion
Matomo On-Premise is the right choice for anyone needing a serious web analytics platform without sacrificing data ownership and visitor privacy. While the installation process requires basic Linux administration skills, once running, Matomo provides comprehensive data without sampling and without history limits.
Compliance with regulations like the GDPR and Indonesia's PDP Law is much easier to prove when data remains entirely within your own infrastructure and is not sent to third-party servers. Built-in features like IP anonymization, consent management, and data retention settings make Matomo a reliable choice for organizations operating under strict regulations.