
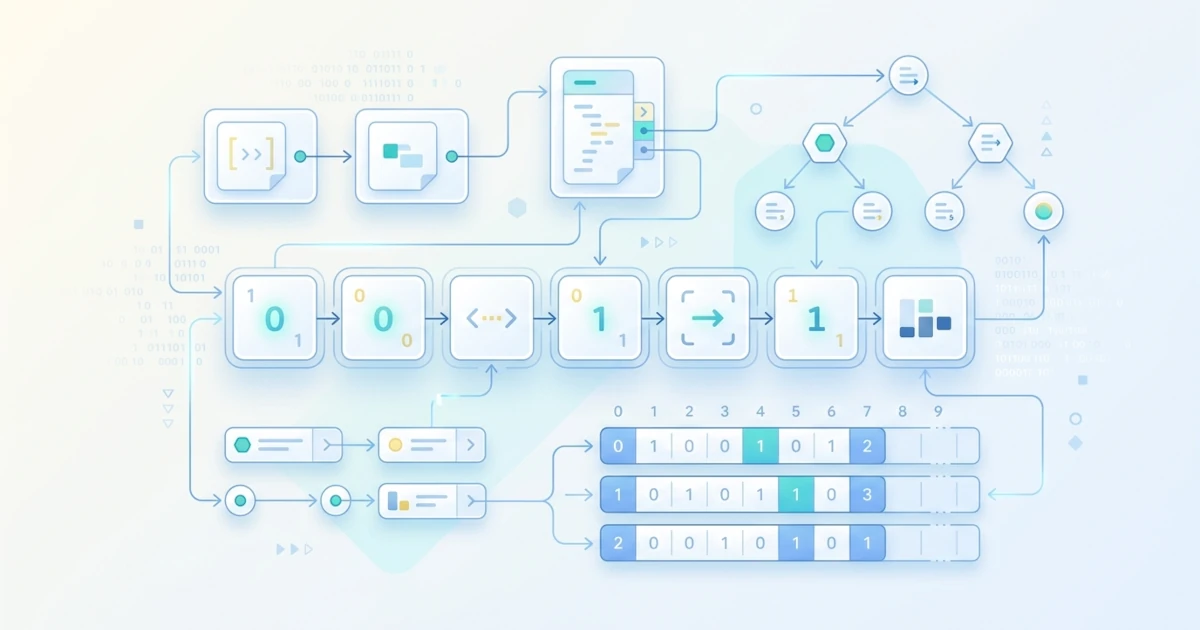
Chapter 3 equipped us with variables that store a single value, whether a string or a number. Real-world needs are rarely that simple: a list of filenames that need to be backed up, a list of users whose status needs checking, or a list of ports that need monitoring, are all collections of values that ideally are stored in a single container, rather than split into dozens of separate variables named file1, file2, file3, and so on. This is where arrays come into play. This chapter covers two types of arrays supported by Bash, namely indexed arrays that order elements based on numbers and associative arrays that use text keys, followed by common operations such as adding, deleting, and slicing elements, and concludes with a case study of processing simple structured data relevant to both Users and Sysadmins.
4.1 Indexed Array: Declaration and Element Access
This sub-chapter covers the most basic and frequently used type of array in Bash: indexed arrays. Almost all array examples appearing in subsequent chapters, including when processing script arguments in Chapter 12 and processing multiple files simultaneously in Chapter 7, use this type of array.
4.1.1 What is an Indexed Array?
An indexed array is an array where each element is labeled with a sequential numerical index, starting from zero. How it works is similar to a numbered shelf: the first element occupies number 0, the second element number 1, and so on. Unlike programming languages such as C or Java, indices in Bash do not have to be sequential without gaps. We could fill only index 0 and index 5, and Bash still considers it a valid array, a condition called a sparse array. This characteristic is important to remember because it will affect the element deletion discussion in sub-chapter 4.3.2.
4.1.2 Creating an Array with Assignment
The most common way to create an indexed array is through compound assignment, which involves writing all elements inside parentheses, separated by spaces.
fruit=("apple" "orange" "mango")Bash does not require a prior type declaration like declare -a; the assignment above automatically recognizes fruit as an indexed array. Adding declare -a before assignment remains valid and is sometimes used to clarify code intent, especially in larger scripts.
declare -a fruit
fruit=("apple" "orange" "mango")
Besides compound assignment, elements can also be filled one by one via explicit indices, including filling non-consecutive indices to intentionally make the array sparse.
color[0]="red"
color[1]="green"
color[5]="blue"
4.1.3 Accessing Array Elements
To read a single element, specify the array name followed by the index in square brackets, wrapped in ${ }.
echo "${fruit[0]}"The line above displays apple, because index 0 refers to the first element. To retrieve all elements at once, use ${fruit[@]} or ${fruit[*]}. Both look identical when displayed as-is, but have an important difference when wrapped in double quotes: "${fruit[@]}" treats each element as a separate word (preserving boundaries between elements even if they contain spaces), while "${fruit[*]}" joins all elements into a single string separated by the first character of IFS (a space by default).
echo "${fruit[@]}"
echo "${fruit[*]}"
The impact of this difference will be felt when the array is used inside a for loop in the next sub-chapter: the "${fruit[@]}" form is the correct choice in almost all cases, aligned with the quoting principles discussed in Chapter 3.
4.1.4 Iterating Elements with a for Loop
The most common pattern for processing all array elements is through a for loop. The complete syntax for a for loop will be thoroughly discussed in Chapter 7, but its basic pattern can be used right away.
for item in "${fruit[@]}"; do
    echo "Fruit: $item"
done
If not only the value but also its index is needed, use ${!fruit[@]}, which is an exclamation mark before the array name that causes Bash to return a list of indices (or keys, for associative arrays in sub-chapter 4.2) instead of their values.
for i in "${!fruit[@]}"; do
    echo "Index $i contains ${fruit[$i]}"
done
This ${!fruit[@]} pattern also keeps iteration safe even when the array is sparse, because Bash only returns indices that are actually populated, rather than assuming a sequential range from 0 to the number of elements minus one.
4.1.5 Verification and Troubleshooting Indexed Arrays
A quick way to inspect the complete contents of an array along with its attributes is via declare -p, the same builtin used for regular variables in Chapter 3.
declare -p fruitdeclare -a fruit=([0]="apple" [1]="orange" [2]="mango")A common mistake made by beginners is forgetting to wrap ${fruit[@]} in double quotes, causing elements containing spaces to split into multiple words, exactly the word splitting problem discussed in Chapter 3. Another more subtle mistake is accessing an index that was never set. Bash does not display an error; it simply returns an empty string.
echo "Index 10: ${fruit[10]}"The line above only displays Index 10: without any error, because index 10 has never been populated. This quiet behavior is similar to referencing an undeclared variable as discussed in Chapter 3, and can be changed to an explicit error via the set -u option, which will be discussed in Chapter 25.
4.2 Associative Array with declare -A
After understanding indexed arrays, this sub-chapter covers the second array type, which is better suited when stored data has a clearer meaning through names rather than numeric sequences, for example mapping server names to their IP addresses or configuration options to their values.
4.2.1 What is an Associative Array?
An associative array is an array that uses arbitrary text, called a key, to reference each element, rather than sequential index numbers like the indexed array in sub-chapter 4.1. Its structure consists of key-value pairs: each unique key stores one value. This feature is only available starting from Bash version 4.0 and above, unlike indexed arrays which have existed since much older Bash versions. This is an important point to note because, as mentioned in Chapter 1, macOS still ships with built-in Bash version 3.2 due to licensing reasons, so associative arrays will not work unless Bash is updated via Homebrew.
4.2.2 Declaration with declare -A
Unlike indexed arrays which can be used directly without explicit declaration, associative arrays must be declared first with declare -A before being populated.
declare -A user_info
user_info["name"]="Budi"
user_info["role"]="sysadmin"
Just like indexed arrays, associative arrays can also be populated directly via compound assignment in a single line, with each key-value pair written inside square brackets.
declare -A server=(
    ["web1"]="192.168.1.10"
    ["db1"]="192.168.1.20"
)
4.2.3 Accessing and Modifying Values
Retrieving a value from a key follows the same syntax as an indexed array, except the content inside the square brackets is a string key rather than an index number.
echo "${server["web1"]}"To modify the value of an existing key, simply reassign to the same key. Bash automatically overwrites the old value with the new one without needing to delete it first.
server["web1"]="192.168.1.99"4.2.4 Iterating Keys and Values
Similar to the ${!fruit[@]} pattern on indexed arrays in sub-chapter 4.1.4, an exclamation mark before the associative array name returns all stored keys, which can then be used to retrieve their respective values.
for key in "${!server[@]}"; do
    echo "$key -> ${server[$key]}"
done
One important difference compared to indexed arrays: the order of keys returned by ${!server[@]} is not guaranteed to follow the insertion order, because associative arrays in Bash are stored in a hash structure, not a sequential structure like indexed arrays. If display order matters, sort the key list before iteration, for example by piping it to sort, a topic that will be covered more when discussing pipes in Chapter 5.
4.2.5 Troubleshooting: Associative Arrays Require Bash 4+
The most common mistake when learning associative arrays is setting a key directly without using declare -A first.
server["web1"]="192.168.1.10"Without declare -A, Bash treats server as a standard indexed array, and the content inside the square brackets ("web1") is evaluated as an arithmetic expression rather than text. Because web1 is not a valid numeric variable, Bash evaluates it as 0, storing the value at index 0 instead of at key "web1" as intended. This mistake is often missed because it does not trigger an error; it simply stores data in the wrong place.
A second error with a clearer error message occurs when running declare -A on an older Bash version.
declare -A server
bash: declare: -A: invalid option
If this error message appears, check the active Bash version before investigating other possibilities.
bash --version
echo "$BASH_VERSION"
In practice, this case is most frequently encountered when a script developed on Linux is executed on macOS without ensuring PATH points to the newer Bash version from Homebrew first, following the steps discussed in Chapter 1 and the version notes in sub-chapter 4.2.1.
| Aspect | Indexed Array | Associative Array |
|---|---|---|
| Element Pointer | Index number, starting from 0 | Arbitrary text key |
| Element Order | Guaranteed to follow index order | Not guaranteed (hash structure) |
| Explicit Declaration Needed | Not mandatory (declare -a optional) | Mandatory (declare -A) |
| Bash Version Availability | Since older versions | Bash 4.0 and above |
4.3 Common Array Operations
After mastering basic declaration and iteration, this sub-chapter covers operations used daily when working with arrays: adding new elements, deleting unneeded elements, retrieving sub-elements via slicing, and counting element length.
4.3.1 Adding Elements with the += Operator
To append a new element to an indexed array without overwriting existing contents, use the += operator followed by the new element inside parentheses.
fruit+=("pineapple")The new element is automatically placed after the highest existing index. The same operator applies to associative arrays, except the format consists of new key-value pairs, and multiple pairs can be added at once in a single line.
server+=(["cache1"]="192.168.1.30" ["cache2"]="192.168.1.31")4.3.2 Deleting Elements with unset
The unset builtin used for deleting regular variables in Chapter 3 also applies to deleting a single array element; simply specify its index or key.
unset 'fruit[1]'It is important to understand that deleting a single element from an indexed array does not cause Bash to automatically reindex remaining elements. An array that was dense becomes sparse, exactly the concept introduced in sub-chapter 4.1.1.
fruit=("apple" "orange" "mango")
unset 'fruit[1]'
declare -p fruit
declare -a fruit=([0]="apple" [2]="mango")Notice that index 1 is completely missing from the declare -p output, rather than turning into an empty string. To delete all array contents along with the variable itself, call unset without an index.
unset fruit4.3.3 Slicing Arrays
Slicing is a technique to extract a subset of array elements based on a starting position and the desired number of elements, using the syntax ${array[@]:offset:length}.
numbers=(10 20 30 40 50)
echo "${numbers[@]:1:3}"
The line above outputs 20 30 40, because slicing begins at offset 1 (the second element) and takes 3 elements. The length parameter can be omitted to retrieve all elements starting from a specific offset to the end of the array.
echo "${numbers[@]:2}"Bash also supports negative offsets to count backward from the end of the array. One technical detail to watch: negative offsets must be separated by a space from the preceding colon, because without a space Bash interprets it as ${parameter:-default} syntax, which has an entirely different meaning.
echo "${numbers[@]: -2}"The line above takes the last 2 elements, namely 40 50. As an additional note, Bash version 4.3 and above also supports negative indices directly on indexed arrays, such as ${numbers[-1]} to retrieve the last element without counting the array length first.
4.3.4 Counting Array Length
The total number of elements in an array is retrieved via ${#array[@]}, using a hash sign in front of the array name combined with subscript @ or *.
fruit=("apple" "orange" "mango")
echo "Total fruit: ${#fruit[@]}"
Be careful to distinguish this syntax from ${#fruit[0]}, which counts the character length of the string at index 0 rather than the number of array elements. These two similar syntaxes have entirely different meanings and are frequently confused by beginners.
echo "First element length: ${#fruit[0]}"For an array that has lost elements via unset as discussed in sub-chapter 4.3.2, ${#fruit[@]} accurately counts the number of elements actually remaining, rather than counting based on the highest index ever present.
4.3.5 Troubleshooting: Sparse Arrays After unset
A dangerous habit frequently seen in beginner scripts is assuming array indices are always densely sequential from 0 to element_count - 1, and using that assumption for manual iteration with C-style for loops.
fruit=("apple" "orange" "mango")
unset 'fruit[1]'

for (( i=0; i<${#fruit[@]}; i++ )); do
    echo "${fruit[$i]}"
done
Because ${#fruit[@]} now equals 2 (not 3, as explained in sub-chapter 4.3.4), the loop only runs for i=0 and i=1. However, the remaining elements are actually at index 0 and index 2, so mango at index 2 is never printed, and i=1 prints an empty string because that index was deleted. The lesson: after an array undergoes unset on certain elements, always iterate using the "${fruit[@]}" or "${!fruit[@]}" pattern as discussed in sub-chapter 4.1.4, and do not rely on dense index assumptions.
4.4 Case Study: Processing Structured Data
This closing sub-chapter combines indexed arrays and associative arrays in a practical scenario: verifying the existence of key directories on a server while displaying their respective backup priorities, a real task typically performed by a Sysadmin prior to scheduling automated backups, a topic to be covered in detail in Chapter 21.
4.4.1 Scenario and Data Design
Consider three critical configuration directories on a server that must be verified: the nginx configuration directory, the mysql data directory, and the web application root directory. Each directory also has a different backup priority level. This requirement fits naturally with two arrays: an indexed array to store the list of paths to check sequentially, and an associative array to map each path to its backup priority.
4.4.2 Writing the Complete Script
Save the following script, which combines all array techniques discussed in sub-chapters 4.1 through 4.3, along with an if conditional structure to be discussed in detail in Chapter 6.
#!/bin/bash

important_directories=(
    "/etc/nginx"
    "/etc/mysql"
    "/var/www/html"
)

declare -A backup_priority=(
    ["/etc/nginx"]="high"
    ["/etc/mysql"]="high"
    ["/var/www/html"]="medium"
)

echo "Total directories checked: ${#important_directories[@]}"
echo "---"

for dir in "${important_directories[@]}"; do
    if [ -d "$dir" ]; then
        status="exists"
    else
        status="not found"
    fi
    echo "$dir -> status: $status, priority: ${backup_priority[$dir]}"
done
4.4.3 Verifying Output and Further Development
Run the script after granting execution permissions, following the practice discussed in Chapter 1.
chmod +x check_directories.sh
./check_directories.sh
On a server with nginx and mysql installed but where /var/www/html has not been created, the output will look similar to this:
Total directories checked: 3
---
/etc/nginx -> status: exists, priority: high
/etc/mysql -> status: exists, priority: high
/var/www/html -> status: not found, priority: medium
This script can be extended further, for example adding new directories to important_directories via the += operator from sub-chapter 4.3.1 without modifying the loop logic, because the loop is dynamically designed to follow array contents rather than hardcoded numbers. This principle highlights the main advantage of arrays over writing separate variables individually as mentioned at the beginning of this chapter: adding new data requires only adding a single line, without touching processing logic. The combination of indexed and associative arrays shown in this case study will be reused in more complex forms when parsing script arguments in Chapter 12 and server health audit scripts in Chapter 17.