
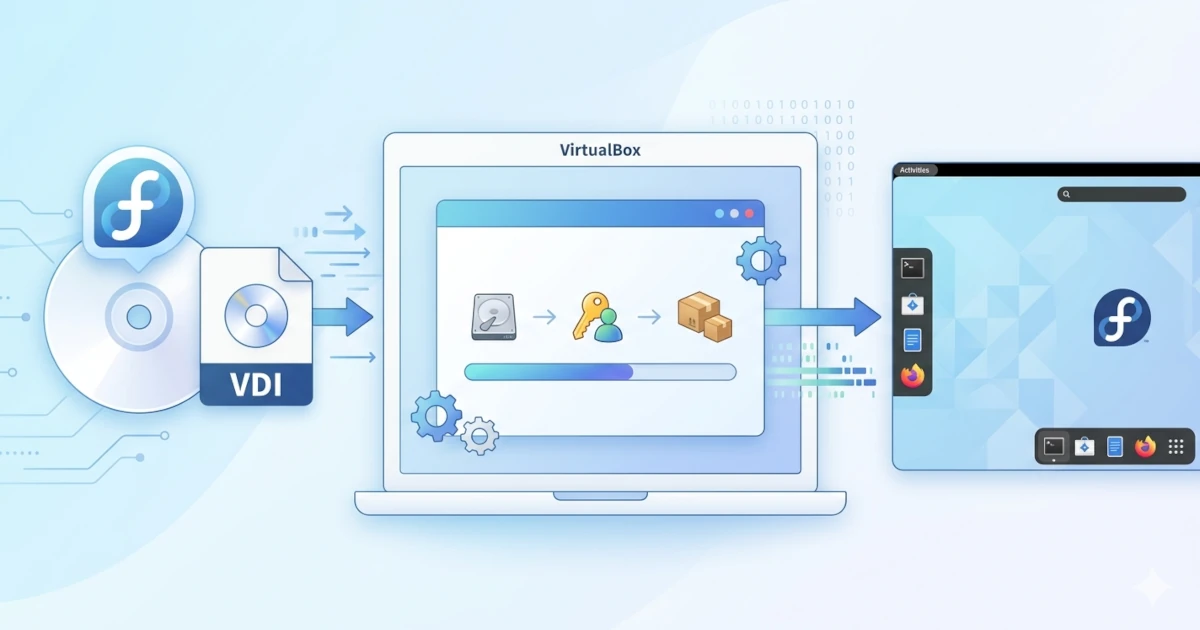
After successfully installing Ubuntu 26.04 LTS in the previous chapter, it is now time to install the second Linux distribution in this series: Fedora Workstation 44. Although the basic principles of Linux installation remain similar, we will discover several interesting differences between these two distributions, ranging from how the live environment works, a different installer interface, to default technology choices such as the filesystem and swap management. Fedora uses an installer named Anaconda, which since Fedora 42 comes with a new web-based interface (WebUI) that is more compact and modern to replace the old hub-and-spokes design used for years; starting from Fedora 43, this interface has also become the default across all Spins and KDE editions, not just Workstation. Fedora Workstation 44 itself is released with GNOME 50 as the latest version of its desktop environment. Running both systems in parallel inside VirtualBox will provide us with a broader perspective on the diversity of the Linux ecosystem and the philosophical differences behind each distribution.
7.1 Creating a Virtual Machine in VirtualBox
The first step is to prepare a new virtual machine (VM) where Fedora Workstation 44 will run. The process is similar to creating the Ubuntu VM in the previous chapter, but there are several configuration details that need to be adjusted to suit Fedora's requirements.
7.1.1 Required Hardware Specifications
The Fedora Project specifies the following requirements for Fedora Workstation 44:
| Component | Minimum | Recommended |
|---|---|---|
| RAM | 2 GB | 4 GB or more |
| Disk space | 20 GB | 40 GB or more |
| Processor | x86_64 (64-bit) | x86_64 (64-bit) |
We will allocate resources above the minimum requirements so that Fedora inside the VM can run smoothly for learning purposes in this series.
Note on CPU architecture:
Since recent releases, Fedora requires a processor with an x86-64-v2 baseline (supporting SSE4.2 instructions and above). Very old 64-bit processors without this support will not be able to boot into Fedora 44. This is generally not an issue if VirtualBox is configured to pass through host CPU features, as nearly all processors manufactured in the last 15 years meet this requirement.
7.1.2 Creating a New VM
Open VirtualBox Manager, then follow these steps:
- Click the New button at the top of the VirtualBox Manager window to open the new VM creation dialog box.
- In the Name and Operating System section, fill in the following information:
- Name: Type the VM name, for example
Fedora Workstation 44. VirtualBox will automatically detect the OS type and version after we add the ISO file. - Folder: Leave as default, which is the location where VM files will be stored.
- ISO Image: Click the folder icon to the right of the field, then browse to and select the Fedora Workstation 44 ISO file downloaded in chapter 5. The Type and Version fields will automatically set to Linux and Fedora (64-bit) once the file is selected.
- Name: Type the VM name, for example
- The Proceed with Unattended Installation option prevents VirtualBox from performing a hands-off installation that bypasses the installer interface. Uncheck it so we can follow the installation process manually and understand each step.
- Click Next to proceed to the Hardware page.
- In the Hardware section, configure resource allocation:
- Base Memory: Set to 4096 MB (4 GB). This amount ensures GNOME and Anaconda run smoothly inside the VM.
- Processors: Set to 2 vCPUs. Two virtual CPUs are sufficient for daily desktop usage.
- Click Next to proceed to the Hard Disk page.
- In the Hard Disk section, select Create a Virtual Hard Disk Now and set the size to 50 GB. VirtualBox will create a virtual disk file in VDI format (VirtualBox Disk Image) which is dynamically allocated by default; the file will only consume host disk space equal to the actual data saved and will not immediately take up 50 GB.
- Click Next, review the configuration summary, then click Finish.
Our new VM will now appear in the left panel of VirtualBox Manager.
7.2 Installation Process with Anaconda Installer
7.2.1 Running the VM and Booting from ISO
- Select the Fedora Workstation 44 VM in VirtualBox Manager, then click the Start button.
- The VM will power on and display the GRUB boot menu with several choices:
- Start Fedora-Workstation-Live: loads the GNOME live environment directly from the ISO.
- Test this media & start Fedora-Workstation-Live: runs an integrity check on the ISO file prior to loading the system. This option is useful to verify that the ISO is not corrupted before installation.
- Troubleshooting: boot troubleshooting menu.
- Select Start Fedora-Workstation-Live and press Enter. Fedora will load the live environment from the ISO into memory. This process takes one to three minutes depending on host computer speed.
- Once the live environment finishes loading, you will be greeted by the Fedora GNOME Desktop running directly from the ISO. This is a temporary session; all changes made here will not be saved after the VM restarts.
- Click the Activities button in the upper left corner (or press the Super key) to initiate installation, then search for Install to Hard Drive in the search bar. Click the icon to launch Anaconda WebUI.
Note: The system runs entirely inside RAM in the live environment. Heavy workloads such as opening multiple applications simultaneously can slow down the system if the VM is only allocated 2 GB of RAM. Allocating 4 GB as recommended will deliver a smoother experience.
7.2.2 Language Selection
The first page that appears after Anaconda WebUI opens is the Welcome screen.
- Select the language to be used during the installation process on the Welcome screen. Options include Indonesian or English. Selecting English is often more convenient for learning purposes since most documentation, tutorials, and support forums are provided in English. The language choice here does not affect the language of the installed operating system; the system language can be changed post-installation via Settings.
- Click Next to continue after selecting the language.
7.2.3 Storage Configuration and Disk Partitioning
Method 1: Use Entire Disk
The only partitioning option available directly in the Anaconda WebUI for Fedora 44 is Use entire disk; Fedora will automatically partition and format the entire selected disk. All existing data on that disk will be completely erased. This is appropriate for installation in a VirtualBox VM since the virtual disk is empty and dedicated to Fedora.
Click on the available virtual disk to select it, ensure the Use entire disk option is selected, then click Next to proceed.
Behind the scenes, all partitioning logic, filesystem selection, and mount point setup in Anaconda (in both automatic and manual workflows) are handled by Blivet, a Python library serving as Anaconda's storage management backend. We will not interact directly with Blivet, but knowing its name is helpful should you encounter the term in error messages or installation logs.
Anaconda will automatically create the following partition layout when using this configuration on UEFI-based systems:
| Partition | Size | Filesystem | Mount Point | Function |
|---|---|---|---|---|
| EFI System Partition (ESP) | ~600 MB | FAT32 | /boot/efi | Boot loader for UEFI |
| /boot | ~1–2 GB | ext4 | /boot | Kernel and initramfs |
| Root | Remaining space | Btrfs | / | Operating system and data |
Anaconda automatically creates two Btrfs subvolumes inside the root Btrfs partition:
- root: mounted as
/, containing the entire operating system. - home: mounted as
/home, containing all user directories and data.
Separating /home into its own subvolume simplifies future snapshot and system recovery operations.
Why Btrfs?
Fedora Workstation has used Btrfs as its default filesystem since Fedora 33. Btrfs is a modern filesystem that supports snapshots (instant backups of filesystem state), transparent data compression, and native data integrity checking. This differs from Ubuntu, which uses ext4, a more conservative yet highly mature and stable filesystem. The choice of Btrfs reflects Fedora's philosophy as a distribution that consistently adopts cutting-edge technology.
Note on Swap:
Fedora does not create traditional swap partitions or swap files since Fedora 33. Instead, Fedora uses zram, a mechanism that compresses data inside RAM itself and stores it back into a swap area that also resides in RAM. This is managed automatically bysystemd-zram-generatorwithout requiring extra disk space. zram-based swap is significantly faster than disk-based swap because read-write operations occur inside RAM.
Disk Encryption (Optional)
There is an Encrypt my data option allowing full-disk encryption using LUKS (Linux Unified Key Setup), the standard disk encryption mechanism used in Linux, located on the Storage Configuration page.
You will be prompted to create a passphrase (encryption password) if this option is enabled. This passphrase will be required every time the system boots, before GRUB loads the OS, meaning data on the disk cannot be accessed at all without the correct passphrase.
- All data on the disk will be transparently encrypted. You use the system as usual without differences after entering the passphrase at boot.
- Do not lose the encryption passphrase. There is no recovery mechanism if the passphrase is lost; data on the disk cannot be recovered.
- LUKS encryption introduces a minor computational overhead that is typically unnoticeable on modern hardware.
Encryption is unnecessary for installation inside a VirtualBox VM used for learning purposes; leave the Encrypt my data option disabled.
Method 2: Custom Partitioning with GParted (Before Installation)
The Anaconda WebUI in Fedora 44 does not provide a direct manual partitioning interface within the installer. Partitions must be prepared beforehand using an external tool such as GParted inside the live environment before launching Anaconda if you wish to use a custom partitioning scheme, for instance to save space for dual booting or to create a specific layout.
Note: Manual partitioning is only recommended for users who already understand disk partitioning concepts. Use Use entire disk for VM installations and learning purposes.
Here is the full workflow for custom partitioning:
Step 1: Enter the Live Environment, Do Not Install Immediately
Close or ignore the welcome screen that appears when the Fedora GNOME live environment finishes loading. Do not click Install to Hard Drive yet.
Step 2: Install GParted
GParted is not included by default in the Fedora live environment. Open Terminal and run:
sudo dnf install gparted -yThis command downloads and installs GParted from the Fedora repositories. An internet connection in the live environment is required.
Step 3: Create Partition Table and Partitions
Open GParted via the Activities Overview. You will be prompted for a password to run it with administrator privileges.
Perform the following steps in GParted:
- Select the target disk from the dropdown menu in the upper right corner of GParted.
- Create a new partition table: Device > Create Partition Table > GPT (required for UEFI systems).
- Create the following partitions:
Partition Size Filesystem Flags EFI 600 MB FAT32 esp, boot Swap 2–4 GB linux-swap - Root 20 GB or more Btrfs or ext4 - Home Remaining space Btrfs or ext4 - - Ensure the EFI partition receives the esp and boot flags: right-click on the EFI partition > Manage Flags > check
espandboot. These flags are required so the UEFI system recognizes the partition as the ESP. - Click the Apply button (green checkmark icon) in the toolbar to apply all changes to the disk.
Why create a manual swap partition if Fedora already has zram?
As explained earlier, Fedora uses zram as a replacement for traditional swap by default. However, zram does not support hibernation (saving all RAM content to disk and powering off completely). If hibernation is required, a traditional disk-based swap partition as shown in the table above is still necessary alongside zram. For learning purposes in a VM, this feature is generally not required.
Step 4: Run Anaconda and Assign Mount Points
Launch Anaconda from the desktop after partitions are created in GParted. Anaconda will detect the existing partitions upon reaching the Storage Configuration page, allowing you to manually assign mount points for each partition.
Proceed using Use entire disk for this series; select the available virtual disk, ensure that option is selected, and click Next to continue.
7.2.4 Starting and Completing Installation
The Fedora 44 Anaconda WebUI proceeds directly to the confirmation page after storage configuration. User account creation is not performed inside Anaconda; this step will take place after installation finishes and the system reboots for the first time.
- Review the configured settings, specifically language and target disk. Use navigation buttons to return to previous pages if changes are needed.
- Click Erase data and install to start the installation process. Anaconda will begin formatting the disk, creating partitions, and copying all required packages.
- The installation screen will display a progress bar along with information on ongoing tasks, such as partition creation, package installation, bootloader configuration, and so on. This process typically takes 10 to 20 minutes depending on host system speed.
- An Exit to live desktop button will appear once installation is complete. Click the button, then shut down the VM.
- Remove the ISO image manually via Settings > Storage > IDE Controller, then power on the VM again.
7.3 First Boot into Fedora
After the VM boots up again, a Setup window will appear to complete the final configuration steps, including account creation. Click Start Setup to begin.
- Privacy: configure Location Services and anonymous diagnostic report submission. Both can be disabled if you prefer not to share data.
- Time Zone: select your time zone.
- Third-Party Repositories: Fedora offers an option to enable third-party repositories, including RPM Fusion and proprietary drivers. Enabling this option is strongly recommended as it simplifies installing additional software not present in official Fedora repositories.
- Create Account: create the primary user account by entering Full Name, Username, and Password. Ensure the password is strong. This account automatically gains
sudoaccess via thewheelgroup. - Setup Complete: setup is finished, click Start Using Fedora Linux.
7.3.1 Installing VirtualBox Guest Additions
The fresh Fedora desktop currently runs at a fixed screen resolution and lacks smooth mouse integration with the host system. VirtualBox Guest Additions is a set of drivers and utilities running inside the guest OS to enhance integration between the VM and host computer, providing automatic screen resizing, shared clipboard, file drag-and-drop, and shared folders. This package is not installed by default in Fedora and must be installed manually for a comfortable daily workflow.
First install the kernel-devel, dkms, gcc, make, and perl packages required to compile Guest Additions kernel modules:
sudo dnf install kernel-devel-$(uname -r) dkms gcc make perl -yFollow these steps inside the VM window:
- Select Devices > Insert Guest Additions CD Image... in the VirtualBox window menu. VirtualBox will mount the Guest Additions image file into the VM's virtual optical drive.
- Open Files, navigate to the VBox_GAs CD drive that appears, open a terminal at that location, and execute:
sudo sh ./VBoxLinuxAdditions.run- Wait for kernel module compilation and installation to complete, then press Enter to close the terminal.
- Restart the VM so the kernel loads the newly installed Guest Additions modules:
sudo rebootEnable View > Auto-resize Guest Display in the VirtualBox window menu once the VM boots back up. The VM window will automatically adjust Fedora's screen resolution to match the window size if Guest Additions are correctly installed.
Troubleshooting: Screen resolution failing to adjust automatically usually indicates that kernel module compilation failed due to a version mismatch betweenkernel-develand the active kernel, a common occurrence after updating the kernel viadnf upgrade. Rununame -rto check the running kernel version, ensure the matchingkernel-develpackage is installed, and retry the Guest Additions installation.
7.4 Post-Installation System Update
A mandatory step after installing Fedora or any Linux distribution is updating the system. Updating ensures you receive all security patches, bug fixes, and improvements released since the ISO image was built. Fedora is known for moving quickly with updates, so several new packages may be available immediately after installation completes.
Fedora 44 utilizes DNF5 as its default package manager, as has been the case since Fedora 41. It represents a new generation of DNF rewritten in C++ for improved performance and lower memory usage compared to Python-based DNF4. Despite significant internal changes, command syntax remains backward-compatible with previous DNF versions; familiar commands continue to function identically.
7.4.1 Updating via GNOME Software (GUI)
Fedora includes GNOME Software, a graphical application center that double-functions as a system update utility.
- Press the Super key to open the Activities Overview, type
Software, and press Enter to open GNOME Software. - Click the Updates tab; the application will check for updates automatically.
- A list of packages will display if updates are available. Click Update to start the update process.
- GNOME Software will prompt for a system restart upon completion if updates include kernel or core system component updates. Click Restart to reboot the VM.
7.4.2 Updating via Terminal
The most direct and common method to update Fedora is via the terminal using the dnf command. This method offers full visibility into all packages being updated.
Open Terminal and execute the following command:
sudo dnf upgradeThe dnf upgrade command performs two tasks simultaneously: updating the package repository metadata and installing the latest available versions of all installed packages. This differs from apt, which splits these operations into apt update and apt upgrade; DNF combines them into a single command.
You will be prompted to confirm by typing y when the prompt "Is this ok [y/N]:" appears. DNF will display a summary of packages to be updated, download size, and installed size before requesting confirmation.
Reboot the system after completion if the update list includes the Linux kernel:
sudo rebootInstallation of Fedora Workstation 44 in VirtualBox is now complete. You now have two Linux systems running side-by-side: Ubuntu 26.04 LTS and Fedora Workstation 44, each with its own distinct characteristics and approach. Ubuntu emphasizes stability and user-friendliness, while Fedora focuses on cutting-edge features and open-source innovation. Running both in parallel provides an effective environment for building a comprehensive understanding of Linux.