
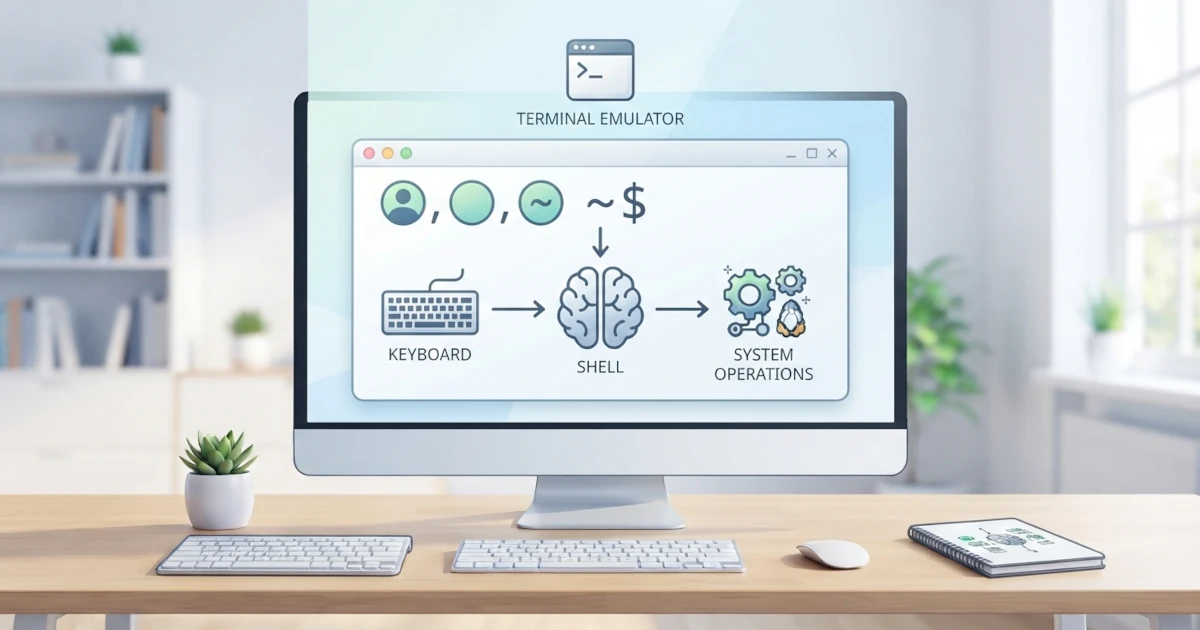
Welcome to a brand-new and vital section in this series: the command line. In previous chapters, we extensively used the GNOME graphical user interface to explore and manage the system. However, the true power of Linux lies within the command line interface. This chapter serves as our gateway into the command line world by introducing two concepts that are often confused, namely terminal and shell, explaining the anatomy of the command prompt, the basic structure of Linux commands, as well as various tips to make using the terminal more comfortable and efficient.
14.1 What Is a Terminal Emulator?
In the past, users interacted with computers through physical devices called terminals, consisting of a screen and keyboard connected to a mainframe computer. As graphical user interfaces emerged, the need to access the command line remained. This is where terminal emulators come into play.
A terminal emulator is a graphical application that emulates that physical terminal within a desktop environment. Through a terminal emulator, we can type commands and view the results in text format. In short, the terminal is a window providing access to the command line, while the commands we type are actually processed by another program called the shell. This is a crucial distinction that will remain relevant throughout this chapter: the terminal is merely the "window", while the shell is the "brain" translating our commands. Whichever terminal emulator is used, the shell and all commands running behind it remain the same.
Commonly encountered terminal emulators include:
- Ptyxis: the default terminal in Ubuntu (since version 25.10) and Fedora Workstation (since version 41), including Ubuntu 26.04 LTS and Fedora Workstation 44 used in this series. Ptyxis is built with GTK4 and libadwaita, leveraging GPU acceleration for smoother rendering, and featuring built-in support for container environments such as Podman, Toolbx, and Distrobox.
- GNOME Terminal: the classic GNOME terminal that served as the default for many years. Since Ptyxis was introduced, GNOME Terminal has been gradually replaced as the default application, although it can still be installed manually for those who prefer it.
- Konsole: the default terminal for the KDE desktop.
- Terminator and Tilix: terminals featuring window splitting capabilities.
Regardless of which terminal is used, the function remains identical: serving as a place to enter commands and read their output. On Ubuntu 26.04 LTS and Fedora Workstation 44, the application we use throughout this series is Ptyxis, as previously mentioned in Chapter 10.
14.2 Opening the Terminal in Ubuntu and Fedora
Because Ubuntu 26.04 and Fedora Workstation 44 both use GNOME, the process for opening a terminal on both systems is virtually identical. There are several methods to achieve this:
- Via the Activities Overview. Press the Super key (the key with the Windows/Start logo), type "Terminal" in the search box, and press Enter.
- Via keyboard shortcuts. Press Ctrl+Alt+T to quickly open a terminal.
- Via the application menu. Click the Show Apps icon at the bottom of the Dash, then locate the Terminal application.
- Via Files (Nautilus). Right-click inside a folder, then select Open in Console to directly open a terminal in that directory.
Once the terminal opens, a window with a dark or light background will appear, containing text called the command prompt. This is where we will enter all commands in subsequent chapters.
14.3 What Is a Shell?
A shell is a program responsible for interpreting the commands typed in the terminal so they can be executed by the operating system. The shell acts as an intermediary between the user and the Linux kernel: we issue commands, the shell interprets them, the kernel executes them, and the results are returned to the screen.
The term "shell" itself implies a protective outer layer, reflecting how this program wraps around the kernel. There are many types of shells in Linux, but the most popular are Bash (Bourne Again Shell) and Zsh (Z Shell).
- Bash is the default shell in Ubuntu 26.04 LTS. Bash is an enhanced version of the original Bourne shell and has been the de facto standard in the Linux world for decades.
- Fedora Workstation 44 also utilizes Bash as the default shell for most users. Some users prefer Zsh, which offers complementary features like auto-completion and richer themes, but Zsh is not the default shell in Fedora.
For beginners, there is no need to worry about choosing a shell. All materials in this series use Bash, which is available on both Ubuntu and Fedora. The active shell currently in use can be identified using the following command:
echo $SHELLIf you are ever curious about which shells are installed on the system, the list is stored in the /etc/shells file. Changing the default shell can be done with the chsh command, though this is an advanced topic covered deeper in Chapter 37 on shell and terminal customization. For now, simply understand that Bash is the "language" we will learn throughout this series.
14.4 Anatomy of the Command Prompt
Before typing commands, it is beneficial to understand the meaning behind the text visible on the command prompt. The prompt is an indicator showing that the shell is ready to receive input. A standard prompt on a system generally looks similar to the following example:
username@laptop:~$Let us break down its components:
username: the username of the currently logged-in user.laptop: the hostname, which is the computer's network name.~: the current working directory. The tilde~symbol is a shortcut representing the home directory of the logged-in user.$: the indicator symbol showing that the login session is running as a standard user.
In addition to the $ symbol, there is also the # symbol. This symbol appears when the shell is executed as the root user (administrator). Paying attention to this distinction is crucial:
username@laptop:~$     ← standard user
root@laptop:~#     ← root user
In this series, example commands requiring administrative privileges are written with the sudo prefix rather than switching directly to the root user. Consequently, prompts featuring the # symbol will rarely appear in the examples throughout this series. The concept of sudo in greater detail, including its differences from su, will be covered in Chapter 22.
14.5 Structure of Linux Commands
Most Linux commands follow the same basic syntax pattern:
command [options] [arguments]command: the name of the executable program to run, such aslsorcp.options: additional flags that modify command behavior, usually prefixed with a hyphen.arguments: the target objects operated on by the command, such as filenames or directory paths.
For instance, the command ls -l /home consists of the command ls, the option -l, and the argument /home. This command instructs the shell to list the contents of the /home directory using a long listing format.
Options themselves are categorized into two formats:
- Short option: a single character prefixed by a single hyphen, such as
-lor-a. Multiple short options can often be combined, for examplels -la. - Long option: a full word prefixed by two hyphens, such as
--allor--human-readable. Long options are easier to read and remember.
Many commands provide both option formats for identical functionality. For example, ls -a is equivalent to ls --all. This convention makes Linux commands flexible and adaptable to individual user preferences.
14.6 Terminal Usage Tips
After mastering the fundamentals, the following practical tips will make your terminal experience significantly smoother and more efficient.
14.6.1 Tab Completion
Typing long commands or filenames can be tedious and prone to typos. The Tab completion feature enables the shell to automatically complete command names or file paths.
Simply type the initial few letters and press the Tab key. The shell will complete the remainder automatically. For example, typing docu and pressing Tab will complete it to Documents if a directory with that name exists. If multiple matches exist, press Tab twice to list all available completions.
14.6.2 Command History
The shell maintains a history of previously executed commands. Past commands can be recalled by pressing the ↑ (Up) and ↓ (Down) arrow keys. This is exceptionally useful for re-running complex commands without retyping them.
You can also display your complete command history using the following command:
historyThis command displays a numbered list of commands. Specific entries can be re-executed by typing an exclamation mark followed by the line number, such as !50 to run command number 50.
14.6.3 Ctrl+C, Ctrl+D, and Ctrl+L
There are three fundamental key combinations that are essential to memorize early on:
Ctrl+C: interrupts and terminates the currently running command. Use this when a process hangs or needs to be aborted.Ctrl+D: signals an end-of-input (EOF) or closes the current terminal session. It is frequently used to exit interactive shell applications or close the terminal window.Ctrl+L: clears the current screen output without wiping the underlying command history. Its function is similar to theclearcommand, although they handle the scrollback buffer (the history of lines that can be scrolled up) slightly differently.
14.6.4 Copying and Pasting in the Terminal
Copying and pasting text inside the terminal differs from conventional graphical applications. Because Ctrl+C is reserved for sending interrupt signals to running processes, text operations use the following shortcuts:
Ctrl+Shift+C: copies the highlighted text selection.Ctrl+Shift+V: pastes text into the active terminal buffer.
On many modern terminal emulators, including Ptyxis, text can also be pasted by right-clicking and selecting Paste, or simply by pressing the middle mouse button. Mastering these shortcuts prevents accidentally killing active processes when attempting to copy text.
In this chapter, we explored terminal emulators and shells as the foundational pillars of the command line interface, learned how to open a terminal in Ubuntu and Fedora, analyzed the anatomy of the command prompt alongside the distinctions between the $ and # symbols, and reviewed the basic syntax structure of Linux commands. We were also equipped with essential efficiency tips ranging from Tab completion and command history to key shortcuts like Ctrl+C, Ctrl+D, and Ctrl+L.
In the next chapter, we will start using the terminal to navigate the filesystem using commands such as pwd, ls, and cd, as well as understanding the differences between absolute and relative paths.