
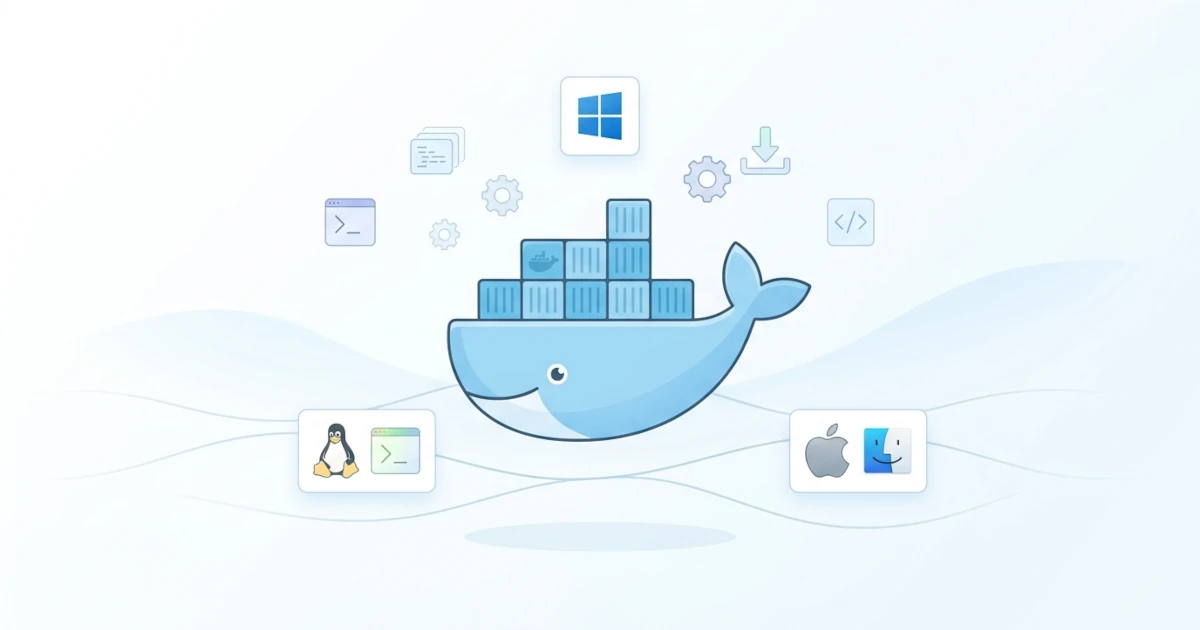
Before creating images or running your first container, Docker must be properly installed on your machine, whether it is a Developer's laptop for daily development needs or a server managed by a Sysadmin/DevOps Engineer in production. Installing Docker varies depending on the operating system: Linux installs Docker Engine directly because its kernel natively supports container features, while macOS and Windows require Docker Desktop because neither operating system runs a Linux kernel natively. This chapter covers the installation steps for Docker across all three platforms, how to verify a successful installation, an overview of Docker Desktop, and common basic configurations applied right after Docker is installed.
2.1 Installing Docker on Linux, macOS, and Windows
Docker installation is not a one-size-fits-all process. Because container architecture relies on Linux kernel features (namespaces and cgroups), Linux can run Docker Engine directly on top of its existing kernel. macOS and Windows do not have a Linux kernel, so Docker Desktop on both platforms runs a lightweight virtual machine behind the scenes to provide the Linux kernel where containers actually execute. Understanding this structural difference is important because installation steps, resource requirements, and troubleshooting methods vary per platform.
2.1.1 Installing Docker Engine on Linux
On Linux, Sysadmin/DevOps Engineers typically install Docker Engine without a GUI, as this is the standard approach used on production servers. Docker offers two official installation routes: package manager repositories (apt for Debian/Ubuntu-based distributions, dnf for Fedora/RHEL/CentOS-based distributions) and a convenience script. The package manager repository is the recommended approach because it simplifies future update processes. The convenience script (get.docker.com) is shorter, but according to official Docker documentation, it is intended only for testing and development environments, not for production. For the apt route, Docker Engine officially supports 64-bit LTS versions of Ubuntu 22.04, 24.04, and 26.04; ensure your distribution matches this list before proceeding.
Here are the steps to install Docker Engine on Debian/Ubuntu-based distributions using the apt repository. Run the following commands sequentially.
sudo apt update
sudo apt install ca-certificates curl
sudo install -m 0755 -d /etc/apt/keyrings
sudo curl -fsSL https://download.docker.com/linux/ubuntu/gpg -o /etc/apt/keyrings/docker.asc
sudo chmod a+r /etc/apt/keyrings/docker.asc
The first three lines prepare the directory for storing GPG keys, then download the official Docker public key to verify the authenticity of the downloaded packages. Next, register the Docker repository into the apt sources using the docker.sources file, a deb822 format currently used as the standard in official Docker documentation, replacing the older single-line .list format.
sudo tee /etc/apt/sources.list.d/docker.sources <<EOF
Types: deb
URIs: https://download.docker.com/linux/ubuntu
Suites: $(. /etc/os-release && echo "${UBUNTU_CODENAME:-$VERSION_CODENAME}")
Components: stable
Architectures: $(dpkg --print-architecture)
Signed-By: /etc/apt/keyrings/docker.asc
EOF
sudo apt update
Once the repository is registered, install Docker Engine along with its official plugins.
sudo apt install docker-ce docker-ce-cli containerd.io docker-buildx-plugin docker-compose-plugindocker-ce is the Docker Engine daemon, a background process named dockerd that actually manages images, containers, networks, and volumes behind the scenes. docker-ce-cli is the command-line interface used daily to send commands to the daemon, containerd.io is the underlying container runtime used by Docker Engine, while docker-buildx-plugin and docker-compose-plugin add the docker buildx and docker compose commands as built-in CLI plugins.
For Fedora, RHEL, or CentOS-based distributions, the installation path uses dnf.
sudo dnf config-manager addrepo --from-repofile https://download.docker.com/linux/fedora/docker-ce.repo
sudo dnf install docker-ce docker-ce-cli containerd.io docker-buildx-plugin docker-compose-plugin
sudo systemctl enable --now docker
After the package is installed on any distribution, by default only the root user or users with sudo privileges can run docker commands. To prevent Developers or Sysadmin/DevOps Engineers from having to type sudo for every Docker command, add the user to the docker group.
sudo groupadd docker
sudo usermod -aG docker $USER
newgrp docker
The newgrp docker command activates group membership without requiring a logout, but the safest approach is still logging out and logging back in so that group changes take effect across all sessions. Note that adding a user to the docker group is practically equivalent to granting root access to that user, because anyone who can control the Docker daemon can attach bind mounts to any system directory. Do not add untrusted users to this group, especially on production servers.
As a final step, ensure Docker starts automatically whenever the server reboots, which is critical for Sysadmin/DevOps Engineers so that container services do not unexpectedly remain down after maintenance or an unexpected reboot.
sudo systemctl enable docker.service
sudo systemctl enable containerd.service
2.1.2 Installing Docker Desktop on macOS
On macOS, Developers install Docker using Docker Desktop, a GUI application that bundles the Docker Engine, CLI, and other supporting tools. Before downloading, make sure your macOS specifications meet the requirements: Docker Desktop supports the three most recent major releases of macOS (the current release and the two previous versions), is available for both Apple Silicon and Intel chips, and requires a minimum of 4 GB of RAM.
- Download the installer from the official Docker page, selecting the version corresponding to your Mac chip (Apple Silicon or Intel).
- Open the downloaded
Docker.dmgfile, then drag the Docker icon to the Applications folder. - Launch
Docker.appfrom the Applications folder to run Docker Desktop for the first time. - Read and accept the Docker Subscription Service Agreement when prompted.
- Select recommended settings for automatic configuration, or advanced settings if you prefer manual configuration.
- Click Finish, and enter your macOS password if prompted for confirmation.
Alternatively, Developers accustomed to using Homebrew can install Docker Desktop via a single terminal command.
brew install --cask dockerOnce the Homebrew process finishes, open the Docker application from Applications or Spotlight to complete initial setup and accept the subscription agreement as described earlier.
2.1.3 Installing Docker Desktop on Windows (WSL2)
On Windows, Docker Desktop recommends the WSL 2 backend (Windows Subsystem for Linux version 2) over the Hyper-V backend, as WSL 2 does not require administrator rights for daily usage and integrates more lightweightly with the Linux filesystem. The minimum requirements are 64-bit Windows 10 version 22H2 (build 19045) or Windows 11 version 23H2 (build 22631) or higher, a 64-bit processor supporting Second Level Address Translation (SLAT), 8 GB of RAM, and hardware virtualization enabled in the BIOS/UEFI.
First, enable WSL 2 using PowerShell or Command Prompt with administrator privileges.
wsl --install
wsl --update
The command wsl --install installs WSL along with the default Linux distribution if not already present, while wsl --update ensures WSL components are updated to the latest version. Docker Desktop requires WSL version 2.1.5 or newer, so verify the installed version with the following command.
wsl --versionOnce WSL 2 is ready, proceed with the Docker Desktop installation.
- Download
Docker Desktop Installer.exefrom the official Docker page. - Run the installer executable.
- Select the per-user installation mode (recommended, as it eliminates the need for administrator privileges each time Docker Desktop is run).
- Ensure the WSL 2 backend option is checked when prompted (this is the default selection on recent Docker Desktop releases).
- After installation completes, search for "Docker Desktop" in the Start Menu to launch it, then accept the subscription agreement.
Sysadmin/DevOps Engineers managing Windows Server or environments governed by policies mandating Hyper-V can opt for the Hyper-V backend instead, although its installation requires all-users mode and administrator privileges. Note that hardware virtualization in BIOS/UEFI must remain enabled for both backends, not just Hyper-V.
2.2 Verifying Installation
After completing installation on any platform, the next step is verifying that Docker runs properly before using it for daily operations. Several verification commands apply identically across Linux, macOS, and Windows because they all use the same Docker CLI.
For Docker Desktop users on macOS and Windows, check the whale icon in the menu bar (macOS) or system tray (Windows) before opening a terminal. While Docker Desktop is initializing its underlying VM, this icon typically displays an animation; once it stabilizes and indicates a ready status, CLI commands can be executed without daemon connection errors.
The most basic verification command checks the installed Docker version.
docker --versionThis command displays only the client-side Docker CLI version. To view both the client version and the server-side Docker Engine (daemon) version, execute the following command.
docker versionIf the "Server" section in the output fails to appear or displays errors such as "Cannot connect to the Docker daemon", the CLI is installed but the daemon is not running. This provides a clear diagnostic indicator separating CLI installation issues from daemon execution issues.
The docker info command gives a comprehensive overview of the running Docker system, including container and image counts, storage driver details, and kernel versions.
docker infoThe most definitive verification involves running an actual container.
docker run hello-worldWhen this command executes, the Docker CLI sends a request to the daemon to locate the hello-world image in local storage. Since this image is typically absent on a newly configured machine, the daemon pulls it from Docker Hub, creates a new container from that image, executes it, and the container outputs a confirmation message to the terminal before exiting. The stopped container remains recorded and can be viewed using docker ps -a. If the "Hello from Docker!" message appears in the terminal, the Docker installation is confirmed to function end-to-end across the CLI, daemon, and registry connectivity.
Finally, check whether the Compose V2 plugin is installed, as nearly all modern workflows rely on docker compose instead of the legacy docker-compose syntax.
docker compose versionCommon issues encountered during verification and their solutions:
- "permission denied while trying to connect to the Docker daemon socket" on Linux. The executing user is not in the
dockergroup or has not re-logged in after being added. Re-runsudo usermod -aG docker $USER, then log out and log back in. - Docker Desktop stuck on "Starting..." on Windows. The most common causes are disabled hardware virtualization in BIOS/UEFI or an outdated WSL 2 version. Execute
wsl --updatein the terminal and restart Docker Desktop. - Docker daemon fails to run after a Linux server reboot. Check its status using
sudo systemctl status docker. If it displays an inactive status, the service is not enabled for auto-start; runsudo systemctl enable --now docker. - The
dockercommand is unrecognized despite Docker Desktop being installed. This typically happens because Docker Desktop has not finished its startup sequence or the terminal session needs to be restarted to refresh PATH environment variables.
2.3 Docker Desktop Overview
Docker Desktop is a single-installation application providing a complete environment to build, share, and run containerized applications on Mac, Linux, or Windows. Unlike Docker Engine, which consists solely of a background daemon and CLI, Docker Desktop bundles multiple tools into one package: Docker Engine, Docker CLI, Docker Compose, Docker Build (Buildx), Docker Scout for baseline image vulnerability scanning, a graphical GUI dashboard for managing containers/images/volumes visually, and an optional single-node Kubernetes feature for orchestration experimentation.
Because macOS and Windows lack a native Linux kernel, Docker Desktop runs a lightweight Linux virtual machine behind the scenes on those platforms. All containers launched via Docker Desktop actually execute inside this VM rather than directly on the macOS or Windows kernel. This explains why Docker Desktop on Windows and macOS features explicit resource allocation settings (CPU, memory, disk), which are absent in native Linux Docker Engine setups where containers run directly on the host kernel without VM abstraction.
Docker Desktop is also available for Linux, but in production environments, Sysadmin/DevOps Engineers managing servers generally install Docker Engine without a GUI, as the Linux kernel natively supports containers and headless servers rarely require visual interfaces. Docker Desktop on Linux is primarily relevant for Developers seeking a uniform GUI experience matching team members on Mac or Windows.
To inspect this bundled environment directly, click the Docker Desktop whale icon and select Dashboard. The Containers tab displays all historical and current containers with status indicators and start/stop/delete controls, the Images tab lists locally stored images along with their size footprints, and the Volumes tab displays storage volumes attached to containers. These three tabs correspond directly to the output of docker ps, docker images, and docker volume ls commands in the CLI, presenting the information visually for easier onboarding.
An essential consideration before deploying Docker Desktop in workplace settings is compliance: under the Docker Subscription Service Agreement, Docker Desktop is free for personal use, education, non-commercial open-source projects, and small businesses meeting both criteria of having fewer than 250 employees and under 10 million US dollars in annual revenue. Organizations exceeding either threshold must obtain paid subscription licenses (Pro, Team, or Business). Sysadmin/DevOps Engineers overseeing software compliance should verify licensing status before deploying Docker Desktop across enterprise teams.
2.4 Basic Configuration
Docker is operational immediately following installation, but several initial configurations are recommended, particularly because default settings may not suit long-term operational needs.
On Linux, Docker Engine daemon configuration resides in /etc/docker/daemon.json, formatted in JSON, which does not exist by default until explicitly created. One critical early configuration is restricting container log sizes, as the default json-file logging driver does not perform automatic log rotation. In operational environments, unmanaged logging is a common pitfall for Sysadmin/DevOps Engineers: containers writing continuous logs over extended periods can fill host disk space without advance warning.
{
  "log-driver": "json-file",
  "log-opts": {
    "max-size": "10m",
    "max-file": "3"
  }
}
The configuration above limits individual container log files to a maximum of 10 MB, maintaining up to 3 rotated files before automatically purging the oldest entries. Another common parameter is data-root, used to relocate Docker image and container storage from the default path (/var/lib/docker) to an alternate partition with larger storage capacity.
{
  "data-root": "/mnt/docker-data"
}
Before applying modifications to daemon.json, validate the file syntax, as invalid JSON prevents the Docker daemon from starting, impacting all hosted containers.
sudo dockerd --validate --config-file=/etc/docker/daemon.jsonIf validation succeeds, apply the changes by restarting the daemon process.
sudo systemctl restart dockerRestarting the daemon may temporarily affect running container availability, depending on the Docker Engine version and whether the live-restore option is active. On production servers, schedule daemon restarts during maintenance windows or verify that live-restore is enabled to keep containers running smoothly throughout daemon restarts.
In Docker Desktop (macOS and Windows), settings equivalent to daemon.json are configurable via the Settings menu under the Docker Engine tab, which provides an embedded JSON editor serving the same function as the Linux daemon.json file. Since Docker Desktop operates via an underlying VM, it includes an extra configuration interface not found in native Docker Engine: the Resources tab, where CPU, memory, swap, and disk allocations assigned to the VM can be adjusted. Resource tuning is particularly important for Developers running multiple database containers or resource-heavy microservices simultaneously, as VM resource limits operate independently from total host hardware capabilities.
Another useful foundational concept is Docker contexts, which define endpoint configurations determining which daemon instance the CLI communicates with.
docker context lsBy default, the context named default connects to the local daemon via Unix socket /var/run/docker.sock on Linux and macOS, or via named pipes on Windows. Context management becomes particularly useful when Sysadmin/DevOps Engineers manage multiple Docker hosts from a single administrative machine, allowing seamless switching between target daemons without changing standard daily docker commands.