
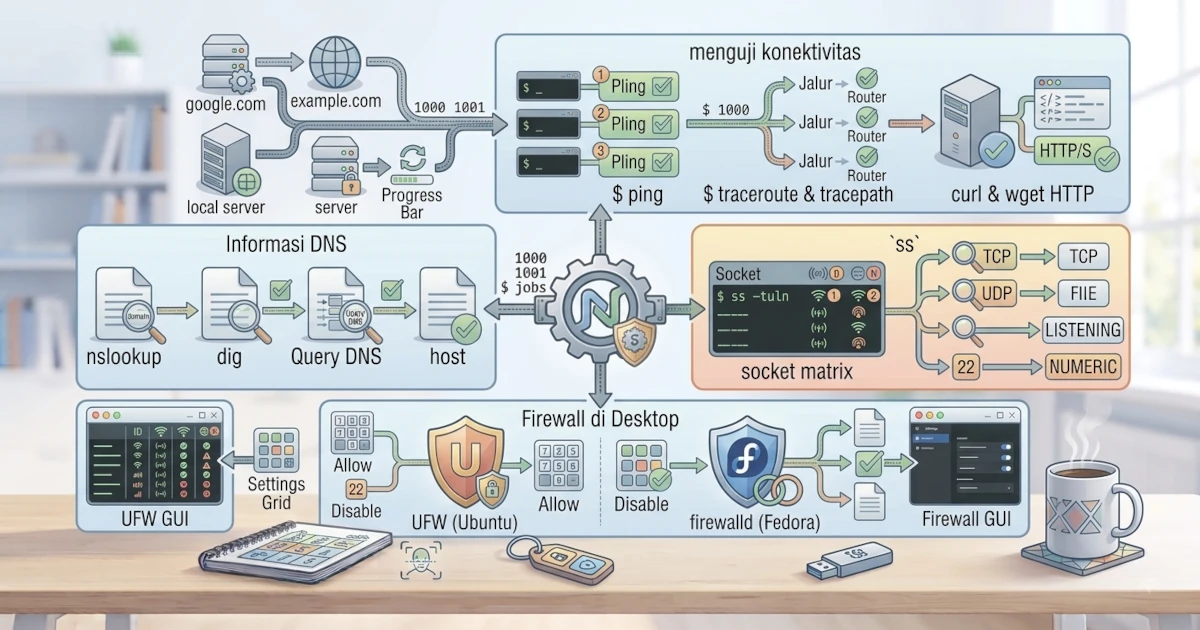
When internet connection has problems, the ability to diagnose the cause is a very useful skill. Linux provides a variety of commands to test connectivity, check DNS, test web services, view active connections, and manage the firewall. This chapter equips you with basic network troubleshooting steps using these commands on Ubuntu 26.04 LTS and Fedora Workstation 44.
A Systematic Approach: From Bottom to Top
Instead of guessing, network troubleshooting is most effective when done step by step, from the layer closest to the hardware up to the services furthest away on the internet. The following sequence is the framework you will use throughout this chapter.
- Check whether the network interface is active, using
ip linkornmcli device status(covered in Chapter 31). - Check whether the interface has a correct IP address and gateway, using
ip addrandip route. - Test basic connectivity to the local network and the internet, using
pingandtracepath. - Check whether DNS resolution is working, using
dig,host, orresolvectl. - Test specific services such as a web server, using
curlorwget. - Finally, make sure the firewall is not blocking connections that should be allowed.
With this framework, if the first step fails, you do not need to waste time checking DNS or the firewall first.
Testing Connectivity
The first step in troubleshooting is to ensure your computer can reach other devices on the network or on the internet.
ping: Test Reachability
The ping command sends small packets (ICMP echo requests) to a destination address and waits for a reply to test whether the destination is reachable.
ping example.comThis command continues until you press Ctrl+C. To send a specific number of packets, use the -c option.
ping -c 4 example.comIf you receive replies, basic connectivity works. If there is no reply, the problem could be with the connection, the destination, or a firewall. Keep in mind that some servers or networks deliberately block ICMP as a security policy, so a lack of ping replies does not always mean the server is actually down. In such cases, continue testing with curl or dig to confirm.
traceroute / tracepath: Packet Path to Destination
To see the path that packets take to a destination, use traceroute or tracepath.
tracepath example.comThis command shows each router the packets pass through. tracepath is available on almost all systems, while traceroute may need to be installed first via sudo apt install traceroute or sudo dnf install traceroute.
mtr: Combination of ping and traceroute
mtr (My Traceroute) combines the functions of ping and traceroute in a single display that updates continuously in real time, showing latency and packet loss at each hop toward the destination. This tool needs to be installed first.
sudo apt install mtr-tiny   # Ubuntu
sudo dnf install mtr        # Fedora
Once installed, run it with:
mtr example.comThe mtr display updates statistics continuously until you press q to exit, making it very useful for diagnosing unstable or slow connections at a particular hop.
DNS Information
Network problems are often caused by DNS resolution failures. Several commands help you check this.
nslookup and dig: DNS Queries
nslookup and dig are used to query DNS information for a domain.
nslookup example.comdig example.comdig displays more complete information and is widely used for advanced diagnostics. If you only need the IP address without other details, use the +short option.
dig +short example.comhost: Simple DNS Lookup
host is a concise command for looking up basic DNS information.
host example.comThis command displays the IP address associated with a domain.
resolvectl: DNS via systemd-resolved
Ubuntu 26.04 LTS and Fedora Workstation 44 both run systemd-resolved as the DNS resolver, as mentioned in Chapter 32 when discussing /etc/resolv.conf. The resolvectl command gives you a direct way to check the status of this resolver, without going through nslookup or dig.
resolvectl statusThis command shows the DNS servers currently in use per interface, including whether DNSSEC and DNS over TLS are active. To test resolution of a domain directly through systemd-resolved:
resolvectl query example.comIf resolvectl status shows no DNS servers registered, this is a strong indicator that your connectivity problem is due to domain name resolution, not the network itself.
curl and wget: Download Files and Test HTTP
curl and wget are useful for downloading files as well as testing HTTP connections.
curl -I https://example.comThe -I option on curl fetches only the HTTP response headers, useful for checking whether a web server is reachable and what HTTP status it returns (e.g. 200 OK or 404 Not Found). If you need to see the connection process in more detail, add the -v (verbose) option.
curl -v https://example.comwget https://example.comwget downloads the file from the given URL. Both help ensure that the web service you are targeting is working.
ss: Viewing Sockets and Active Connections
ss is the replacement for netstat (the old command from the net-tools package, which is no longer installed by default) for displaying sockets and active network connections on your system.
ss -tulnThe -t option displays TCP connections, -u displays UDP, -l displays listening sockets, and -n displays numbers instead of names. This command is useful for seeing what services are running and listening on which ports. To find out which process (program) is using a port, add the -p option and run it with sudo.
sudo ss -tulnpFirewall on the Desktop
A firewall controls incoming and outgoing network traffic. Ubuntu and Fedora each use different firewall tools.
UFW (Uncomplicated Firewall) on Ubuntu
Ubuntu provides UFW as a simple interface for managing the firewall. To check its status, use:
sudo ufw statusTo enable or disable the firewall, use enable and disable.
sudo ufw enablesudo ufw disableTo allow connections on a specific port, for example SSH on port 22:
sudo ufw allow 22firewalld on Fedora
Fedora uses firewalld, which works with the concept of zones. To check its status:
sudo firewall-cmd --stateTo see the rules on the active zone:
sudo firewall-cmd --list-allTo allow connections on a specific port, for example SSH on port 22, use the --add-port option with --permanent so that the rule remains after reboot, then reload the configuration with --reload.
sudo firewall-cmd --add-port=22/tcp --permanent
sudo firewall-cmd --reload
Without the --permanent option, any added rules only apply to the runtime configuration and will be lost after firewalld is reloaded or the system reboots. firewalld configuration can also be done through the graphical interface, namely the Firewall application available in Settings.
Basic Configuration via GUI and Terminal
Both firewalls can be managed via the terminal as shown above. Additionally, Ubuntu provides GUFW, a graphical interface for UFW, while Fedora provides the Firewall application in Settings. For beginners, the graphical interface is easier, but understanding the basic commands gives you full control.
Network troubleshooting is a step‑by‑step process, from testing connectivity, checking DNS, testing services, to checking the firewall. Through commands such as ping, tracepath, mtr, dig, resolvectl, curl, and ss, you can trace the source of problems systematically, layer by layer. Mastering these commands will make you more confident in handling everyday network issues on Linux.