
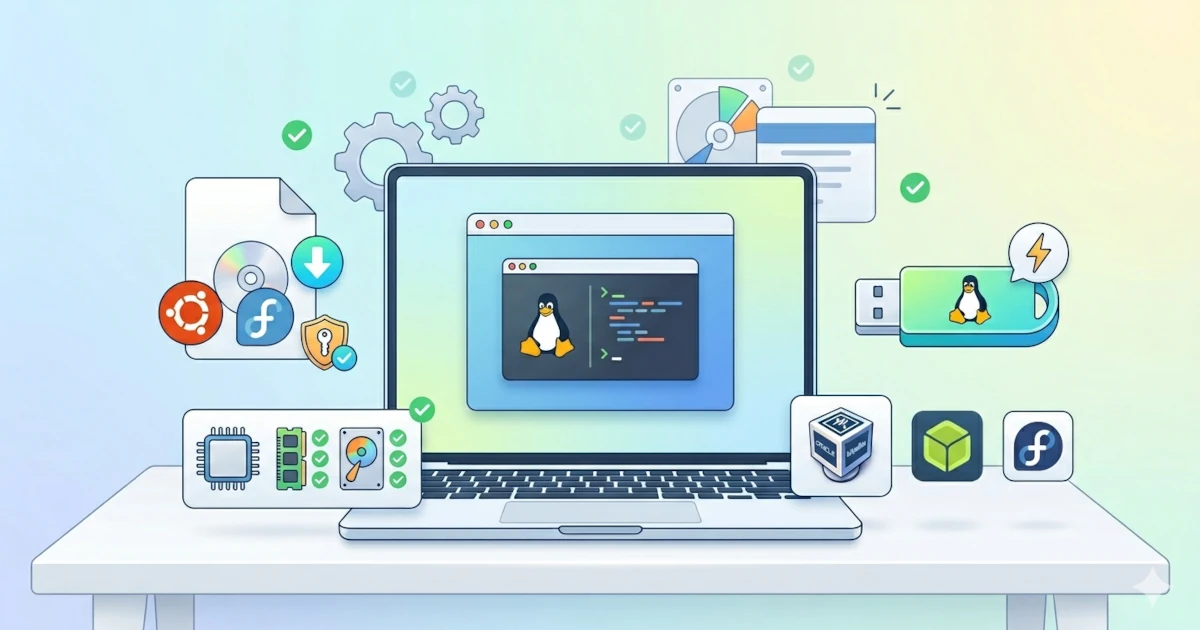
Thorough preparation before installing Linux will make the installation process run more smoothly and minimise risks such as data loss or incorrect configuration. This chapter will guide you from understanding the installation environment options — whether using a virtual machine or directly on hardware — to downloading the right ISO file and preparing the installation media. The steps in this chapter apply to both methods.
Understanding Virtual Machines and Their Benefits for Learning
A Virtual Machine (VM) is a virtual computer environment that runs inside an existing operating system. Using a VM allows you to run Linux on top of Windows or macOS without permanently changing your computer's configuration. The operating system running inside the VM is called the guest, while the main operating system on which the VM runs is called the host.
VMs offer several significant advantages for learning purposes:
- Safe for experimentation: You can simply delete and recreate a VM without affecting the host system if a configuration error occurs or the system becomes corrupted.
- Snapshots: Most VM software supports snapshots — the ability to save the system state at a specific point in time. You can revert to a previous state at any time if something does not go as expected.
- Easy to start: Creating a new VM does not require repartitioning the disk or creating a bootable USB. You only need to attach the ISO file and start the installation.
- Runs alongside the main system: You can view tutorials in your Windows or macOS browser while operating Linux in the VM window simultaneously.
The VM software that will be used in this series is Oracle VirtualBox because it is the best choice for beginners. It is free and open source, and available for Windows, macOS, and Linux.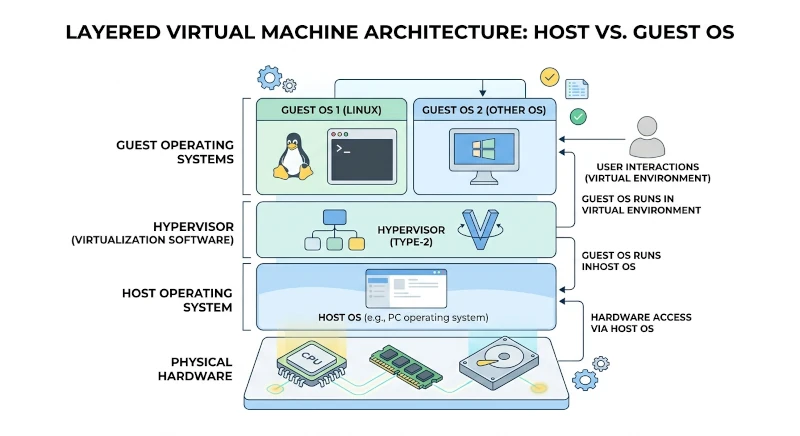
Installing VirtualBox
Oracle VirtualBox is virtualization software developed by Oracle and released under the GNU GPL version 3. VirtualBox supports various host operating systems such as Windows, macOS, and Linux, and can run various guest operating systems, including all major Linux distributions.
The latest version of VirtualBox can be downloaded from its official page at virtualbox.org/wiki/Downloads.
Download and Installation on Windows
VirtualBox supports Windows 10 and Windows 11 with x86_64 (64-bit) processors. Official support for Windows 11 on Arm processors (as a host) has also been available since VirtualBox version 7.2.
Note: Mainstream support for Windows 10 from Microsoft ended in October 2025. VirtualBox can still be installed on Windows 10, but it is recommended to use Windows 11 as the host if possible to continue receiving regular security updates.
Installation steps on Windows:
- Go to virtualbox.org/wiki/Downloads.
- Click Windows hosts to download the .exe installer file.
- Double-click the installer file after the download finishes.
- Follow the installation wizard that appears. Leave all components selected by default to get USB, networking, and Python support.
- Click Install if Windows asks for confirmation to install network drivers during the process.
- VirtualBox Manager will open automatically after installation is complete.
Note: Ensure that hardware virtualization features (Intel VT-x or AMD-V) are enabled in your computer's BIOS/UEFI. Most modern computers enable them by default, but some devices may need manual activation.
Download and Installation on macOS
VirtualBox supports macOS with Intel processors as well as Apple Silicon (M1, M2, and later) on version 13 Ventura and newer.
Installation steps on macOS:
- Go to virtualbox.org/wiki/Downloads.
- Select macOS / Intel hosts or macOS / Apple Silicon hosts according to your Mac's processor type. Processor information can be viewed via Apple → About This Mac.
- Double-click the downloaded .dmg disk image file to mount it.
- Double-click the VirtualBox.pkg file inside the window that opens.
- Follow the installation wizard until completion.
- The VirtualBox icon will appear in the Applications folder in Finder after the process finishes.
Note for Apple Silicon (M1/M2/M3) users: VirtualBox on Apple Silicon can only run Arm-based guest operating systems. Modern Linux distributions such as Ubuntu and Fedora are available in Arm versions, but the experience and support are not as comprehensive as the x86_64 versions. Other alternatives to consider for Apple Silicon Macs are UTM or Parallels Desktop.
VirtualBox Extension Pack
The VirtualBox Extension Pack is an official add-on package from Oracle that extends VirtualBox's capabilities. These features include:
- USB 2.0 and USB 3.0 support to access USB devices at full speed.
- VirtualBox Remote Desktop Protocol (VRDP) for remote VM access over the network.
- Disk image encryption using AES.
- NVMe controller for better storage performance emulation.
- PXE boot for Intel network cards.
The Extension Pack is available on the same page as VirtualBox. It is licensed under the Personal Use and Educational License (PUEL), which means it is free for personal and educational use.
How to install the Extension Pack:
- Make sure the version of the Extension Pack you download exactly matches the installed VirtualBox version.
- Double-click the downloaded
.vbox-extpackfile. - Click Install and accept the PUEL license when VirtualBox Manager prompts for confirmation.
Installing the Extension Pack is optional in this book. However, you will need it if you plan to use USB devices inside the VM.
Dual Boot: Definition and Considerations
Dual boot is a configuration where two operating systems are installed on a single physical computer. The user can choose which operating system to run when the computer is powered on via the boot menu. For example, you could install Windows and Ubuntu on the same computer.
Advantages of dual boot over a VM:
- Full performance: The operating system runs directly on the hardware without a virtualization layer. This is important for gaming or workloads that require direct hardware access.
- Real experience: You get the true experience of using Linux, including hardware management and direct interaction with physical devices.
Considerations before choosing dual boot:
- Risk of data loss: Incorrect disk partitioning can erase existing data, so backing up important data is highly recommended.
- Partition management: You need to provide free space on the disk by shrinking a Windows partition or using a separate disk.
- Boot loader: Installing Linux will modify the system boot loader. You may need to manually restore the Windows boot loader if problems occur.
- Cannot run simultaneously: You can only run one operating system at a time.
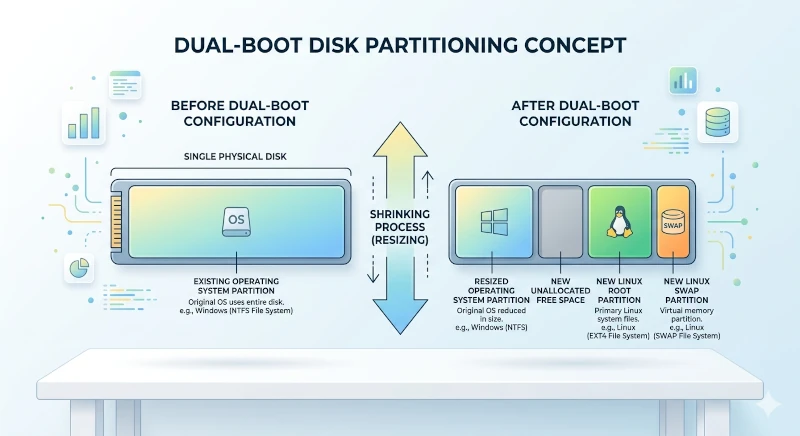
Recommendation for beginners: Using a VM is highly recommended first. Dual boot can be the next step once you feel comfortable with Linux and want to use it more intensively.
Minimum Hardware Specifications
Make sure your computer meets the minimum required specifications before proceeding. These specifications apply to installation on real hardware as well as a reference for resource allocation on a VM.
Requirements for Ubuntu 26.04 LTS
The following are the minimum specifications recommended by Canonical to run Ubuntu Desktop 26.04 LTS (codename "Resolute Raccoon"):
| Component | Minimum | Recommended |
|---|---|---|
| Processor | 2 GHz dual-core | 2 GHz quad-core or more |
| RAM | 6 GB | 8 GB or more |
| Storage | 25 GB | 50 GB or more |
| Display | 1024x768 | 1920x1080 |
| Internet connection | Not required | Needed for online installation |
Ubuntu 26.04 LTS supports 64-bit processor architectures (x86_64/AMD64 and ARM64). 32-bit processors are no longer supported since version 18.04 LTS.
Note: The minimum RAM requirement for Ubuntu Desktop increased from 4 GB (on 24.04 LTS) to 6 GB on 26.04 LTS, in line with the use of GNOME 50 and the desktop session now being fully Wayland-based (the X11/Xorg session has been removed). This figure is a recommendation, not a strict limit — installation can still be attempted with less RAM, but performance will be sluggish. If your device has less than 6 GB of RAM, consider lightweight variants such as Xubuntu or Lubuntu.
Requirements for Fedora Workstation 44
The following are the minimum specifications recommended by the Fedora Project for Fedora Workstation 44:
| Component | Minimum | Recommended |
|---|---|---|
| Processor | 2 GHz dual-core | 2 GHz quad-core or more |
| RAM | 2 GB | 8 GB or more |
| Storage | 20 GB | 40 GB or more |
| Display | 1024x768 | 1920x1080 |
| Internet connection | Not required | Needed for updates and RPM Fusion |
Fedora Workstation 44 is available for x86_64 (Intel/AMD 64-bit), Arm aarch64, ppc64le, and s390x architectures.
Note for older processors: Starting with Fedora 44, the kernel requires an x86_64 processor with the x86-64-v2 baseline (supporting SSE4.2 instructions). Intel/AMD processors released before approximately 2009 will likely not boot at all, not just run slowly. Fedora Workstation is also fully Wayland-based (without an X11 session), just like Ubuntu 26.04 LTS.
Note for VM users: Allocate at least 6 GB of guest RAM if creating an Ubuntu VM, or at least 2 GB (ideally 4 GB) for a Fedora VM, so that the graphical display runs smoothly. The host system should have a total RAM of at least 8–12 GB to remain responsive while the VM runs alongside other applications. Since both distros now run on Wayland, make sure the 3D graphics acceleration option in the VirtualBox Display settings (Settings → Display → Enable 3D Acceleration) is turned on after Guest Additions are installed, so the desktop does not feel choppy.
Downloading the ISO
An ISO file is a disk image file that contains a complete copy of the Linux installation media. This file is used as the installation source both in a VM and for creating a bootable USB.
Downloading Ubuntu 26.04 LTS
Ubuntu 26.04 LTS can be downloaded from the official page at ubuntu.com/download/desktop with the following steps:
- Open the official Ubuntu download page.
- Locate the Ubuntu 26.04.x LTS section.
- Click the Download Ubuntu 26.04 LTS amd64 button.
- Wait for the download to finish. The file size is about 6.1 GB — larger than the previous 24.04 LTS version.
Downloading Fedora Workstation 44
Fedora Workstation 44 is available at fedoraproject.org/workstation/download with the following steps:
- Open the official Fedora download page.
- Select Fedora Workstation 44 Live ISO in the Intel and AMD x86_64 systems section.
- Click Download to begin.
Verifying ISO Integrity (Checksum)
Verifying the integrity of the file using a checksum is highly recommended after the download completes. This step ensures that the file has not been corrupted or modified by unauthorised parties.
A checksum is a hash value generated from the contents of a file using a cryptographic algorithm such as SHA-256. A change of even one bit in the file will produce a completely different hash value. The authenticity of the file can be confirmed by comparing the hash value of the downloaded file with the official value provided by the developers.
Verifying Ubuntu 26.04 LTS:
Use the following command in a terminal to verify:
sha256sum ubuntu-26.04-desktop-amd64.isoCompare the output with the SHA-256 value listed on the official Ubuntu page.
Verifying Fedora Workstation 44:
Fedora provides checksum values and verification instructions via the Verify button on the download page. Use the following command in a Linux or macOS terminal:
sha256sum Fedora-Workstation-Live-44-1.7.x86_64.isoUse this command in PowerShell if you are using Windows:
Get-FileHash Fedora-Workstation-Live-44-1.7.x86_64.iso -Algorithm SHA256Delete the file and download it again if the generated hash does not match.
Creating a Bootable USB (for Installation on Real Hardware)
Creating a bootable USB is necessary if you want to install Linux directly on real hardware. This step is not required for VM users because VirtualBox can read the ISO file directly.
Prepare a USB flash drive with at least 8 GB capacity. Ensure that important data has been backed up because all data on the USB will be erased during this process.
Using Balena Etcher
Balena Etcher is an open-source application designed to flash ISO files to USB flash drives or SD cards. It has a simple interface and automatic verification.
- Download and install Etcher from etcher.balena.io.
- Open the Etcher application.
- Click Flash from file and select the downloaded ISO file.
- Click Select target and choose the USB flash drive to use.
- Click Flash! to start copying the file.
Using Fedora Media Writer
This official application from the Fedora Project can be used to flash any Linux ISO file to USB.
- Download Fedora Media Writer for Windows, macOS, or via Flathub for Linux.
- Open the application and select Custom image.
- Select the ISO file to use and specify the target USB flash drive.
- Click Write to begin.
Using Raspberry Pi Imager
Raspberry Pi Imager can also be used as an alternative to create a bootable Linux USB, even though it was originally designed for Raspberry Pi devices.
- Open the Raspberry Pi Imager application.
- Select Choose OS, scroll down, and select Use custom to locate your ISO file.
- Select the USB flash drive under Storage.
- Click Write to run the flashing process.
Balena Etcher remains the simplest choice for users creating a bootable USB for the first time.
All preparations are now complete, from choosing the method to preparing the installation media. The next stage is the installation process, which will be fully guided in the following chapter.