
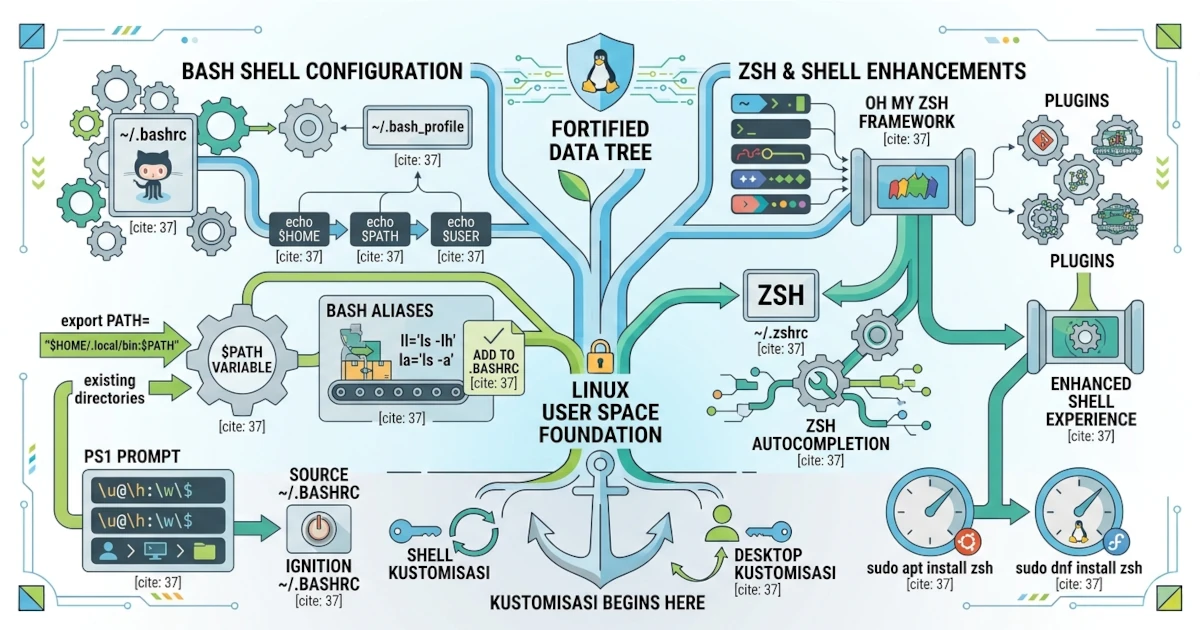
The terminal and shell are not just tools for running commands, but a workspace that you can customise to make it more comfortable and productive. Through changes to configuration files, adding environment variables, creating aliases, and modifying the prompt display, you can shape your terminal experience according to your needs. This chapter discusses various ways to customise the shell on Ubuntu 26.04 LTS and Fedora Workstation 44, including a few small but important differences between the two distributions that often confuse beginners.
Shell Configuration Files
Shell behaviour is controlled by configuration files stored in your home directory. Before modifying these files, it is important to understand when each file is read by Bash, because Ubuntu and Fedora actually have slightly different default habits.
~/.bashrc: Read Every Time You Open a Terminal
The ~/.bashrc file is read by Bash every time you open an interactive non-login shell, which is the situation that occurs whenever you open a new terminal window or tab from the GNOME desktop. For this reason, ~/.bashrc is the right place to store aliases, functions, and settings that you want to be active in every terminal session.
You can view the contents of this file with:
cat ~/.bashrcAfter modifying this file, apply the changes without closing the terminal using the command:
source ~/.bashrc~/.bash_profile and ~/.profile: The Difference Between Ubuntu and Fedora
The files read when you log in (for example logging into the desktop session or logging in via SSH) are called login shell files. This is where a difference that often causes confusion lies: Ubuntu and Fedora do not provide the same login shell files by default.
- Ubuntu 26.04 LTS does not create
~/.bash_profilefor new users. Instead, Ubuntu provides~/.profile, which automatically sources~/.bashrcinside it. - Fedora Workstation 44 provides
~/.bash_profileby default (copied from/etc/skelwhen the account is created), which also sources~/.bashrc.
The following table summarises the differences:
| File | Ubuntu 26.04 LTS | Fedora Workstation 44 |
|---|---|---|
~/.bashrc | Exists, read every time a terminal opens | Exists, read every time a terminal opens |
~/.bash_profile | Not created by default | Exists by default |
~/.profile | Exists, read at login | Not created by default |
In practice, because both of the above files already source ~/.bashrc, you almost never need to edit them directly. Simply store all your aliases, functions, and environment variables in ~/.bashrc, and they will apply both at login and when opening a new terminal.
~/.zshrc (If Using Zsh)
If you switch to Zsh, its configuration file is ~/.zshrc. Its function is similar to ~/.bashrc, that is, to hold settings that are read every time Zsh is run as an interactive shell.
Environment Variables
Environment variables are variables that store information about the system environment and can be read by running programs.
echo $HOME, $PATH, $USER
To see the value of an environment variable, use echo followed by the variable name prefixed with a dollar sign.
echo $HOMEecho $PATHecho $USER$HOME points to your home directory, $USER contains the username, and $PATH contains the list of directories the shell searches when you run a command. To see all active environment variables at once, use the command:
envAdding a Directory to $PATH
To allow the shell to find programs that you store in your own directory, add that directory to $PATH. For example, to add ~/.local/bin:
export PATH="$HOME/.local/bin:$PATH"This arrangement places the new directory at the beginning of the list, so programs inside it take priority. Save this line in ~/.bashrc so it applies permanently every time you open a terminal.
export: Setting an Environment Variable
The export command makes a variable available to programs run by the shell. Without export, the variable is only recognised within the shell itself and is not passed on to other programs.
Why Don't GUI Applications See Variables in .bashrc?
This is a common trap for beginners: environment variables you add to ~/.bashrc only apply to programs run from inside the terminal. Applications launched via the Activities Overview or Dash do not go through ~/.bashrc at all, so they will not see those variables.
The modern solution that works on both Ubuntu and Fedora (because both use GNOME and systemd) is to create a configuration file in the ~/.config/environment.d/ directory. Variables defined there will be available to all applications in your desktop session, including those launched via the GUI. For example:
mkdir -p ~/.config/environment.d
nano ~/.config/environment.d/10-custom.conf
The file content is simply VARIABLE=value pairs, for example:
PATH=${HOME}/.local/bin:${PATH}These changes will only take effect after you log out and log back in.
Aliases: Creating Command Shortcuts
Aliases allow you to create short names for long or frequently used commands.
alias ll='ls -lh'
To create an alias, use the syntax alias name='command'.
alias ll='ls -lh'After that, typing ll is equivalent to running ls -lh. To see all currently active aliases, run the alias command without arguments, and to remove an alias from the current session use unalias name.
Saving Aliases in .bashrc
Aliases created directly in the terminal only last for the duration of the session. To make them permanent, add the alias line to the ~/.bashrc file, then run source ~/.bashrc to apply it.
Custom Shell Prompt (PS1)
The prompt that appears before you type a command is controlled by a variable called PS1. You can change it to display information such as the username, hostname, and current directory.
The following example sets the prompt to display that information:
export PS1="\u@\h:\w\$ "In that string, \u represents the username, \h the hostname, \w the current directory, and \$ displays a dollar sign. Save this setting in ~/.bashrc to make it permanent.
Adding Colour to PS1
The prompt can also be coloured using ANSI escape codes. The following example makes the username and hostname parts appear green:
export PS1="\[\033[01;32m\]\u@\h\[\033[00m\]:\w\$ "\033[01;32m changes the text colour to bold green, while \033[00m resets the colour to normal. Note that the colour codes are wrapped with \[ and \]. These square brackets tell Bash that the text inside does not produce any visible characters, so Bash can calculate the prompt length correctly. If these are forgotten, the prompt display can become garbled when you type long commands or use the arrow keys to recall history.
Introduction to Zsh and Oh My Zsh
In addition to Bash, there is an alternative shell called Zsh that offers complementary features such as richer autocompletion and command correction. Zsh can be installed through the package manager.
sudo apt install zshOn Fedora, use:
sudo dnf install zshOnce installed, you can make Zsh your default shell using the chsh command:
chsh -s $(which zsh)This change only takes effect after you log out and log back in. Note that both Ubuntu 26.04 LTS and Fedora Workstation 44 still use Bash as the default shell; Zsh is always optional and needs to be installed and enabled manually.
Because Ubuntu 26.04 and Fedora Workstation 44 both use Ptyxis as the default terminal, you can also try Zsh without changing the system‑wide default shell: open Preferences in Ptyxis, select your terminal profile, then under the Command section choose the option to run a custom command and enter the path to Zsh. This method is useful for trying out a new shell per terminal profile before deciding to permanently switch with chsh.
For ease of configuration, many users install Oh My Zsh, a framework that provides ready‑to‑use themes and plugins for Zsh. Because its setup is more advanced, Oh My Zsh is optional and can be explored after you are comfortable with the shell basics.
Starship: A Modern Cross‑Shell Prompt Alternative
If you only want to beautify and enrich the information on your prompt without switching shells or installing the entire Oh My Zsh framework, there is another option called Starship. Starship is a lightweight prompt that works equally well in Bash, Zsh, and Fish, and can display contextual information such as the active Git branch or detected programming language version in your working directory.
The availability of the Starship package in the official repositories varies between distribution versions, so the most consistent installation method for both Ubuntu and Fedora is via the official installation script:
curl -sS https://starship.rs/install.sh | shAfter installation, enable Starship by adding the following line at the end of ~/.bashrc:
eval "$(starship init bash)"Further configuration, such as choosing which modules to display, is done through the ~/.config/starship.toml file.
Shell customisation is an enjoyable step to make the terminal more personal and efficient. From configuration files, environment variables, aliases, to the prompt, every element can be adjusted gradually. In the next chapter, you will apply the same spirit to customise the GNOME desktop appearance to your taste.