
Chapter 35 closed with a deliberately unresolved promise: the backup-config.sh, cleanup-temp.sh, and health-check.sh scripts that we wrote and scheduled via cron or systemd timers all apply to only a single server. As soon as the network grows from one server to three, such as the 192.168.1.0/24 scheme we have been building since Chapter 9 (DNS at 192.168.1.10) and Chapter 12 (Nginx at 192.168.1.20), copying the exact same scripts one by one to every server via scp and then running them manually via SSH begins to feel completely unreasonable. Ten servers means ten identical manual processes, and human error is just waiting to happen when one server gets missed or ends up with a slightly different script version than the rest. This chapter introduces Ansible as a direct answer to that problem, along with the broader Infrastructure as Code concept that serves as its umbrella framework.
This scenario is extremely familiar to any Sysadmin managing more than one server. Developers request a specific version of a Node.js package installed across five application servers simultaneously. The security team requests that the same firewall configuration be applied to all production servers after an incident is discovered on a single host. Without dedicated tools, requests like these turn into repeated manual checklists, prone to forgotten steps, and nearly impossible to audit regarding who changed what. Ansible answers this with an approach different from standard bash scripting: describing the desired end state through structured configuration files, and letting Ansible itself calculate which steps must be run to achieve that state on every target server.
We will begin this chapter with the Infrastructure as Code concept and a brief look at how Ansible works, followed by installing Ansible on the control node, setting up the inventory and basic playbook anatomy, and concluding with running a first playbook that actually installs Nginx on a target server. Chapter 37 will complete the initial provisioning side using cloud-init, whereas this chapter focuses on configuring servers that are already up and running.
36.1 Infrastructure as Code Concepts
Infrastructure as Code (IaC) is the practice of managing and provisioning infrastructure, ranging from server configurations and networking to VM provisioning, using machine-readable definition files rather than manual terminal steps or clicking around in a dashboard. These definition files are declarative: we write the desired end state (such as "the nginx package must be installed and its service must be running") rather than a step-by-step sequence of imperative commands as in the Chapter 35 bash scripts.
36.1.1 The Configuration Drift Problem Solved by IaC
Configuration drift refers to a condition where the actual configuration of a server gradually deviates from its intended configuration, usually due to unrecorded manual changes. One server receives a security patch early because a Sysadmin logged in directly to fix an urgent issue, while four other servers behind the same load balancer remain on the old version because that change was never replicated. When an incident occurs, this type of drift makes troubleshooting significantly harder because "identical" servers turn out to have different configuration histories.
IaC closes this gap by making definition files the single source of truth. Configuration changes are made by modifying those files and re-running them against all target servers, rather than manually logging into an individual machine. These files can also be stored in Git like application code, ensuring every server configuration change has a history, can be reviewed via pull requests, and can be rolled back just like code. This version control concept for infrastructure is what separates IaC from simple automation scripts.
36.1.2 How Ansible Works: Agentless, Push-Based, and Idempotent
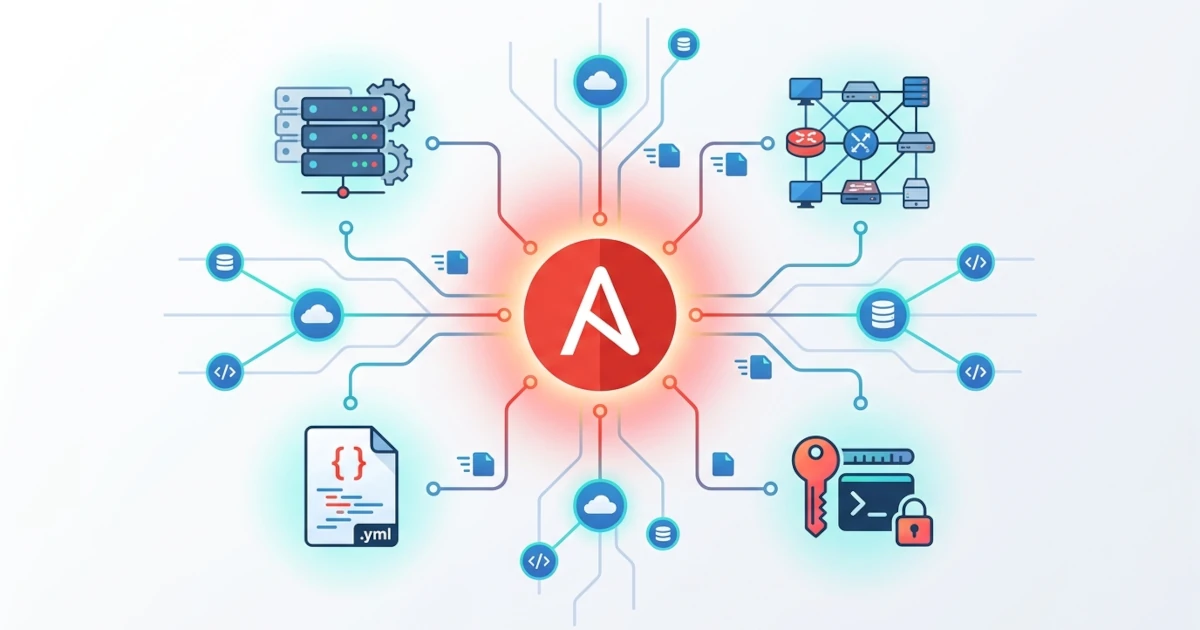
Ansible is not the only IaC tool, but its core characteristics make it an ideal starting point. Three major features distinguish it from similar tools like Puppet and Chef.
- Ansible is agentless, meaning no dedicated daemon software needs to be installed and continuously running on managed servers. Ansible simply connects over SSH, the protocol we configured back in Chapter 3, leaving no additional background processes to maintain or exploit as new attack vectors on target servers.
- Ansible uses a push-based model: a single machine called the control node pushes configuration changes out to managed nodes (target servers) as soon as commands are issued. This differs from pull-based tools like Puppet, which rely on agents running on each target server to periodically pull the latest configuration from a central server.
- Every Ansible operation is designed to be idempotent, meaning that executing the same playbook multiple times against the same server yields the exact same end state without unintended side effects on subsequent runs. If the Nginx package is already installed, re-running the installation playbook will not reinstall it or throw an error; it will simply report that the requested state is already met. This property makes playbooks safe to re-run routinely during deployment processes, unlike naive bash scripts that might fail or behave unpredictably if run twice against the same host.
It is important to differentiate configuration management tools like Ansible, Puppet, and Chef from provisioning tools like Terraform, which is discussed again in Chapter 44 for deeper exploration. Configuration management deals with "how to configure existing servers," whereas provisioning deals with "how to create the servers or instances themselves" in cloud or on-premise environments. Cloud-init, covered in Chapter 37, fills the gap between the two by handling initial provisioning the moment a VM first boots, before Ansible steps in for advanced configuration.
| Aspect | Ansible | Puppet/Chef | Terraform |
|---|---|---|---|
| Architecture | Agentless, push-based via SSH | Requires local agent per node, typically pull-based | Agentless, calls cloud provider APIs |
| Primary Focus | Configuration management | Configuration management | Infrastructure provisioning (VMs, networks, storage) |
| Configuration Language | YAML (playbooks) | Custom DSL (Puppet) / Ruby (Chef) | HCL (HashiCorp Configuration Language) |
| Initial Learning Curve | Relatively gentle | Steeper, requires learning DSL or Ruby | Gentle for provisioning, separate state concepts |
In short, Ansible was chosen for this chapter because its agentless architecture keeps initial setup much simpler than Puppet or Chef, while its focus on configuration management complements the shell scripts from Chapter 35 rather than replacing them entirely.
36.2 Installing Ansible on the Control Node
The control node is the machine where Ansible is installed and from which all commands are executed, while managed nodes are the target servers being configured. Ansible requires the control node to run on a Unix-like system (Linux, macOS, or BSD) with Python installed; Windows is not supported as a control node, though it can still be managed as a target node via the WinRM protocol (beyond the scope of this chapter). Managed nodes generally require Python 3 installed as well, because most Ansible modules execute as Python scripts on the managed side. Ubuntu Server includes Python 3 by default, except on certain minimal cloud images that intentionally strip it down.
36.2.1 Installing Ansible via APT
Ubuntu has provided the ansible package in its universe repository across recent LTS releases. This package is a metapackage bundling ansible-core (the core engine) alongside a curated set of official collections, covering learning and daily operational needs without extra installations.
Practical Steps
- Ensure the universe repository is enabled, update package lists, and install Ansible on the control node.
sudo apt update sudo apt install ansible - Verify the installed Ansible version.
ansible --version
Verification and Troubleshooting
- The first line of the
ansible --versionoutput follows theansible [core X.Y.Z]format, followed by lines forconfig file,python version, and related metadata. TheX.Y.Znumbers reflect whatever version is currently packaged in the Ubuntu Server 26.04 LTS repository at package installation time, so do not be alarmed if it differs from online examples; always treat the output on your server as the authoritative reference rather than fixed figures from tutorials including this chapter. - If you require the absolute latest upstream Ansible version not yet added to Ubuntu repositories, official Ansible documentation recommends installing via
pipxrather than third-party PPAs, whose support has waned in recent releases. For the learning requirements in this chapter, theansibleAPT package is more than sufficient. - An
Unable to locate package ansibleerror typically means the universe repository is inactive. Enable it usingsudo add-apt-repository universeand repeatapt update.
36.2.2 Preparing SSH Access to Managed Nodes
Because Ansible connects to managed nodes over SSH, key-based authentication configured back in Section 3.2 is an absolute prerequisite before moving forward. Without it, Ansible will pause at every host waiting for password prompts that cannot be answered in automated workflows. This section assumes an additional server has been prepared specifically for exercises in this chapter, named app01 with IP address 192.168.1.40 following the 192.168.1.0/24 subnet scheme used since Chapter 9; adjust this IP and hostname to match your available infrastructure.
Practical Steps
- From the control node, copy the public key created in Section 3.2.1 to
app01.ssh-copy-id [email protected] - Log in manually once over standard SSH to verify the connection and accept the host key for
app01into the control node'sknown_hostsfile.ssh [email protected] exit - Ensure this user has
sudoaccess onapp01, as package installations in Section 36.4 require privilege escalation via thebecomedirective used in playbooks.ssh [email protected] sudo whoami
Verification and Troubleshooting
- The
sudo whoamicommand in step three should outputrootwithout prompting for a password ifapp01's sudoers file is configured withNOPASSWD, or prompt for a password once if it is not. Both conditions are valid; if prompted, note it down because you will need to add the--ask-become-passflag when running playbooks in Section 36.4.2. - The manual SSH login step is not a mere formality. Without storing
app01's host key inknown_hostsbeforehand, Ansible's first connection attempt may hang waiting for an interactive prompt readingAre you sure you want to continue connecting (yes/no)?that never appears in non-interactive contexts, a common trap for Sysadmins new to Ansible. - A
Permission denied (publickey)error at any stage means you should return to Section 3.2 troubleshooting, as the issue lies in the SSH layer rather than Ansible.
36.3 Inventory and Basic Playbooks
Two files form the foundation of every Ansible task: an inventory listing managed target servers, and a playbook defining what actions to execute against those servers. We will create a dedicated working directory and build both files step by step.
36.3.1 Creating a Static Inventory
An inventory is a list of hosts and host groups targeted by Ansible, written in INI or YAML format. This section uses INI format because it is more concise for small inventory files.
Practical Steps
- Create a working directory for all Ansible files in this chapter.
mkdir -p ~/ansible-project cd ~/ansible-project - Create the inventory file.
nano inventory.ini - Add the definition for the
webserversgroup containingapp01.[webservers] app01 ansible_host=192.168.1.40 ansible_user=sysadmin
Verification and Troubleshooting
- Display the host list parsed from the inventory to verify the syntax is valid.
The output will be in JSON format; verify the block readingansible-inventory -i inventory.ini --list"webservers": {"hosts": ["app01"]}to confirm Ansible successfully parsed the group and host according toinventory.ini. - For larger inventories, hosts can be grouped into multiple categories (such as
[webservers],[dbservers]), as well as group-of-groups using the[production:children]syntax. This chapter uses a single group to keep focus on the basic workflow. - Ansible also supports dynamic inventories that fetch host lists directly from cloud provider APIs or internal CMDB systems rather than static files like
inventory.ini. This becomes useful when server counts reach dozens and change frequently, but it lies beyond this introductory chapter.
36.3.2 Testing Connectivity with Ad-Hoc Commands
An ad-hoc command is a single-line Ansible command executed instantly without writing a playbook, perfect for quick checks like verifying connectivity before authoring actual playbooks.
Practical Steps
- Run Ansible's built-in
pingmodule against all hosts in thewebserversgroup.ansible webservers -i inventory.ini -m ping
Verification and Troubleshooting
- A successful response displays
app01 | SUCCESS =>followed by a JSON block containing"ping": "pong". Thepingmodule here purely tests the SSH transport path and Python interpreter on the managed node, unlike standard ICMP shellpingcommands. - An
UNREACHABLEstatus generally indicates SSH connectivity issues, such as an incorrect IP or port, or unaccepted host keys as discussed in Section 36.2.2. - A
FAILEDstatus mentioningpythonmeans the Python 3 interpreter was not found in default paths on the managed node. Add the variableansible_python_interpreter=/usr/bin/python3to the host line ininventory.iniif this occurs.
36.3.3 YAML Playbook Anatomy
A playbook is a YAML file describing one or more plays, where each play contains a list of tasks executed sequentially against specified hosts. Every task essentially calls a single module, which is an idempotent wrapper for work, such as ansible.builtin.apt for package management or ansible.builtin.service for managing systemd services.
Practical Steps
- Create a test playbook to understand its structure before moving to the actual Nginx playbook.
nano hello.yml - Add the following minimal structure.
The--- - name: First test playbook hosts: webservers tasks: - name: Display a simple message ansible.builtin.debug: msg: "Ansible connected successfully to {{ inventory_hostname }}"namelines at the play and task levels serve as descriptive labels printed during execution and do not alter execution logic.hosts: webserverspoints to the group defined ininventory.iniin Section 36.3.1. The variable{{ inventory_hostname }}uses Jinja2 syntax, the templating engine used by Ansible to inject dynamic values, which in this case represents the target host name currently being processed. - Run the playbook.
ansible-playbook -i inventory.ini hello.yml
Verification and Troubleshooting
- Output should display the
TASK [Gathering Facts]block first, an automated task that runs at the beginning of a play to collect system information from managed nodes, followed byTASK [Display a simple message]printing the message containingapp01, and concluding with aPLAY RECAPline summarizingapp01 : ok=2 changed=0 unreachable=0 failed=0 skipped=0 rescued=0 ignored=0. - YAML errors like
mapping values are not allowed in this contextalmost always indicate indentation mistakes. YAML is extremely sensitive to spacing, and Ansible requires consistent space indentation instead of tab characters. - Fact gathering can be disabled using
gather_facts: falseat the play level to speed up playbooks that do not rely on system facts, though we keep it enabled by default for the Nginx playbook in the next section.
36.4 Running a Simple Playbook: Installing Nginx
Chapter 12 installed Nginx on 192.168.1.20 manually using apt install nginx typed directly into the server terminal. This section translates that process into an Ansible playbook and executes it against app01. The true power of this shift becomes obvious when the process must be repeated on a second, third, or tenth server: simply execute the playbook again without retyping sequential manual commands on every host.
36.4.1 Writing install-nginx.yml
Practical Steps
- Create a new playbook file.
nano install-nginx.yml - Define two tasks: installing the Nginx package, and ensuring the service is active and enabled.
Setting--- - name: Install and start Nginx hosts: webservers become: true tasks: - name: Install nginx package ansible.builtin.apt: name: nginx state: present update_cache: true - name: Ensure nginx service is active and enabled on boot ansible.builtin.service: name: nginx state: started enabled: truebecome: trueat the play level executes all contained tasks with privilege escalation (equivalent tosudo) on the managed node, matching the sudo access checks made in Section 36.2.2. Theupdate_cache: trueparameter inansible.builtin.aptworks like runningapt updatebefore installation, whilestate: presentasserts that the package must be installed regardless of whether it was present before, consistent with idempotency concepts from Section 36.1.2. Theansible.builtin.servicemodule in the second task replaces manual combinations ofsystemctl start nginxandsystemctl enable nginxpracticed in Chapter 5. - Validate playbook syntax prior to execution.
ansible-playbook -i inventory.ini install-nginx.yml --syntax-check
Verification and Troubleshooting
- The
--syntax-checkflag validates YAML structure and module names without contacting target nodes or making real changes. Output readingplaybook: install-nginx.ymlwithout error messages indicates valid syntax. - Module names are fully qualified using the
ansible.builtin.prefix, following Fully Qualified Collection Name (FQCN) conventions recommended since Ansible 2.10+ to prevent namespace collisions when third-party collections use matching module names.
36.4.2 Executing and Verifying Playbook Idempotency
Practical Steps
- Run the playbook for the first time. Include the
--ask-become-passflag (shortened to-K) if the user onapp01prompts for a password duringsudochecks from Section 36.2.2.ansible-playbook -i inventory.ini install-nginx.yml - Re-run the exact same playbook without altering any files to observe its idempotent behavior as outlined in Section 36.1.2.
ansible-playbook -i inventory.ini install-nginx.yml
Verification and Troubleshooting
- On the initial run, the
PLAY RECAPline should displayapp01 : ok=3 changed=2 unreachable=0 failed=0 skipped=0 rescued=0 ignored=0, wherechanged=2confirms that the package installation and service enablement tasks modifiedapp01's state. - On the second execution, the
changedcount drops to0whileokremains3because Ansible detects that Nginx is already installed and running, requiring no additional actions. This confirms the idempotency concept explained theoretically in Section 36.1.2. Theupdate_cache: trueparameter does not invalidate this behavior; Ansible updates package caches under the hood on both runs, but thechangedstate onansible.builtin.apttracks whether package installations or upgrades occurred rather than cache updates. - Verify from an external host that Nginx is running on
app01using the samecurlpattern from Section 12.1.
Receiving the default Welcome to nginx! page confirms that playbook execution produced the exact same target state as manual setup in Chapter 12.curl http://192.168.1.40 - Errors mentioning
Missing sudo passwordindicate that the--ask-become-passflag was omitted when running against a user withoutNOPASSWDsudo rights on the target server. - To perform quick audits prior to applying changes on production infrastructure, use the
--checkflag to run playbooks in simulation mode (similar to dry-run modes in Section 35.2.2), reporting which tasks would result inchangedwithout executing them. Making this check a standard procedure before applying new playbooks to untested production hosts is highly recommended.
At this point, we have constructed a working Ansible workflow: one control node, one managed node listed in an inventory, and a playbook proven to be idempotent across repeated runs. This install-nginx.yml playbook can scale to dozens of target hosts by simply adding new lines to inventory.ini without changing a single line of playbook code—a capability that manual bash scripts from Chapter 35 lack. Chapter 37 steps back to an earlier stage in the server lifecycle: cloud-init, which automates initial provisioning like user creation and SSH key placement from the moment a VM first boots, right before Ansible takes over advanced configuration management as demonstrated in this chapter.