
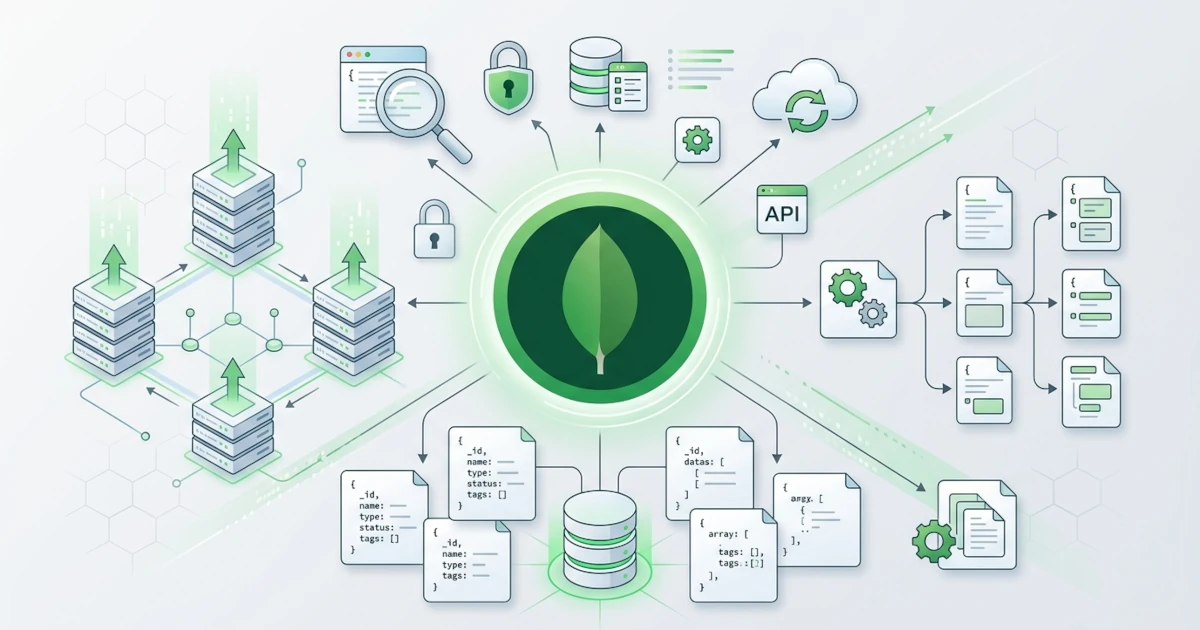
Chapter 20 closes the discussion of relational RDBMS in Part V after successively covering PostgreSQL in Chapter 18, MySQL in Chapter 19, and MariaDB in Chapter 20 itself. Chapter 21 takes a different direction by introducing MongoDB, the most widely used document-based NoSQL database in its category, leaving far behind the table and row model that we are already familiar with from the three previous RDBMSs. We will first understand the fundamental differences of the NoSQL data model compared to RDBMS, install MongoDB 8.0 directly from its official repository, practice CRUD operations via mongosh, enable authentication which turns out not to be automatically enabled from initial installation, and highlight an important note regarding the compatibility of the official MongoDB repository with the relatively new Ubuntu 26.04 release.
21.1 NoSQL vs RDBMS Concepts: Document vs Table
A Developer who is building a product catalog for an e-commerce application often encounters the same problem: clothing category products have size and color attributes, electronics category products have power and warranty attributes, while book category products have author and page count attributes. Forcing all combinations of these attributes into a single relational table in PostgreSQL or MySQL usually ends up with many columns containing NULL values or a complex Entity-Attribute-Value design to query. Cases like this are the main reason NoSQL was born and developed into its own database category since the late 2000s.
21.1.1 Document-Oriented Data Model vs Relational
NoSQL is not a single product, but rather a large umbrella for several data models that all avoid the rigid table structure of an RDBMS, ranging from key-value stores like Redis, column-family stores like Cassandra, graph databases like Neo4j, to document store which is the focus of this chapter through MongoDB. Instead of rows in a table, MongoDB stores data as documents in BSON (Binary JSON) format, a binary representation of JSON that adds additional data types such as dates and high-precision decimal numbers. A collection of similar documents is grouped into a collection, the equivalent of a table concept in RDBMS, but without the requirement that every document within it has an identical field structure. This flexibility does not mean MongoDB is always used without any structure validation at all; through the $jsonSchema option in db.createCollection(), Sysadmins and Developers can still enforce validation rules on specific fields if a production collection requires stricter structural control, although an in-depth discussion of this is outside the scope of this introductory chapter.
The most striking difference lies in how related data is stored. An RDBMS normalizes data into multiple separate tables and then joins them back during queries via JOIN, whereas MongoDB tends to adopt the embedded document pattern: data that is frequently accessed together, such as shipping address details within an order document, is directly inserted as a sub-document inside its parent document. This pattern eliminates the need for JOIN for cases of data reading that frequently occur together, with the consequence that data can feel duplicated compared to a fully normalized relational design.
A misconception that needs to be clarified from the start: NoSQL does not mean MongoDB ignores ACID transactions, which have been discussed since Section 18.1 PostgreSQL. Since version 4.0, MongoDB has supported multi-document transactions with full ACID guarantees, although by design their usage remains less frequently needed compared to RDBMS because the embedded document pattern already resolves many cases that require cross-table transactions in RDBMS.
21.1.2 When to Choose NoSQL, When to Stay with RDBMS
Sysadmins receiving new database provisioning requests from the Developer team need to understand that the choice between RDBMS and NoSQL is not a matter of which is strictly better, but rather about compatibility with data characteristics. Modern industry practices actually lean toward polyglot persistence: using more than one type of database within a single system, each for the needs it fits best. Financial transaction data that requires strict consistency and clear inter-table relations is still safer stored in PostgreSQL or MariaDB as covered in Chapters 18 and 20, while product catalog data, activity logs, or content with frequently changing structures are more conveniently managed in MongoDB.
| Aspect | RDBMS (PostgreSQL/MySQL/MariaDB) | MongoDB (NoSQL Document Store) |
|---|---|---|
| Data structure | Table with rows and columns | Collection containing BSON documents |
| Schema | Rigid, defined upfront (CREATE TABLE) | Flexible, each document can have different fields |
| Inter-data relation | Normalized via foreign keys and JOIN | Generally embedded document, occasionally manual reference |
| Scaling | Generally vertical scaling, sharding is more complex | Designed for horizontal scaling via native sharding |
| Example use case | Financial data, inventory with strict relations | Product catalog, activity log, CMS content |
The table above is not an absolute rule, but is sufficient to serve as initial consideration material for Sysadmins before approving new database provisioning requests from Developers.
21.2 Installing MongoDB from Official Repository
Unlike PostgreSQL and MariaDB which are available directly from official Ubuntu repositories, MongoDB since October 2018 changed its license to SSPL (Server Side Public License) starting from version 4.x onward. This license does not meet open source criteria under the Debian Free Software Guidelines, leading Debian and Ubuntu to discontinue including modern mongodb-org package versions in their official repositories. Therefore, installing the latest MongoDB version must be done via MongoDB Inc's own official repository, not through regular apt install mongodb which will only point to legacy packages or not be found at all.
21.2.1 Adding GPG Key and APT Repository
Practical Steps
- Ensure
gnupgandcurlare installed for the GPG key import process.sudo apt update sudo apt install -y gnupg curl - Download and import the official MongoDB 8.0 public key.
curl -fsSL https://pgp.mongodb.com/server-8.0.asc | \ sudo gpg -o /usr/share/keyrings/mongodb-server-8.0.gpg --dearmor - Add the official repository to
/etc/apt/sources.list.d/. Note that the line below intentionally uses thenoblecodename (Ubuntu 24.04 LTS), not the Ubuntu 26.04 codename that we are using. The complete reason is discussed in Section 21.5.echo "deb [ arch=amd64,arm64 signed-by=/usr/share/keyrings/mongodb-server-8.0.gpg ] https://repo.mongodb.org/apt/ubuntu noble/mongodb-org/8.0 multiverse" | \ sudo tee /etc/apt/sources.list.d/mongodb-org-8.0.list
Verification and Troubleshooting
- Ensure the file
/usr/share/keyrings/mongodb-server-8.0.gpgis successfully created and not zero bytes in size before proceeding to the next step. - If the
apt updatecommand in the next step displays aNO_PUBKEYerror, repeat the GPG key import process as the key file likely failed to download completely due to an interrupted connection midway.
21.2.2 Package Installation and Service Verification
Practical Steps
- Update the package list so the new repository is read, then install the
mongodb-orgmeta-package.
Thesudo apt update sudo apt install -y mongodb-orgmongodb-orgpackage automatically pulls several components at once as dependencies:mongodb-org-server(main daemon),mongodb-org-mongos(router for sharded cluster),mongodb-mongosh(modern interactive shell), andmongodb-org-toolswhich contains utilities likemongodumpandmongorestorefor Chapter 23 requirements later. - Run and enable the
mongodservice so it automatically starts whenever the server boots.sudo systemctl start mongod sudo systemctl enable mongod sudo systemctl status mongod - Confirm the version that is actually installed.
mongod --version
Verification and Troubleshooting
- Normal
systemctl statusoutput displaysactive (running)status, listening on default port27017. Confirm viasudo ss -tlnp | grep 27017. - If the service fails to start, inspect logs via
sudo journalctl -u mongod -n 50or directly in the native MongoDB log file at/var/log/mongodb/mongod.log. The most common cause on new servers is data directory/var/lib/mongodbpermissions not being owned by themongodbuser. - Field note: By default MongoDB only listens for connections from
127.0.0.1via thebindIpparameter in/etc/mongod.conf. This behavior is a good built-in safety measure and should not be hastily changed to0.0.0.0before authentication is fully active as we will discuss in Section 21.4, considering many real incidents on the internet involved MongoDB instances exposed publicly without passwords resulting in stolen or held-hostage data.
21.3 Basic Operations via mongosh: CRUD
mongosh is MongoDB's official interactive shell based on JavaScript, replacing the legacy mongo which had its development discontinued since MongoDB 6.0. Sysadmins and Developers use mongosh for the same purposes as psql in PostgreSQL or mariadb in MariaDB: running queries, managing users, and performing daily administration directly from the command line.
21.3.1 Connecting to mongosh and Database/Collection Structure
Practical Steps
- Enter
mongoshwithout authentication first, because authorization is indeed not yet enabled at this stage.mongosh - Switch to a new database named
webapp_catalog. Unlike explicitCREATE DATABASEin RDBMS, MongoDB only actually creates the database and collection once there is a first write operation directed to it.use webapp_catalog - Display the list of databases that actually contain data.
show dbs
Verification and Troubleshooting
- The
show dbscommand executed before any write operation will not displaywebapp_catalog, because that database has not actually been created in the storage engine. This is normal and not a sign of failure; simply proceed to Section 21.3.2 to prove it. - The prompt changing to
webapp_catalog>indicates the session is now within the correct database context.
21.3.2 Create, Read, Update, Delete (CRUD)
Practical Steps
- Create one product document in the
productscollection, continuing the e-commerce catalog scenario from Section 21.1.
Thedb.products.insertOne({ name: "Keyboard Mekanik", category: "elektronik", price: 750000, stock: 25 })productscollection andwebapp_catalogdatabase are automatically created when this command is executed, proving the schemaless nature discussed in Section 21.1.1. - Add multiple documents at once with intentionally different field structures, to demonstrate schema flexibility.
db.products.insertMany([ { name: "Kaos Polos", category: "pakaian", price: 85000, size: ["S", "M", "L"] }, { name: "Novel Laskar Pelangi", category: "buku", price: 65000, author: "Andrea Hirata", pages: 529 } ]) - Read all documents in the
productscollection.
Adddb.products.find().pretty()at the end for easier-to-read output on documents with nested structures. - Read documents with a filter, for example electronics category products priced above 500 thousand.
db.products.find({ category: "elektronik", price: { $gt: 500000 } }) - Update the
stockvalue in the Keyboard Mekanik document using the$setoperator.db.products.updateOne( { name: "Keyboard Mekanik" }, { $set: { stock: 20 } } ) - Delete one document based on a filter.
db.products.deleteOne({ name: "Kaos Polos" })
Verification and Troubleshooting
- Each successful
insertOne,updateOne, anddeleteOnecommand returns a result object containing fields likeacknowledged: truealong with the count of affected documents, similar to theQuery OKmessage function in MySQL/MariaDB known since Section 19.3. - MongoDB automatically adds an
_idfield of typeObjectIdthat is unique to every new document if not defined manually, serving as an implicit primary key equivalent toSERIALorAUTO_INCREMENTin RDBMS. - A common mistake by Developers newly transitioning from RDBMS is forgetting that
find()without filters and withoutlimit()will return all documents in the collection. On production collections containing millions of documents, this habit can significantly burden server memory, so always include filters or.limit()when exploring data on running production servers.
21.4 Basic Authentication and Access Control
The MongoDB installation from Section 21.2 runs by default without any authentication; anyone able to connect to port 27017 automatically gains full access without needing a username or password. This default behavior was previously responsible for various real-world security incidents when many MongoDB instances were intentionally or unintentionally exposed to the public internet without authentication or firewalls, then discovered and exploited by Attackers scanning for such instances en masse. Enabling authentication before the server is actually used for real data is not an optional step, but a fundamental requirement.
21.4.1 Enabling Authorization and Creating Admin User
Practical Steps
- While authentication is still disabled, log into
mongoshand switch to theadmindatabase to create the first administrative user.mongosh
Theuse admin db.createUser({ user: "admin", pwd: passwordPrompt(), roles: [ { role: "userAdminAnyDatabase", db: "admin" }, "readWriteAnyDatabase" ] })passwordPrompt()function prompts for hidden password input in the terminal, which is safer than typing plain passwords directly inside thedb.createUsercommand where it risks being stored in shell history. - Exit
mongosh, then edit the configuration file/etc/mongod.confto enable authorization.security: authorization: enabled - Restart the
mongodservice so the new configuration takes effect.sudo systemctl restart mongod - Test the connection again, this time requiring credentials to be included.
mongosh -u admin -p --authenticationDatabase admin
Verification and Troubleshooting
- Connection attempts without the
-uand-pflags after authorization is enabled must be immediately rejected with the error messageCommand find requires authenticationwhen attempting any operation, proving that protection is active. - The
--authenticationDatabase adminparameter must be included because theadminuser was created in theadmindatabase, not in the application database. Forgetting this parameter is the most common mistake made by Sysadmins enabling MongoDB authentication for the first time.
21.4.2 Creating Application User with Restricted Roles
Just like the least privilege principle already applied to PostgreSQL application users in Section 18.3 and MariaDB in Section 20.3, the admin user should not be used directly by Developer applications. Create a separate user whose access rights are restricted solely to the webapp_catalog database.
Practical Steps
- Log in as
admin, then switch to thewebapp_catalogdatabase.mongosh -u admin -p --authenticationDatabase adminuse webapp_catalog - Create an application user with the
readWriterole restricted only to this database.db.createUser({ user: "webapp_user", pwd: passwordPrompt(), roles: [ { role: "readWrite", db: "webapp_catalog" } ] }) - Test logging in with this new user.
mongosh -u webapp_user -p --authenticationDatabase webapp_catalog webapp_catalog
Verification and Troubleshooting
- Run
db.products.find()anddb.products.insertOne({ name: "Test" })aswebapp_userto prove that read and write access functions normally on thewebapp_catalogdatabase. - Try switching to another database, for example
use adminthendb.system.users.find(), and ensure the operation is rejected with anot authorizedmessage. This failure serves as proof that role restriction works as intended, just like testing theapp_readonlyrole in Section 20.3.3 of the previous chapter.
21.5 Release Compatibility Note with Ubuntu 26.04 LTS
Review the repository line in Section 21.2.1 which intentionally uses the codename noble (Ubuntu 24.04 LTS), even though the server used throughout this series runs Ubuntu 26.04 LTS with codename Resolute Raccoon. This difference is not a typo, but an anticipatory step that Sysadmins need to understand before practicing.
21.5.1 Why Official Repositories Can Lag Behind Recent Ubuntu Releases
MongoDB Inc. only publishes mongodb-org builds for specific Ubuntu codenames that have undergone official testing and certification on their end, rather than automatically following every new Ubuntu release from day one. In previous Ubuntu releases, the gap between the official Ubuntu release date and when that codename appears on repo.mongodb.org usually spans several months, because the MongoDB team needs to validate compatibility of build toolchains and baseline glibc/OpenSSL of that new release. Since Ubuntu 26.04 LTS is still relatively new at the time of writing this material, there is a high possibility that codename resolute is not yet available as an official target in the MongoDB repository at the time this series is practiced.
21.5.2 Safe Strategy Before Practice
Sysadmins need to verify this official support status directly before following installation steps in Section 21.2, rather than assuming it as a fact that permanently applies. Open MongoDB's official installation documentation page for Ubuntu at www.mongodb.com/docs/manual/administration/install-on-linux, then check whether codename resolute is listed as a supported target.
- If
resoluteis listed in official documentation, use that codename directly to replacenoblein the repository line of Section 21.2.1. - If not listed, continue using
nobleas a fallback as demonstrated in Section 21.2.1. This approach is not an official statement from MongoDB Inc., but a common field practice used by Sysadmins when official repositories do not yet provide builds for the latest distro release, given that baselineglibcand OpenSSL between adjacent Ubuntu LTS releases are generally sufficiently compatible. - The fastest way to test this support status directly on your own server is replacing
noblewithresolutein the repository line of Section 21.2.1, then runningsudo apt update. A404 Not Founderror pointing to pathdists/resolute/means builds for that codename are indeed not yet available and the repository line needs to be reverted tonoble, whereas a smoothapt updateexecution indicates official support is ready to use. - Whatever the choice, thoroughly test installation results following Section 21.2.2 before using this server for production data, as cross-codename compatibility is never officially guaranteed and retains the risk of causing unexpected issues down the road.
Up to this point, the server is running MongoDB 8.0 complete with the webapp_catalog database populated with product documents, protected by enabled authentication, and cleanly separated between the admin user and the restricted read-write webapp_user. Chapter 22 continues Part V by installing web UIs to simplify visual management for all three types of databases practiced, ranging from phpMyAdmin, pgAdmin 4, to mongo-express specifically for MongoDB.