
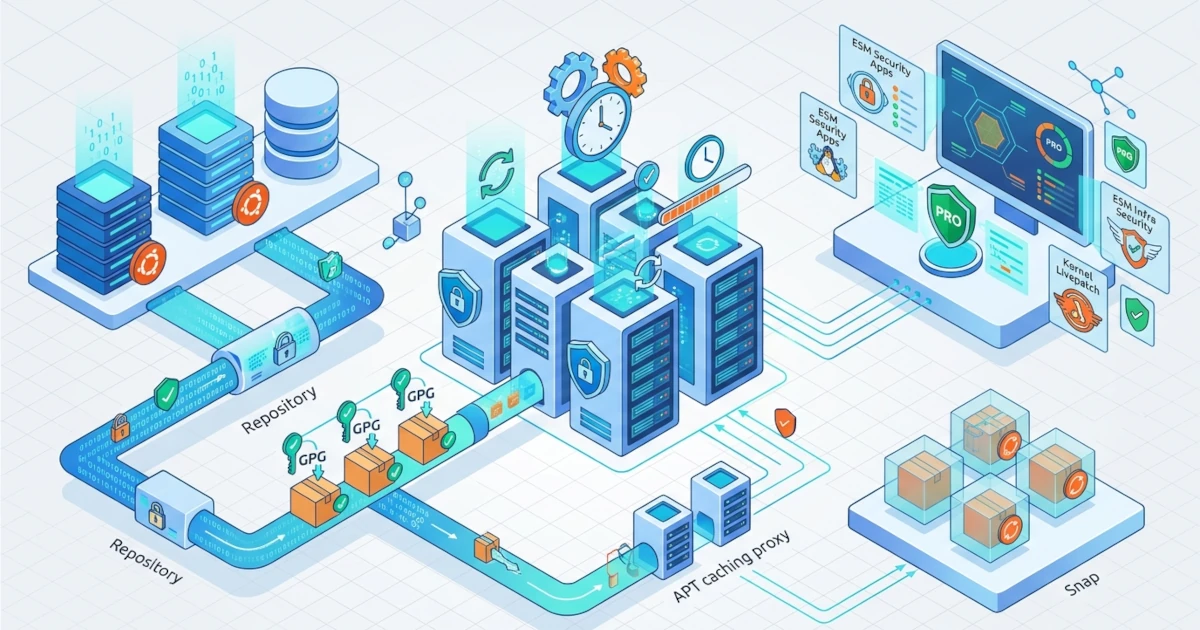
Every time we run apt install, there is a long chain of trust working behind the scenes, starting from the official Ubuntu repositories, GPG keys verifying package authenticity, to dependencies installed automatically without asking us one by one. On a personal workstation, this matter usually stops at the principle of "as long as it installs." On a production server, the stakes are much higher. A single package from an unverified third-party repository can open the door for an Attacker, and a single server receiving security patches late due to a missed manual update can become a vulnerability exploited for months before anyone notices.
This chapter discusses package management from a server perspective, not merely as "how to install an application." We begin by refreshing APT while comparing its mental model with dnf in the RHEL-based ecosystem, then move on to more cautious repository strategies, security update automation via unattended-upgrades and Livepatch, the position of snap in server environments, and conclude with Ubuntu Pro as a foundation for long-term compliance.
6.1 APT Review and the dnf Mental Model for Servers
APT (Advanced Package Tool) is a high-level package management layer used by Ubuntu and the entire Debian family. APT handles resolving dependencies, fetching packages from repositories, and calling dpkg at the lower level to actually install files onto the system. Sysadmins coming from a RHEL, CentOS, Fedora, or Rocky Linux background are usually accustomed to dnf. The good news is that their mental models are nearly identical: both work with the concept of registered repositories, automatic dependency resolution, and a local metadata cache that needs to be refreshed prior to the installation process.
| Task | APT (Ubuntu/Debian) | dnf (RHEL-based) |
|---|---|---|
| Refresh repository metadata | apt update | dnf check-update |
| Upgrade all packages | apt upgrade / apt full-upgrade | dnf upgrade |
| Install new package | apt install package-name | dnf install package-name |
| Remove package and unused dependencies | apt autoremove | dnf autoremove |
| Search package information | apt show package-name | dnf info package-name |
| Transaction history | cat /var/log/apt/history.log | dnf history |
The difference that most often traps cross-ecosystem Sysadmins lies in automation rather than daily interactive commands. Provisioning scripts or image builds on servers should use apt-get instead of apt. While apt is indeed more convenient for human use due to its user-friendly color output and progress bars, that interface is deliberately not guaranteed to remain stable across releases and may change at any time. apt-get and apt-cache are older interfaces with stable output formats, making them far safer to use inside Ansible playbooks or automation shell scripts, which we will discuss in Chapters 35 and 36.
The second critical item to consider in automation scripts is interactive prompts. APT occasionally displays configuration dialogs (for instance, during a package upgrade that modifies configuration files), and these dialogs can cause automation scripts to hang indefinitely waiting for input that never comes. Always set the following environment variable before executing APT from non-interactive scripts.
export DEBIAN_FRONTEND=noninteractiveA structural change to note in Ubuntu Server 26.04 LTS is the repository source file format. Since Ubuntu 24.04 LTS, the default format transitioned from the one-liner style .list to the more structured deb822 format, stored as /etc/apt/sources.list.d/ubuntu.sources. The old /etc/apt/sources.list file is still read by APT if present, but new installations of Ubuntu Server 26.04 LTS use this deb822 format out of the box.
Quick Verification
cat /etc/apt/sources.list.d/ubuntu.sourcesThe deb822 format writes each repository as key-value blocks separated by blank lines (similar to email header formats), unlike the old .list format that compressed all information into a single line. The Types, URIs, Suites, Components, and Signed-By blocks are much easier to read and parse using automation tools compared to the legacy single-line format.
A common pitfall encountered by Sysadmins migrating from legacy Ubuntu releases: apt update suddenly displays duplicate source warnings when legacy /etc/apt/sources.list files still contain active lines pointing to the official Ubuntu repositories already declared in ubuntu.sources. The solution is not to delete ubuntu.sources, but rather to clear or remove the duplicate lines in the old /etc/apt/sources.list file.
6.2 Repository Management
Official Ubuntu repositories (main, universe, restricted, multiverse) undergo security review and support processes by the Ubuntu Security team. When we add repositories beyond these, the responsibility for security verification shifts entirely to us as Sysadmins. This section discusses two often overlooked aspects of repository management: the risks of adding third-party sources and strategies to accelerate updates via local mirrors.
6.2.1 PPAs, Third-Party Repositories, and Their Risks
PPA (Personal Package Archive) is a repository hosted by Launchpad, allowing anyone, individuals or organizations, to distribute Ubuntu packages without going through the official main archive review process. PPAs are very useful for acquiring newer software versions than those available in official repositories (such as the latest Nginx or PostgreSQL versions before landing in Ubuntu's stable repository), but this convenience carries consequences.
Unlike packages in main and universe, packages in PPAs are not audited by the Ubuntu Security team and do not automatically receive backported security patches. PPA maintainers can abandon their repositories at any time without notice, leaving our servers dependent on unpatched, frozen package versions. A more severe risk: a compromised or intentionally malicious PPA can inject rogue packages that automatically install via routine upgrades, because APT treats PPA packages identically to official packages once the repository is added and trusted.
Practical Steps
- Before adding any PPA to a production server, audit the maintainer and their activity via that PPA's Launchpad page. Note when the last update occurred and the size of the user base reporting issues.
- If the PPA is deemed suitable, add it using
add-apt-repository, which automatically handles importing GPG keys and creating the repository source file.sudo add-apt-repository ppa:ownername/projectname sudo apt update - Inspect the newly created source file to confirm that the repository correctly points to the intended PPA, rather than a typosquatted name.
cat /etc/apt/sources.list.d/*projectname*.sources - If a PPA must be completely removed along with packages installed from it (for example, if the PPA becomes unmaintained), use
ppa-purgeinstead of deleting it manually, as this tool automatically reverts packages back to official Ubuntu archive versions.sudo apt install ppa-purge sudo ppa-purge ppa:ownername/projectname
Verification and Troubleshooting
- A list of all active third-party repositories on the server can be viewed simultaneously using the following command, which is extremely useful during security audits or when inheriting servers from previous Sysadmins.
grep -rh ^deb /etc/apt/sources.list.d/ 2>/dev/null ls /etc/apt/sources.list.d/*.sources 2>/dev/null - In production environments, a far safer practice is to restrict third-party repositories to a minimum and document the rationale for every addition. Servers filled with PPAs from unverified sources can become a nightmare during security audits or system hardening procedures discussed in Chapter 30.
- When options exist, prioritize official Ubuntu
universeor backports repositories over third-party PPAs for newer software requirements, as both remain covered under Canonical's support umbrella.
6.2.2 Local Mirrors for Faster Updates
When dozens or hundreds of servers reside on the same internal network, pulling updates individually from official Ubuntu repositories over the internet wastes bandwidth and slows down deployment. This issue becomes acute during major security patch releases that must be deployed across all servers immediately. The solution is a local mirror, a copy or cache of the Ubuntu repository hosted on the internal network, allowing each server to pull packages locally rather than reaching out to the internet every time.
There are two common approaches. The first approach, a full mirror via apt-mirror, downloads the complete contents of the Ubuntu repository to a local server. This approach is suitable for large organizations with many servers requiring complete control over repository content. The second approach, a caching proxy via apt-cacher-ng, stores only package copies explicitly requested by client servers. This method is significantly lighter on storage and better suited for small to medium scale deployments.
Practical Steps: Caching Proxy with apt-cacher-ng
- On the server acting as the cache host, install
apt-cacher-ng.sudo apt update sudo apt install apt-cacher-ng - By default,
apt-cacher-ngruns as a systemd service listening on port3142. Verify it before moving to client configuration.systemctl status apt-cacher-ng - On each client server intended to use this cache, configure APT to route traffic through the proxy via a new configuration file.
sudo nano /etc/apt/apt.conf.d/02proxyAcquire::http::Proxy "http://cache-server-ip:3142"; - Run
apt updateon the client server normally. Downloaded packages will now route through the local cache.sudo apt update
Verification and Troubleshooting
- Open the status page for
apt-cacher-ngin a browser athttp://cache-server-ip:3142/acng-report.htmlto view cache hit statistics and saved packages. - If clients fail to download packages through the proxy, verify that port
3142is not blocked by firewalls between client and cache servers. Firewall configurations for such scenarios are detailed in Chapter 31. - In real-world deployments, local mirrors show their greatest benefit during mass automated server rebuilds (such as via Ansible or cloud-init images covered in Chapters 36 and 37). This process completes in minutes rather than hours because servers avoid repeatedly fetching identical packages over the internet.
6.3 Update Automation
Manual updates relying on Sysadmin memory to log into servers individually are a recipe for security vulnerabilities. Ubuntu Server provides two complementary automation mechanisms: unattended-upgrades for routine userspace package updates, and Livepatch for kernel patches that require no rebooting.
6.3.1 unattended-upgrades: Automated Security Configuration
unattended-upgrades is an official Ubuntu package that performs security updates automatically in the background, requiring no daily Sysadmin intervention. On server installations provisioned via Subiquity (discussed in Chapter 2), this package is often pre-installed, though understanding and tweaking its configuration remains essential.
Practical Steps
- Ensure
unattended-upgradesis installed.sudo apt update sudo apt install unattended-upgrades - Enable automatic update mechanisms interactively via Debian's configuration dialog.
sudo dpkg-reconfigure -plow unattended-upgrades - Inspect and configure which update sources may install automatically. By default, only security origins are enabled, deliberately conservative to prevent routine updates from unexpectedly altering major application versions in production.
sudo nano /etc/apt/apt.conf.d/50unattended-upgradesUnattended-Upgrade::Allowed-Origins { "${distro_id}:${distro_codename}-security"; "${distro_id}ESMApps:${distro_codename}-apps-security"; "${distro_id}ESM:${distro_codename}-infra-security"; }; - Verify that the mechanism is scheduled to execute via the dedicated file controlling execution intervals.
cat /etc/apt/apt.conf.d/20auto-upgradesAPT::Periodic::Update-Package-Lists "1"; APT::Periodic::Unattended-Upgrade "1";
Two additional directives in 50unattended-upgrades warrant careful consideration for production servers. Unattended-Upgrade::Remove-Unused-Dependencies cleans up unused dependencies after upgrades, while Unattended-Upgrade::Automatic-Reboot determines if the server may automatically reboot when required by kernel updates.
Unattended-Upgrade::Automatic-Reboot "false";
Unattended-Upgrade::Automatic-Reboot-Time "02:00";
Automatic reboots during agreed maintenance windows (e.g., early morning) make sense for servers where brief downtime is acceptable. However, for production database servers or high-availability services, keep Automatic-Reboot set to false and handle kernel reboots manually on controlled schedules. Automatic reboots conflicting with peak hours can cause avoidable downtime incidents.
Verification and Troubleshooting
- Simulate an upgrade process without making system changes. This confirms that configuration settings are valid before relying on automated execution.
sudo unattended-upgrades --dry-run --debug - Check execution logs to review automatically upgraded packages.
cat /var/log/unattended-upgrades/unattended-upgrades.log - If a package must be excluded from automatic upgrades (e.g., specific kernel versions retained for driver compatibility), add it to the blacklist list.
Unattended-Upgrade::Package-Blacklist { "linux-image-*"; }; - After automated kernel updates install, run
needrestartto identify services or processes using outdated in-memory libraries that need restarting to apply security patches.sudo apt install needrestart sudo needrestart
6.3.2 Livepatch: Kernel Patching Without Reboots
Standard kernel updates, even when automated using unattended-upgrades, still require system reboots to apply patches. For critical kernel vulnerabilities requiring immediate remediation, waiting for the next scheduled maintenance window leaves systems exposed. Canonical Livepatch addresses this by injecting security patches directly into the running kernel in memory without rebooting.
Livepatch is included as part of Ubuntu Pro, and its scope extends to ARM64 architectures alongside x86_64. Cloud-based ARM64 servers and server-grade devices like the Raspberry Pi can leverage zero-downtime kernel patching.
Practical Steps
- Livepatch requires an active Ubuntu Pro subscription (covered in Section 6.5). Once the Ubuntu Pro token is attached, enable the service specifically.
sudo pro enable livepatch - Check Livepatch status, including monitored kernel versions and applied patches.
canonical-livepatch status --verbose
Verification and Troubleshooting
- A
runningstatus incanonical-livepatch statusoutput indicates the service is actively monitoring the kernel. The fixes column displays CVEs patched live on the running kernel. - Livepatch applies only to supported official generic Ubuntu kernels, not custom-compiled kernels. If a server uses a custom kernel, Livepatch will not function, and manual reboots remain the only way to apply updates.
- Livepatch does not replace scheduled reboot maintenance. It acts as an extra defense layer for critical zero-day vulnerabilities, while scheduled reboots ensure all system components outside the kernel run clean versions.
6.4 Snap in Server Environments
Snap is a universal package format developed by Canonical that packages applications along with their dependencies into self-contained containers, isolated from the base system via confinement mechanisms. Snap acts as an alternative to deb/APT, offering automatic updates and version consistency across Linux distributions. On servers, snaps provoke debate because desktop-centric behaviors do not always align with production needs.
6.4.1 When Snap Makes Sense vs. When to Avoid It
Snap makes sense on servers for specific use cases. Standalone utilities requiring minimal system integration, such as certbot for Let's Encrypt certificates (Chapter 17) or lxd/Incus for system containers (Chapter 29), benefit from snap's automatic updates because such tools should ideally stay up to date for protocol compatibility and security.
Conversely, snaps should be avoided for core production stack applications requiring strict versioning control. Concrete reasons faced by Sysadmins include:
- Uncontrolled automatic update schedules. By default, snap checks and applies updates automatically every few hours. For production applications requiring staging and approval processes, this behavior risks introducing unannounced changes outside approved maintenance windows.
- Overhead of
snapdand loop devices. Every snap package runs from asquashfsfilesystem mounted as a separate loop device. This adds systemd processes to monitor and increases disk space consumption for retained rollback revisions. - Classic confinement weakens isolation. Several popular snaps, including development tools, use
classicconfinement mode, which disables sandboxing for system access, effectively negating snap isolation security benefits. - Dependency on Snap Store. Servers running in air-gapped environments without direct internet connectivity require custom proxy configurations for Snap Store, unlike APT which easily points to internal mirrors as discussed in Section 6.2.2.
Quick Verification
snap list
snap services
The first command displays all installed snaps along with version and release channels (stable, candidate, beta, or edge). The second command displays snaps running as background systemd services, useful for auditing resources on overhead-sensitive servers.
Verification and Troubleshooting
- For snaps that must be installed but require controlled updates, use
snap refresh --holdto temporarily delay updates, allowing scheduled manual refreshes at predetermined times.sudo snap refresh --hold=720h snap-name - In production environments, the safest approach is to use snap sparingly for utility tools designed to stay updated, while relying on APT/deb for core infrastructure components managed via staging pipelines.
6.5 Ubuntu Pro
First referenced in Chapter 1, Ubuntu Pro serves as the underlying subscription behind features like Livepatch. This closing section covers Ubuntu Pro comprehensively: features provided and steps to activate it for personal use at no cost.
6.5.1 Included Features (ESM, Livepatch, Compliance)
Ubuntu Pro is Canonical's subscription service expanding security coverage and adding enterprise features to standard Ubuntu LTS releases. Its three core components include:
| Component | Function |
|---|---|
| ESM (Expanded Security Maintenance) | Extends security patch coverage for packages in main and universe repositories from the 5-year LTS baseline up to 10 years, including universe packages lacking official security coverage outside Ubuntu Pro. |
| Livepatch | Rebootless kernel security patching, as covered in Section 6.3.2. |
| Compliance tooling | USG (Ubuntu Security Guide) to audit and apply industry hardening benchmarks (CIS Benchmark, DISA-STIG), alongside access to FIPS-certified cryptographic modules for regulated environments. |
For Sysadmins managing long-lifecycle servers, such as internal infrastructure rarely upgraded to newer LTS releases, ESM represents the primary reason to adopt Ubuntu Pro. Without ESM, unmaintained universe packages past their standard support window can harbour unpatched vulnerabilities while running normally.
6.5.2 Free Activation for Personal Use
Canonical offers free Ubuntu Pro subscriptions for personal use up to a limited machine count. Specific quotas are subject to change, so consult ubuntu.com/pro for current limits. This offer allows Sysadmins to explore features on personal servers, homelabs, or learning environments used throughout this book.
Practical Steps
- Register an Ubuntu One account (if needed) and retrieve a personal activation token at
ubuntu.com/pro. - Verify that
ubuntu-pro-clientis installed. On Ubuntu Server 26.04 LTS, this package comes pre-installed on fresh deployments.sudo apt install ubuntu-pro-client - Attach Ubuntu Pro on the server using the obtained token.
sudo pro attach YOUR_ATTACH_TOKEN
Verification and Troubleshooting
- Check status across all Ubuntu Pro services to see active and available components.
pro status - To activate specific components independently, such as enabling ESM while leaving Livepatch disabled, use
pro enableorpro disableper service.sudo pro enable esm-infra sudo pro disable livepatch - Be mindful of limitations: free tiers target personal use, not commercial server fleets. When managing enterprise infrastructure across dozens of nodes, evaluate paid commercial Ubuntu Pro plans with full Canonical support.
At this point, we have built a package management strategy extending beyond running apt install, covering repository selection risks, update automation via unattended-upgrades and Livepatch, evaluating snap usage, and activating Ubuntu Pro. Chapter 7 covers advanced storage topics, ranging from LVM and software RAID to disk health monitoring essential for production data workloads.