
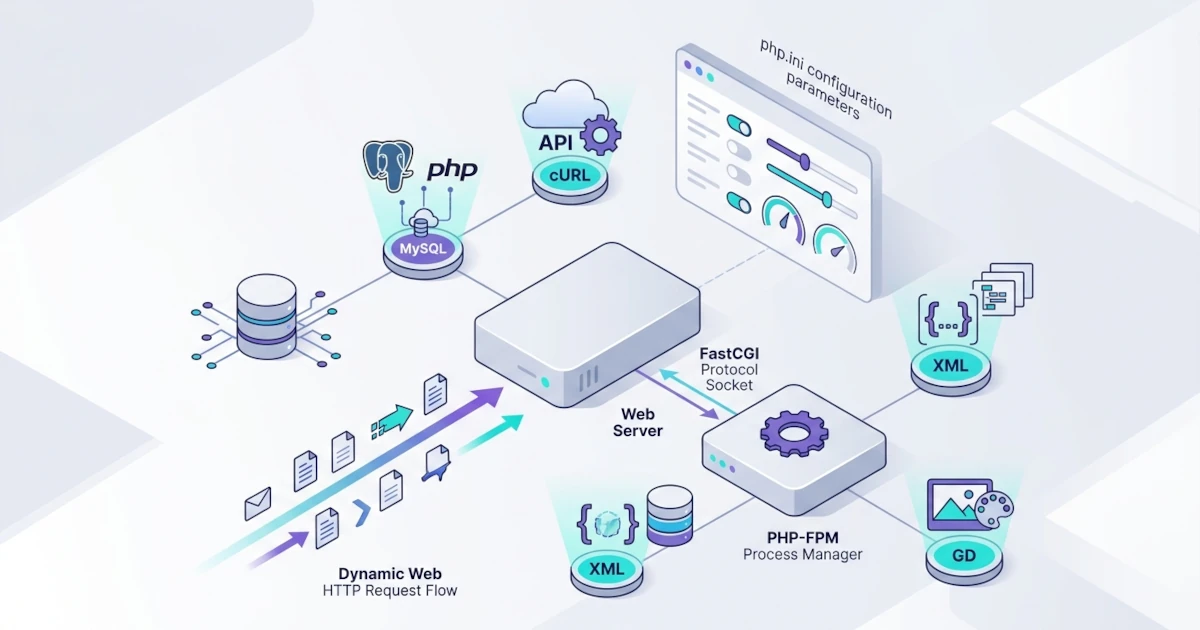
Nginx from Chapter 12 and Apache from Chapter 13 have proven capable of serving the example.local and blog.example.local pages well, but both have only been tested with static HTML files. In practice, almost all web applications actually used by Clients, ranging from CMSs like WordPress to modern frameworks like Laravel, require content that is dynamically generated when a request comes in, not just files read as-is from disk. Web servers like Nginx and Apache do not actually know how to run PHP code at all; both are only good at serving files and forwarding requests. There is another layer responsible for translating .php files into HTML output, and that is the role of PHP and its runtime.
This chapter discusses the installation of PHP and common extensions required by web applications, followed by an explanation of two PHP integration models to web servers, namely mod_php and PHP-FPM, along with the reasons why PHP-FPM has become the current standard choice. After that, we practice connecting PHP-FPM directly to Nginx via FastCGI and to Apache via mod_proxy_fcgi, reusing the example.local virtual host built in Chapter 12 and Chapter 13. The chapter closes with basic php.ini configuration, testing with a real PHP script, and an introduction to Composer as the standard PHP dependency manager used by almost all modern frameworks including Laravel, serving as preparation before Chapter 15 covers Node.js as an alternative web application runtime, and Chapter 16 covers reverse proxy and load balancing for more complex backend applications.
14.1 PHP Installation and Common Extensions for Web Needs
PHP is a server-side scripting language designed specifically for web development, executed on the server before the results are sent as plain HTML to the Visitor's browser. Ubuntu Server provides PHP directly from the official repository, so its installation does not require third-party repositories for standard needs.
14.1.1 Installing PHP-FPM and PHP CLI from the Ubuntu Repository
There are several PHP package variants in Ubuntu, depending on how PHP will be run. For the needs of this chapter, we install two variants simultaneously: php-fpm to run PHP behind a web server, and php-cli to run PHP scripts directly from the terminal, which is also useful for testing and troubleshooting purposes.
Practical Steps
- Update the package list, then install PHP-FPM and PHP CLI.
Thesudo apt update sudo apt install php-fpm php-cliphp-fpmandphp-clipackages are actually metapackages that pull Ubuntu's default PHP version, for examplephp8.4-fpmandphp8.4-cli. The exact version may differ depending on when the Ubuntu repository was last synced, so do not be surprised if the numbers do not match the examples in this module exactly. - Unlike Nginx and Apache which immediately listen on a port once installed, PHP-FPM is only truly useful after being connected to a web server in Section 14.3. Even so, its service is still automatically active and running as soon as the installation completes. Confirm its status.
systemctl status php8.4-fpm.service - Check the version of PHP actually installed.
php -v
Verification and Troubleshooting
- If the service name
php8.4-fpm.serviceis not found, check the version of PHP actually installed viaphp -vfirst, then adjust the version number in allsystemctlcommands in this chapter. - PHP-FPM listens via a Unix socket, not a TCP port, so
ss -tlnpwill not show it. Use the following command to ensure its socket is actually created.
Thels -l /run/php/php8.4-fpm.sockfile should already be there as soon as the service is active.
14.1.2 Common PHP Extensions for Web Needs
A basic PHP installation only includes core functions of the language. Real-world needs like database connections, image processing, or reading XML files require additional extensions installed separately. Almost all modern PHP CMSs and frameworks, including WordPress and Laravel, require a specific combination of extensions to run without errors.
Practical Steps
- Install the collection of extensions most frequently needed by PHP web applications.
Just likesudo apt install php-mysql php-pgsql php-curl php-mbstring php-xml php-zip php-gd php-intlphp-fpm, these packages are metapackages that pull specific versions corresponding to the installed PHP. Thephp-mysqlandphp-pgsqlpackages respectively provide drivers for MySQL/MariaDB and PostgreSQL, two databases we will install in Chapter 17 and Chapter 18. Thephp-curlpackage is used by applications to call external APIs,php-mbstringhandles multi-byte string encoding like UTF-8,php-xmlandphp-zipare required for many data import/export processes, whilephp-gdhandles image processing such as thumbnails. - Restart PHP-FPM so the new extensions are actually loaded.
sudo systemctl restart php8.4-fpm - Ensure the newly installed extensions are actually recognized by PHP.
php -m | grep -Ei 'mysqli|pgsql|curl|mbstring|gd'
Verification and Troubleshooting
- In the field, a
Call to undefined functionerror on a PHP application newly moved to a new server almost always means an extension was forgotten, not a bug in the application code. Match the error message with the list of active extensions viaphp -mbefore assuming the application code is at fault. - Adding new extensions in the future always requires a PHP-FPM restart, because PHP loads its entire extension list only once when the process first starts, similar to the Apache module restart habit we learned in Section 13.3.1.
14.2 mod_php vs PHP-FPM: Model Differences and When to Use Each
PHP needs a way to connect to a web server before it can process Visitor requests, and there are two main models for this: mod_php and PHP-FPM. Understanding the architectural differences between the two is important for Sysadmins, because the wrong choice can lead to confusing compatibility issues, especially on servers already using MPM event like the Apache installation result in Chapter 13.
14.2.1 mod_php: PHP Embedded Directly in the Web Server
mod_php is an Apache module, installed via packages like libapache2-mod-php, which embeds the PHP interpreter directly into every Apache worker process. Every time Apache receives a request for a .php file, that worker process itself runs the PHP code without needing to communicate with another process. This model is simple and was once the de facto standard for many years, but it has a fundamental flaw: the PHP interpreter is not thread-safe, so mod_php can only run on top of MPM prefork which uses one separate process per connection, not MPM worker or event which use threads.
The consequences are directly felt on our server. Ubuntu Server uses MPM event as default since recent releases, as discussed in Section 13.1. Check the currently active MPM again.
apache2ctl -M | grep mpmAs long as the output shows mpm_event_module, installing mod_php means forcing Apache to switch back to MPM prefork, which is far more memory-intensive for high traffic loads, a trade-off that is rarely worth it just to run PHP. This is the main reason mod_php is increasingly abandoned in new installations, although it is still widely found on older servers that have been running for a long time without being migrated.
14.2.2 PHP-FPM: Standalone Process Manager
PHP-FPM (FastCGI Process Manager) takes a completely different approach. PHP-FPM runs as its own service, completely separated from the web server process, and communicates with Nginx or Apache via the FastCGI protocol, either through a Unix socket like /run/php/php8.4-fpm.sock which we saw in Section 14.1.1, or over a TCP port. The web server simply forwards requests for .php files to that socket, waits for the result, and sends it back to the Visitor, exactly like the reverse proxy mechanism we practiced in Section 12.3.2.
Because it stands alone, PHP-FPM does not care at all which MPM Apache is using, and can be paired with Nginx, which does not even have the concept of PHP modules. PHP-FPM also manages its own worker processes through the concept of pools, groups of PHP processes whose minimum, maximum, and scaling strategy can be configured independently of the web server configuration. It also allows multiple versions of PHP to run side-by-side on the same server, each with its own pool and socket. This is something impossible for mod_php, because its interpreter is directly merged with the Apache process.
14.2.3 Comparison Table and Recommended Usage
In the field, PHP-FPM has become the standard choice for new installations, including the official WordPress documentation which recommends Nginx with PHP-FPM as one of the recommended stacks. mod_php remains relevant as historical knowledge and for special cases of legacy servers running applications heavily dependent on its behavior, but it is not the default choice for servers built from scratch.
| Aspect | mod_php | PHP-FPM |
|---|---|---|
| Execution location | Embedded inside Apache worker processes | Separate process/service, contacted via FastCGI |
| MPM/web server compatibility | Only MPM prefork, Apache specific | All Apache MPMs, also Nginx and other web servers |
| Multi-version PHP | Difficult, one interpreter per Apache process | Easy, each version has its own pool and socket |
| Resource isolation | Merged with Apache resources | Can be managed independently via pool configuration |
| Current status in the field | Legacy, maintained for old compatibility | De facto standard for new installations |
The next section practices connecting the installed PHP-FPM directly, both to Nginx and to Apache.
14.3 Connecting PHP-FPM to Nginx (FastCGI) and to Apache (proxy_fcgi)
PHP-FPM, which has been active since Section 14.1, is not yet connected to any web server, so requests for .php files still cannot be processed. This section connects PHP-FPM to Nginx via the default FastCGI configuration, then to Apache via the mod_proxy_fcgi module, reusing the exact same document root and example.local virtual host from Chapter 12 and Chapter 13.
14.3.1 Connecting PHP-FPM to Nginx
Nginx has been actively serving example.local since the end of Chapter 13, so this section can be practiced directly without modifying any services first.
Practical Steps
- Create a simple test file in the existing
example.localdocument root.echo "<?php phpinfo(); ?>" | sudo tee /var/www/example.local/html/info.php sudo chown www-data:www-data /var/www/example.local/html/info.php - Edit the
example.localserver block.sudo nano /etc/nginx/sites-available/example.local - Add
index.phpto the existingindexdirective, then add the following newlocationblock inside theserverblock.
Theindex index.html index.php; location ~ \.php$ { include snippets/fastcgi-php.conf; fastcgi_pass unix:/run/php/php8.4-fpm.sock; }nginxpackage from the Ubuntu repository includes the/etc/nginx/snippets/fastcgi-php.conffile by default. This file contains standard FastCGI parameters, includingSCRIPT_FILENAMEwhich tells PHP-FPM exactly which.phpfile to execute, so we do not need to manually rewrite these parameters in every server block. - Test the syntax, then apply the changes.
sudo nginx -t sudo systemctl reload nginx - Test from another computer on the same network.
curl http://www.example.local/info.php
The resulting response is a long HTML page containing PHP configuration details, signaling that Nginx successfully forwarded the request to PHP-FPM and received the output back. Note that accessing http://www.example.local/ without specifying info.php still displays the old index.html from Chapter 12, instead of automatically looking for index.php, because Nginx reads the index directive sequentially from left to right, and index.html is still found first in the document root.
Verification and Troubleshooting
- The appearance of a
502 Bad Gatewayerror here has a different meaning than a502on a regular reverse proxy in Section 12.3.2. The cause is almost always a misspelled socket path or PHP-FPM not yet active, rather than a dead HTTP backend. Confirm with the following command:systemctl status php8.4-fpm.service ls -l /run/php/php8.4-fpm.sock - If the
File not found.error appears inside the response body instead of a regular Nginx error page, it generally meansfastcgi_passis correct but PHP-FPM could not find the file at the path passed to it. Ensure therootin the server block matches the document root where the PHP file is actually stored. - The
phpinfo()page reveals many server configuration details, including internal paths and software versions. Remove or disable thisinfo.phpfile on production servers after testing is complete, as this information greatly assists Attackers in mapping potential vulnerabilities to exploit.
14.3.2 Connecting PHP-FPM to Apache (proxy_fcgi)
Apache has been inactive since being stopped at the end of Chapter 13, while Nginx is still using port 80. Similar to the pattern in Chapter 13, stop Nginx first before activating Apache to avoid port conflicts, then reuse the example.local.conf virtual host built in Section 13.2.1.
Practical Steps
- Stop Nginx, then reactivate Apache.
sudo systemctl stop nginx sudo systemctl start apache2 - Enable the
proxy_fcgiandsetenvifmodules, the two modules required by Apache to communicate with PHP-FPM via FastCGI.sudo a2enmod proxy_fcgi setenvif - The
php8.4-fpmpackage in Ubuntu automatically prepares an integration configuration file for Apache as soon as it detectsapache2is installed. Check its existence.
Thels /etc/apache2/conf-available/ | grep phpphp8.4-fpm.conffile should already be there, with contents roughly like this:
This<FilesMatch \.php$> SetHandler "proxy:unix:/run/php/php8.4-fpm.sock|fcgi://localhost/" </FilesMatch>SetHandlerdirective is the core connector. Every request for a file ending in.phpis forwarded viamod_proxy_fcgito the exact same PHP-FPM socket used by Nginx in Section 14.3.1, a sign that both web servers truly share the single same PHP engine behind them. - Enable the configuration.
sudo a2enconf php8.4-fpm - Restart Apache, because enabling new modules requires a full restart as discussed in Section 13.3.1.
sudo apache2ctl configtest sudo systemctl restart apache2 - Test from another computer on the same network.
curl http://www.example.local/info.php
The phpinfo() page that appears should be identical to the one served by Nginx earlier, because both actually forward requests to the same PHP-FPM process, with only the path in front being different.
Verification and Troubleshooting
- If Apache still downloads raw
.phpfiles instead of executing them, most likelya2enconf php8.4-fpmhas not been run or a restart has not been performed afterward. Confirm with the following command:apache2ctl -M | grep proxy_fcgi - If
libapache2-mod-phpwas previously installed on the same server from another experiment, that module might conflict withproxy_fcgibecause both claim to handle.phpfiles. Disable it first withsudo a2dismod php8.4before enablingproxy_fcgi. - We can prove that both web servers share the exact same PHP-FPM by creating a small script that displays the active SAPI.
The output remainsecho '<?php echo php_sapi_name(); ?>' | sudo tee /var/www/example.local/html/sapi.php curl http://www.example.local/sapi.phpfpm-fcgiwhether accessed via Nginx or Apache, rather thanapache2handlerwhich appears when usingmod_php. This is clear evidence that PHP-FPM is not tied to any specific web server.
Return the server to baseline state after this testing is complete, following the same pattern as the closing of Chapter 13, so Nginx remains the main web server for upcoming chapters.
sudo systemctl stop apache2
sudo systemctl disable apache2
sudo systemctl start nginx
curl http://www.example.local/info.php
PHP-FPM itself does not need to be restarted or modified when switching from Apache back to Nginx, as the service runs independently of whichever web server is currently active, which is the core of the architectural difference discussed in Section 14.2.2.
14.4 Basic php.ini Configuration and Testing with PHP Scripts
PHP stores most of its behavior settings in the php.ini file, ranging from memory limits to whether error messages are allowed to be displayed to Visitors. This section practices modifying several directives most frequently adjusted by Sysadmins in the field, while closing the chapter with a final test using a PHP script that better reflects real usage compared to just phpinfo().
14.4.1 Most Frequently Adjusted php.ini Directives
Ubuntu separates php.ini files based on the SAPI using them, rather than providing a single file for all contexts. Since the installation in Section 14.1, only two directories are relevant to us: /etc/php/8.4/fpm/php.ini used by PHP-FPM when serving the web, and /etc/php/8.4/cli/php.ini used when PHP is run via the terminal. Changing one does not affect the other at all, a common source of confusion when a setting has been "changed" but its behavior does not change in the browser.
Practical Steps
- Edit PHP-FPM's
php.ini, as this is what actually affects our web applications.sudo nano /etc/php/8.4/fpm/php.ini - Find and adjust the following directives as needed.
Thememory_limit = 256M upload_max_filesize = 20M post_max_size = 20M display_errors = Offmemory_limitsetting caps the maximum memory usable by a single PHP script, preventing a single problematic request from consuming server resources. Theupload_max_filesizeandpost_max_sizeparameters need to be raised together, because apost_max_sizesmaller thanupload_max_filesizewill still reject large uploads even if the individual file limit has been increased. Thedisplay_errorssetting should be set toOffon production servers, so that PHP error messages that often contain file paths and software versions are not visible to Visitors or Attackers looking for vulnerabilities. - Restart PHP-FPM so changes take effect.
sudo systemctl restart php8.4-fpm - Verify the active values via the
phpinfo()page created in Section 14.3.1.curl -s http://www.example.local/info.php | grep -i memory_limit
Verification and Troubleshooting
- If the value shown in
phpinfo()is still the old value, most likely the wrong file was edited, for example accidentally editingphp.iniin theclidirectory instead offpm, or PHP-FPM was not restarted after changes were made. - After
display_errorsis turned off, fatal errors in PHP scripts will only display a blank white page without any message to the browser, widely known as the White Screen of Death among PHP Developers. Do not panic seeing this blank page; trace the PHP-FPM error log first before concluding something is broken.sudo tail -n 20 /var/log/php8.4-fpm.log
14.4.2 Final Testing with PHP Script
To conclude, we create a small PHP script that actually processes simple logic, rather than just displaying static configuration info like phpinfo(), while verifying that all layers built throughout this chapter actually work together.
Practical Steps
- Create the
status.phpfile in theexample.localdocument root.sudo nano /var/www/example.local/html/status.php - Add the following code.
<?php echo "<h1>PHP is active on this server</h1>"; echo "<p>Current server time: " . date('Y-m-d H:i:s') . "</p>"; echo "<p>PHP SAPI running this script: " . php_sapi_name() . "</p>"; echo "<p>mysqli extension installed: " . (extension_loaded('mysqli') ? 'Yes' : 'No') . "</p>"; - Before accessing via a browser, check its syntax directly from the terminal via PHP CLI installed in Section 14.1.1. This step is a good habit to catch typos early before they affect Visitors.
Healthy output showsphp -l /var/www/example.local/html/status.phpNo syntax errors detected. - Match file ownership, then test from another computer on the same network.
sudo chown www-data:www-data /var/www/example.local/html/status.php
curl http://www.example.local/status.php
Verification and Troubleshooting
- The
date()line in the output should show the current server time. If the clock is far off from actual time, this is not a PHP issue, but a sign that timezone configuration or time synchronization viachronyfrom Chapter 11 needs review, along with a note thatdate.timezoneinphp.inialso needs to be set explicitly so PHP does not rely on system timezone guesses. - The
php_sapi_name()line is the fastest way to verify PHP-FPM is actually handling requests, rather than another mechanism. Its value should remainfpm-fcgi, consistent with testing in Section 14.3.2.
14.5 Composer: Dependency Manager for PHP
PHP itself only provides the language and its extensions, whereas real applications like Laravel almost always depend on dozens to hundreds of interconnected third-party libraries. Downloading and manually organizing each library along with its respective version and dependencies is clearly impractical, and this is where Composer acts as the standard PHP dependency manager, similar to APT's role at the operating system level discussed in Chapter 6, only working at the application and per-project level instead of per-server.
14.5.1 Installing Composer from the Official Installer
Ubuntu Server actually provides the composer package via apt, but its version tends to lag behind official recent releases due to Ubuntu's repository freeze schedule rather than Composer's release schedule. Documentation for Laravel and most modern frameworks assumes the latest version of Composer, so installing via the official installer script from getcomposer.org is recommended over the apt package for active development needs.
Practical Steps
- Download the installer, then verify its checksum via the official signature before executing it. This verification step is important because the installer is essentially a PHP script executed with Sysadmin privileges.
The messagephp -r "copy('https://getcomposer.org/installer', 'composer-setup.php');" php -r "if (hash_file('sha384', 'composer-setup.php') === file_get_contents('https://composer.github.io/installer.sig')) { echo 'Installer verified'.PHP_EOL; } else { echo 'Installer corrupt, remove and repeat'.PHP_EOL; unlink('composer-setup.php'); }"Installer verifiedmust appear before proceeding to the next step. If a corrupt message appears instead, repeat the download process from the beginning; do not proceed with the file already deleted by the script above. - Run the installer to generate
composer.phar, then remove the installer file as it is no longer needed.php composer-setup.php php -r "unlink('composer-setup.php');" - Move
composer.pharto/usr/local/binso it can be called from any directory as a globalcomposercommand, following the same third-party binary conventions practiced previously on this server.sudo mv composer.phar /usr/local/bin/composer composer --version
Verification and Troubleshooting
- If the
composercommand results incommand not foundafter being moved, make sure/usr/local/binis included in the current user'sPATHviaecho $PATH. - Composer can update itself at any time without repeating the installer process, simply via
sudo composer self-update. - The package
apt install composerremains a valid choice for servers prioritizing version consistency viaunattended-upgradesfrom Chapter 6 and not heavily dependent on the newest Composer features.
14.5.2 Adding Dependencies and Basic Autoloading
This section practices the most common Composer workflow encountered by Sysadmins when setting up or deploying PHP applications, which is adding dependencies and leveraging class autoloading without needing manual include or require for each file.
Practical Steps
- Create an experimental directory separate from the web server document root, so it does not mix with the
example.localvirtual host built in Chapter 12 and Chapter 13.mkdir ~/demo-composer && cd ~/demo-composer - Add a popular library as an example, namely
monolog/monologfor logging needs.
This command automatically creates three things simultaneously:composer require monolog/monologcomposer.jsonwhich records what dependencies are needed by the project,composer.lockwhich locks the exact version of each dependency and its sub-dependencies so reinstallations produce identical versions, and thevendor/directory where library code and its autoloader are actually stored. - Create a small script that utilizes Composer's autoloading, without a single manual
requireline to library files.
Fill with the following code.nano test.php<?php require 'vendor/autoload.php'; use Monolog\Logger; use Monolog\Handler\StreamHandler; $log = new Logger('demo'); $log->pushHandler(new StreamHandler('php://stdout')); $log->info('Composer successfully loaded dependency via autoloading.'); - Run it via PHP CLI.
php test.php
Verification and Troubleshooting
- Healthy output displays a single log line formatted with a timestamp, channel name
demo, levelINFO, and the written message, indicating theMonolog\Loggerclass was loaded automatically byvendor/autoload.phpeven though it was never manually required. - The error
Failed opening required 'vendor/autoload.php'meanscomposer requireorcomposer installhas not been run in that directory, so thevendor/folder does not exist yet. - When moving a Composer-based PHP application to another server or performing a deployment, run
composer install, notcomposer update. Theinstallcommand readscomposer.lockas-is and creates an identical environment, whereasupdatelooks for newer versions satisfying constraints incomposer.jsonand can silently bump dependency versions on production servers. - The
vendor/directory is typically not included in Git repositories due to its large size and ability to be recreated anytime viacomposer install. What must be included arecomposer.jsonandcomposer.lock, as both are the single source of truth for project dependencies.
At this point, PHP-FPM is fully installed with common extensions, connected to Nginx and Apache, ready to run real PHP applications with reasonable default configurations for web needs, and equipped with Composer to manage modern application dependencies like Laravel. Chapter 15 introduces Node.js as a web application runtime with an execution model completely different from PHP-FPM, before Chapter 16 continues the reverse proxy topic touched upon since Chapter 12, this time for various backend applications, including PHP and Node.js, and load balancing across multiple backends at once, followed by Chapter 17 adding an HTTPS layer via Let's Encrypt to all virtual hosts we have built.