
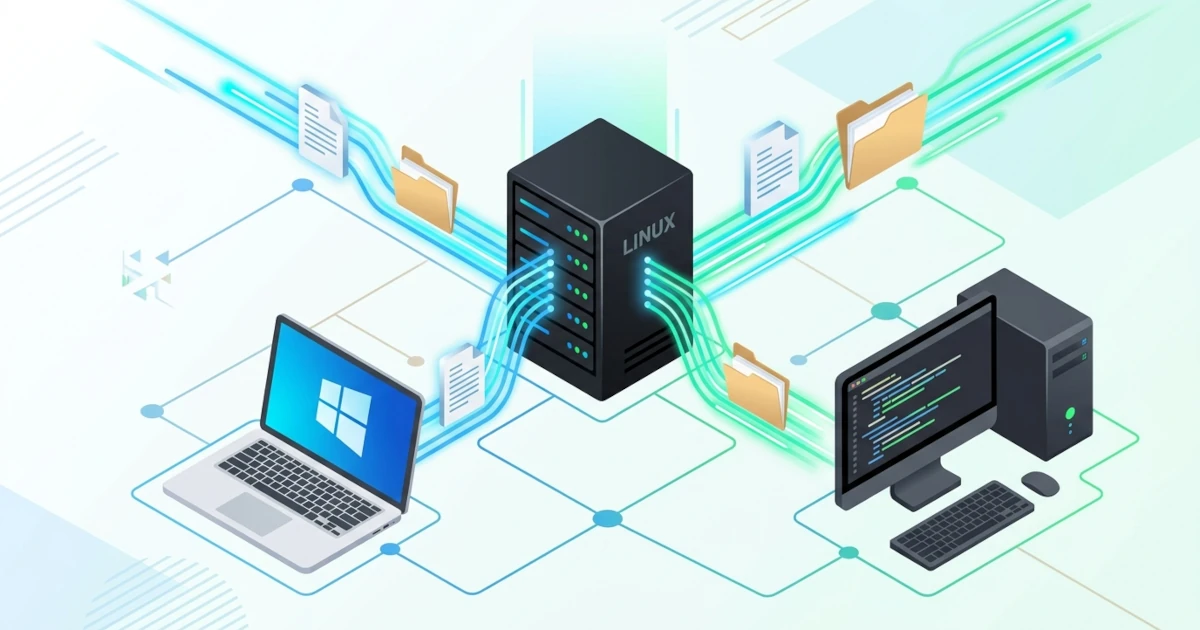
Chapter 23 concludes Part V with backup and restore strategies for the four databases already installed on our server. Chapter 24 opens Part VI with a need that arises far more frequently in daily office life: how a single folder on a Linux server can be accessed simultaneously by the design team's Windows laptops, the developer team's Linux workstations, and other devices across different platforms at the same time. This kind of cross-platform file sharing need is addressed by Samba, the implementation of the SMB/CIFS protocol in the Linux world that has been trusted since the early days of Windows networking. We will understand the basics of the SMB/CIFS protocol, install and configure Samba on Ubuntu Server 26.04 LTS, create a folder share complete with its permissions, configure Samba user authentication, and conclude the chapter by connecting to that share from both Windows and Linux clients.
24.1 SMB/CIFS Concepts
SMB (Server Message Block) is a network protocol used to share files, printers, and other resources between computers on a single network. This protocol was originally developed by IBM in the 1980s, then further developed by Microsoft as the foundation for file sharing across all Windows operating systems. CIFS (Common Internet File System) is the name Microsoft used for an early dialect of SMB during the Windows NT and Windows 95 era, and to this day the term "SMB/CIFS" is still often used interchangeably even though modern SMB versions are vastly different from the original CIFS dialect.
Samba is an open-source project that reimplements the SMB/CIFS protocol so that Unix and Linux systems can communicate with Windows clients without needing any Microsoft licenses or operating systems at all. The project was started by Andrew Tridgell in 1992 and remains the primary bridge for Linux-Windows interoperability to this day. When Samba is installed, our Linux server can act as a file server that Windows Explorer sees exactly like a standard Windows file server, complete with user authentication and folder permissions.
In the field, this kind of platform combination is very common: design and marketing teams use Windows or macOS laptops, while server infrastructure and development teams run on Linux. Samba becomes the most practical answer when Sysadmins must provide a shared folder without forcing any single division to switch operating systems. This requirement differs from NFS discussed in Chapter 25, as NFS was designed purely for Linux/Unix-to-Linux/Unix file sharing and is not natively understood by Windows.
24.1.1 Evolution of SMB Protocol Versions
SMB has gone through several major generations, and the version used directly affects security as well as file transfer performance. The following table summarizes the three main generations relevant to modern Samba configurations.
| Version | Introduced in | Characteristics |
|---|---|---|
| SMB1 | Windows NT / CIFS era (1990s) | Chatty (high network round-trips), no encryption, vulnerable to exploits such as EternalBlue used by the WannaCry ransomware in 2017. Considered obsolete and must not be enabled on production servers. |
| SMB2 | Windows Vista / Windows Server 2008 | Protocol completely overhauled, significantly fewer commands, requests can be batched (compounding) to reduce network round-trips, performance improved significantly compared to SMB1. |
| SMB3 | Windows 8 / Windows Server 2012 | Added transport encryption (SMB Encryption), multichannel to utilize multiple network connections simultaneously, and various advanced security enhancements. Serves as the target modern protocol for current Samba deployments. |
Since Samba version 4.11 released in 2019, the default values for both server min protocol and client min protocol have been changed to SMB2, no longer SMB1. This means modern Samba installations, such as the one shipped with Ubuntu 26.04 LTS, reject SMB1 connections by default, aligning with official Samba project recommendations to protect servers from WannaCry-style exploits. The good news is that almost all modern clients (Windows 10/11, recent macOS versions, and any Linux distribution) support SMB2 and SMB3 without issues, so disabling SMB1 has virtually no impact on daily users, unless there are very legacy devices like network printers or old NAS units that still rely on SMB1.
24.1.2 NetBIOS: A Legacy Mechanism Being Phased Out
NetBIOS is a legacy mechanism for host naming and computer name resolution on local networks via broadcasts, long before DNS became the de facto standard. In the Samba world, the component handling NetBIOS is a separate service called nmbd, while the core process that actually serves file transfers and SMB authentication is smbd. Modern Windows clients no longer rely fully on NetBIOS broadcasts to discover file servers; host name resolution now relies mostly on DNS or direct connections via IP addresses, making NetBIOS gradually a legacy mechanism that no longer needs to be enabled.
Its implication for server configuration: NetBIOS should be explicitly disabled using the disable netbios = yes directive, a recommended hardening step because it reduces the attack surface without sacrificing core file-sharing functionality. The practical steps are covered in Section 24.2.3.
24.2 Installing and Configuring Samba
This section installs Samba from official Ubuntu repositories and aligns its configuration with modern practices: minimum protocol SMB2 and above, and NetBIOS disabled.
24.2.1 Installing the Samba Package
Practical Steps
- Update the package list, then install
sambaalong withsamba-common-binwhich contains administrative tools likesmbpasswd,testparm, andpdbedit.sudo apt update sudo apt install -y samba samba-common-bin - Check the installed Samba version.
smbd --version
Verification and Troubleshooting
- Ensure the main service
smbdis active and running automatically at boot.systemctl status smbd --no-pager - If
apt installfails with anUnable to locate packagemessage, re-runsudo apt updateto ensure the repository index is fully synchronized, identical to APT troubleshooting in Chapter 6.
24.2.2 Understanding the Structure of smb.conf
All Samba configurations are centralized in a single file, /etc/samba/smb.conf, divided into a [global] section for overall server settings and a separate section for each defined share (shared folder or resource), marked by the share name inside square brackets like [share-name]. The Ubuntu package includes example [homes] and [printers] sections in a disabled (commented-out) state as an initial reference.
Practical Steps
- Back up the default configuration file before making changes, a mandatory habit before touching any production service configuration file.
sudo cp /etc/samba/smb.conf /etc/samba/smb.conf.orig - Open the configuration file to inspect its default
[global]section contents.
Note thesudo nano /etc/samba/smb.confworkgroup = WORKGROUPdirective defining the Windows workgroup name, andserver stringwhich acts as the server description when viewed from Network Neighborhood/File Explorer on Windows clients.
Verification and Troubleshooting
- Validate the syntax of the configuration file anytime before reloading, using
testparmbundled insamba-common-bin.
This command readstestparm -ssmb.conf, reports syntax errors if any, and prints the effective configuration actually used by Samba. Always runtestparmevery time you finish editingsmb.conf, becausesmbddoes not explicitly reject an invalid configuration during a reload, but potentially ignores typo directives quietly without clear error messages.
24.2.3 Configuring SMB3 and Disabling NetBIOS
Practical Steps
- Add the following two directives to the
[global]section in/etc/samba/smb.conf.
The default[global] workgroup = WORKGROUP server min protocol = SMB2_10 disable netbios = yesserver min protocolin Samba since version 4.11 is actually SMB2_02 (automatically rejecting SMB1), but we raise it slightly toSMB2_10so the server requires a dialect equivalent to Windows 7 and above, a safer and more explicitly documented baseline. We deliberately do not touchserver max protocol, because its default value is alreadySMB3_11, the latest SMB3 dialect supported by Samba today; rewriting it as merelySMB3risks locking negotiation to the earliest SMB3 dialect (SMB3_00) instead of the latest. Thedisable netbios = yesdirective turns off NetBIOS functionality as explained in Section 24.1.2. - Re-validate the configuration, then apply it by reloading the service.
testparm -s sudo systemctl reload smbd - Since NetBIOS is now disabled, the
nmbdservice is no longer needed. Stop and disable the service so it does not consume server resources without active functionality.sudo systemctl disable --now nmbd - Open the required firewall port. Because NetBIOS is disabled, we only need port
445/tcpfor SMB directly over TCP/IP, without the legacy NetBIOS ports (137, 138, 139) typically included in UFW's default Samba app profile.
In-depth discussion on UFW and app profiles follows in Chapter 31.sudo ufw allow 445/tcp
Verification and Troubleshooting
- Confirm that the minimum protocol and NetBIOS directives are correctly read from the effective configuration.
testparm -s 2>/dev/null | grep -Ei "protocol|netbios" - Ensure only port 445 is actually listening, without port 139 belonging to the NetBIOS session service.
sudo ss -tlnp | grep smbd - If legacy clients (such as network printers or old NAS units) suddenly fail to connect after this change, the cause is almost always that the device only supports SMB1. The solution is not re-enabling SMB1 on the server which poses a security risk, but updating the device's firmware or isolating it on a separate network.
24.3 Creating Shared Folders and Setting Permissions
Practical scenario for this section: the design team and development team need a shared folder named proyek to exchange files, regardless of their respective platforms. This folder must be writable only by authorized team members, not all users on the server.
24.3.1 Preparing Linux Directory and Permissions
Practical Steps
- Create a dedicated system group for members authorized to access this share.
sudo groupadd tim-proyek - Create the directory where share files will be stored, then assign its ownership to that group.
sudo mkdir -p /srv/samba/proyek sudo chown root:tim-proyek /srv/samba/proyek - Apply
2770permissions: owner and group get full read/write/execute access, other users have no access at all, while the setgid bit (leading digit2) ensures every new file created inside this folder automatically inherits group ownership oftim-proyek, rather than the primary group of the user creating it.sudo chmod 2770 /srv/samba/proyek
Verification and Troubleshooting
- Ensure permissions and the setgid bit are properly applied.
Correct output starts withls -ld /srv/samba/proyekdrwxrws---, with the lettersin the group permission position indicating an active setgid bit.
24.3.2 Defining Shares in smb.conf
Practical Steps
- Add a new share section at the end of
/etc/samba/smb.conf.[proyek] path = /srv/samba/proyek valid users = @tim-proyek read only = no create mask = 0660 directory mask = 2770 force group = tim-proyekvalid users = @tim-proyekrestricts access exclusively to members of that group, the@sign denotes a reference to a Linux group, not an individual user.create maskanddirectory maskensure every new file and folder created via Samba maintains permissions consistent with Section 24.3.1, whileforce groupacts as an additional layer forcing group ownership to remaintim-proyekeven if the logged-in user has a different primary group. - Validate and reload the configuration.
testparm -s
sudo systemctl reload smbd
Verification and Troubleshooting
- An
Unknown parameter encounterederror message fromtestparmindicates a typo in a directive name; re-check the spelling of every line inside the[proyek]section.
24.3.3 Verifying Registered Shares
Practical Steps
- Confirm that the
[proyek]section is recognized as part of Samba's effective configuration.
Testing via a real SMB connection (beyond just reading configuration files) can only be performed after Samba users and passwords are created in Section 24.4, as Ubuntu's default configuration does not allow anonymous/guest access to any share.testparm -s 2>/dev/null | grep -A6 "^\[proyek\]"
Verification and Troubleshooting
- The
testparmoutput must display all newly written directives:path,valid users,read only,create mask,directory mask, andforce group. - If the
[proyek]section does not appear at all, verify thatsystemctl reload smbdin the previous step actually succeeded, check viajournalctl -u smbd -n 30.
24.4 Samba User Authentication
Samba does not use standard Linux passwords for SMB authentication. Every user accessing a share via the SMB protocol must have a separate Samba password, stored in Samba's own credential database (by default using the tdbsam backend), although that user must still be registered as a Linux system user first.
24.4.1 Creating System Users and Samba Passwords
Scenario following Section 24.3: siti represents the design team accessing from Windows, and andi represents the development team accessing from Linux. Both are created as system users without an interactive login shell, since they only need file access via Samba, not SSH access to the server, adhering to the same principle of least privilege as Section 23.6.1.
Practical Steps
- Create both system users, then add them to the
tim-proyekgroup created in Section 24.3.1.sudo useradd --no-create-home --shell /usr/sbin/nologin siti sudo useradd --no-create-home --shell /usr/sbin/nologin andi sudo usermod -aG tim-proyek siti sudo usermod -aG tim-proyek andi - Set Samba passwords for each user using
smbpasswd.
Thesudo smbpasswd -a siti sudo smbpasswd -a andi-aflag adds a new user to the Samba database while prompting twice interactively for password confirmation. This command will fail with aFailed to add entry for usermessage if the corresponding Linux system user does not exist yet, as Samba always validates Unix account existence before creating its own password entry.
Verification and Troubleshooting
- Display a list of all registered Samba users on this server.
sudo pdbedit -L - View specific account flag details, including active or locked status.
sudo pdbedit -Lv -u siti
24.4.2 Testing Local Authentication
Practical Steps
- List shares using the newly created user credentials, completing the configuration verification postponed in Section 24.3.3.
Thesmbclient -L localhost -U sitiproyekshare should appear in the output list after enteringsiti's Samba password, alongside the defaultIPC$share used by Samba for inter-process communication. - Test direct connection to the
proyekshare using the same user, locally from the server itself.
If authentication succeeds,smbclient //localhost/proyek -U sitismbclientdrops into an interactivesmb: \>shell where you can try commands likelsorputto test file transfers.
Verification and Troubleshooting
- An
NT_STATUS_LOGON_FAILUREmessage means the Samba username/password combination is incorrect, not the Linux password. Reset it usingsmbpasswdif forgotten. - An
NT_STATUS_ACCESS_DENIEDmessage when trying to write files viaputusually indicates the user is not yet part of thetim-proyekgroup; verify withgroups siti.
24.5 Connecting from Windows and Linux
The share is ready for access. This section completes the chapter with connection methods from the Windows client side representing the design team, and the Linux client side representing the development team.
24.5.1 Connecting from Windows
Practical Steps
- Open File Explorer on a Windows computer, then type the server address in the address bar using UNC path format.
Since NetBIOS was disabled in Section 24.2.3, use the server's IP address directly or a hostname resolvable via internal DNS, rather than relying on automatic discovery via Network Neighborhood which historically depended on NetBIOS broadcasts.\\SERVER_IP_ADDRESS\proyek - When prompted for credentials, enter username
sitialong with the Samba password created in Section 24.4.1. - Optionally, map this share as a persistent network drive via Command Prompt.
net use Z: \\SERVER_IP_ADDRESS\proyek /user:siti
Verification and Troubleshooting
- The Windows error "The specified network password is not correct" generally means the entered Samba password is wrong, or Windows is still attempting to use old credentials stored in Credential Manager. Clear legacy credentials via Windows Credential Manager before trying to log in again.
- If the folder cannot be accessed at all, ensure port 445 from Section 24.2.3 is truly open from the client network direction, not just locally on the server itself.
24.5.2 Connecting from Linux
Practical Steps
- Install required client packages:
smbclientfor interactive access, andcifs-utilsto mount SMB filesystems directly to local directories.sudo apt install -y smbclient cifs-utils - Test interactive connections first, following the same pattern as Section 24.4.2 but from a separate client computer.
smbclient //SERVER_IP_ADDRESS/proyek -U andi - For daily usage, mounting the share as a local directory is far more practical than the
smbclientshell. Store credentials in a separate file to avoid typing passwords on every mount and to prevent passwords from being recorded in shell history.sudo nano /etc/samba/credentials-proyekusername=andi password=PasswordSambaAndi!2026 domain=WORKGROUPsudo chmod 600 /etc/samba/credentials-proyek - Create a mount point, then test manual mounting using the credential file.
Thesudo mkdir -p /mnt/proyek sudo mount -t cifs //SERVER_IP_ADDRESS/proyek /mnt/proyek \ -o credentials=/etc/samba/credentials-proyek,vers=3.0,uid=andivers=3.0flag forces the client to use SMB3, aligning with SMB3 being the default maximum protocol in Samba as explained in Section 24.2.3, whileuid=andiensures all files at the mount point appear locally owned by userandi. - To automatically re-mount at boot, add the following entry to
/etc/fstab.
The//SERVER_IP_ADDRESS/proyek /mnt/proyek cifs credentials=/etc/samba/credentials-proyek,vers=3.0,uid=andi,_netdev 0 0_netdevoption tells systemd that this filesystem depends on the network, delaying mount execution until network connections are fully ready during boot, preventing boot hangs while waiting for unreachable shares.
Verification and Troubleshooting
- Test the
/etc/fstabentry without rebooting.sudo mount -a df -h /mnt/proyek - Error
mount error(13): Permission deniedmeans the username/password combination in the credential file is wrong, or the user is not yet in thetim-proyekgroup on the server. - Error
mount error(112): Host is downor connection timeouts usually indicate port 445 is not open on the firewall side; re-check Section 24.2.3.
24.5.3 Monitoring Active Connections on the Server Side
As Sysadmins, we need a way to monitor who is currently connected to shares without asking users directly.
Practical Steps
- View all current sessions and open files served by Samba.
sudo smbstatus
Verification and Troubleshooting
- The output of
smbstatusdisplays columns forUsername,Machine(client IP address), andProtocol Version, useful for verifying that clients are indeed negotiating SMB3 rather than silently downgrading to SMB2 due to legacy device limitations. - Honest field note: shared folders used concurrently by many people like
proyekare prone to simultaneous write conflicts (two users saving the same file almost at the same time). Samba itself does not provide locking mechanisms as robust as modern document collaboration tools, so team communication habits, such as file naming conventions and dedicated work folders, remain the most practical mitigation beyond server technical configurations.
At this point, our Linux server effectively operates as a cross-platform file server: SMB3 as the default protocol, NetBIOS disabled for a reduced attack surface, the proyek share with clear permissions and authentication, accessible seamlessly from both Windows and Linux. Chapter 25 continues the topic of file sharing from a different perspective, namely NFS, a protocol designed specifically for file sharing between Linux/Unix systems.