
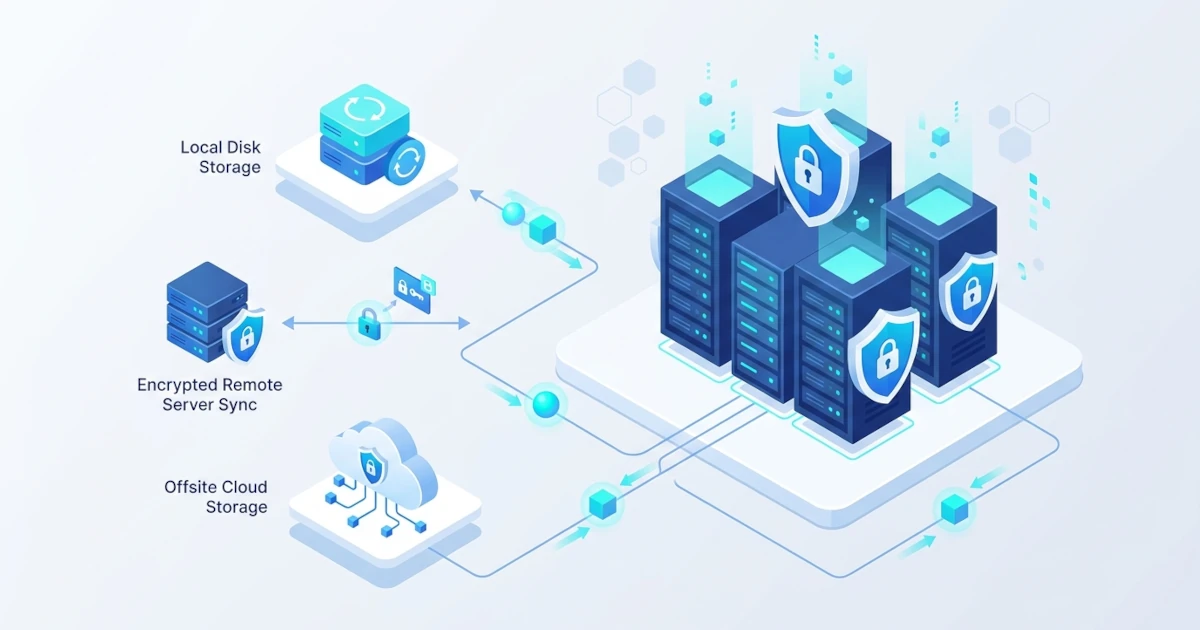
Chapter 39 completed an important part of the data story on this server: logs that were previously scattered are now centralized, neatly rotated, and governed by a clear retention policy. However, that centralized log system, no matter how well configured, remains just regular files residing on a single disk on a single server. The same applies to the database dump from Chapter 23, the contents of /var/www from Chapter 12 and Chapter 13, as well as the TLS certificates in /etc/letsencrypt from Chapter 17. All of these critical assets are gathered on the main server (192.168.1.10), and so far the series has never addressed a fundamental question: what happens if this server's disk suffers a total failure, or if an Attacker manages to gain entry and encrypt the entire disk contents through a ransomware attack? Chapter 7.2.3, Chapter 28.4.4, and Chapter 29.3.5 have already pointed out that LVM, KVM, or LXD snapshots are not a substitute for backups, as all three still reside on the same physical disk. Chapter 23.1 and Chapter 23.7 also promised that a truly reliable backup topic, complete with 3-2-1 principles and regular restore testing, would be thoroughly discussed here. Chapter 40 fulfills that promise: we will build a comprehensive server backup strategy, starting from fundamental principles, storage-efficient local backups, encrypted backups to a separate server using BorgBackup, extension to off-site storage, up to the habit of testing restores that distinguishes actual backups from backups that merely feel safe.
40.1 The 3-2-1 Principle in Server Backup Strategy
40.1.1 What Is the 3-2-1 Rule and Why Every Number Matters
The 3-2-1 Rule is a classic guideline in the backup world specifying: keep at least three copies of data (the original data plus two backup copies), on two different types of media or storage, with at least one copy located at an off-site location physically separated from the original data. This rule was first popularized by photographer Peter Krogh for photo archiving needs, but it has now become a standard recommendation in cybersecurity, including by institutions like CISA (Cybersecurity and Infrastructure Security Agency) in the United States. Every number in this rule addresses a different type of failure mode:
- Three copies of data reduce the risk of a single point of failure. If there is only one backup, damage to the backup itself, such as a corrupt dump file as mentioned in Chapter 23.1, leaves us back at square one with no other options.
- Two different media types protect against failures specific to a single storage type, such as a specific disk firmware bug, or a misconfiguration that happens to destroy all volumes in a storage pool simultaneously.
- One off-site copy protects against disasters that destroy an entire physical location at once, such as a data center fire, or, far more commonly in the field, an Attacker who, after breaching the main server, proceeds to wipe out local backups accessible over the same network.
This final point is the one most frequently overlooked by novice Sysadmins. Backups stored in a different directory on the exact same disk, or even on another server but still accessible using identical credentials as the production server, remain technically a single copy vulnerable to the exact same threats.
40.1.2 Mapping the Current Server State to the 3-2-1 Rule
Before adding new tools, it is best to first measure how far the current main server setup is from the 3-2-1 rule. Data from previous steps, database dumps from Section 23.6.2 and centralized logs from Section 39.2.2, are both currently stored in only a single location.
Practical Steps
- First check what has already been stored as database backups from Chapter 23.
ls -la /var/backups/database/ - Also check the size of the centralized log output from forwarding in Chapter 39.
du -sh /var/log/remote/
Verification and Troubleshooting
- Both commands above should display existing data, but everything still resides on the same disk as the main server itself. In 3-2-1 terminology, this condition only achieves "1-1-0": one copy of original data, on one media type, with zero off-site presence.
- The following table summarizes the targets we aim to achieve in the rest of this chapter, along with the sections discussing them.
| Copy | Location and Media | Discussed in |
|---|---|---|
| 1 (original) | Main server disk (192.168.1.10), where applications run daily | Already running since Chapter 2 |
| 2 | Local second disk (/mnt/data) on the same server, different physical media | Section 40.2 |
| 3 (off-site) | Separate backup server (backup01, 192.168.1.50) as an initial step, expanded to cloud storage as true off-site | Section 40.3 and 40.4 |
40.2 Local Incremental Backups with rsync and Hard Links
40.2.1 Preparing a Second Disk as Local Backup Media
The second copy in the 3-2-1 rule ideally resides on physical media separate from the primary disk, even if still on the same server. This section utilizes an additional disk already attached following the steps in Section 7.4.1, permanently mounted at /mnt/data via /etc/fstab. We will place local backup copies there, isolated from the system disk where /etc, /var/www, and /var/backups/database originally reside.
Practical Steps
- Create a dedicated directory to store local backups.
sudo mkdir -p /mnt/data/backup-lokal
Verification and Troubleshooting
- Make sure
/mnt/datais genuinely mounted to the second disk before proceeding further, rather than being just a regular empty directory.
If this command outputs nothing, it means thefindmnt /mnt/data/etc/fstabentry from Section 7.4.1 is not active yet, and/mnt/datais merely a standard folder on the system disk. Writing backups there will still succeed without any error messages in this state, even though data silently ends up on the exact same disk as the primary drive, causing the goal of separating media in the 3-2-1 rule to fail unnoticed. Runsudo mount -afirst to activate pendingfstabentries, then proceed to the next step.
40.2.2 Storage-Efficient Snapshots with rsync --link-dest
Incremental backup is a backup technique that copies only the data that has changed since the previous backup, rather than re-copying all data every time. The --link-dest option in rsync implements this technique elegantly: for every file whose content remains unchanged, a hardlink is created pointing to the identical file in the previous backup instead of re-copying it. As a result, each backup folder appears as a full copy and can be browsed directly, whereas physically unchanged files occupy disk space only once. This pattern was first popularized by Mike Rubel through the "rotating snapshots" technique and has become a standard approach for creating snapshot-style local backups without extra tools beyond rsync, which was introduced in Section 3.2.2.
Practical Steps
- Create a backup script at
/usr/local/bin/backup-lokal.sh.sudo nano /usr/local/bin/backup-lokal.sh - Fill it with the following logic: link to the previous backup via the
terakhirsymlink if present, or perform a full copy if this is the first execution.#!/bin/bash set -euo pipefail SUMBER=(/etc /var/www /var/backups/database) TUJUAN="/mnt/data/backup-lokal" STAMP=$(date +%Y-%m-%d_%H%M%S) BARU="$TUJUAN/$STAMP" TERAKHIR="$TUJUAN/terakhir" mkdir -p "$BARU" if [ -d "$TERAKHIR" ]; then rsync -a --delete --link-dest="$TERAKHIR" "${SUMBER[@]}" "$BARU/" else rsync -a --delete "${SUMBER[@]}" "$BARU/" fi rm -f "$TERAKHIR" ln -s "$BARU" "$TERAKHIR" - Grant execution permissions to the script.
sudo chmod +x /usr/local/bin/backup-lokal.sh - Run it twice in succession to observe the effect of
--link-dest, pausing briefly between executions.sudo /usr/local/bin/backup-lokal.sh sleep 5 sudo /usr/local/bin/backup-lokal.sh
Verification and Troubleshooting
- Compare actual disk space usage (
du -sh) with apparent size if every folder stood independently (du -sh --apparent-size) across all backup folders.
Ifdu -sh /mnt/data/backup-lokal/2* du -sh --apparent-size /mnt/data/backup-lokal/2*--link-destfunctions properly, total actual disk usage will be substantially smaller than the sum of apparent sizes, because identical files across folders are only counted once by the filesystem. - The most convincing proof that two files are indeed a single hardlink is an identical inode number. Compare inode numbers of unchanged files between two backup folders.
ls -i /mnt/data/backup-lokal/2*/etc/hostname - The
STAMPformat in the script is intentionally precise down to seconds (%H%M%S), not just minutes. If configured only to minutes, two close executions like the test steps above could generate identical folder names, causing the second execution to silently overwrite the same folder instead of building a new snapshot. - Notes from the field: the
--link-desttechnique is effective for short-term retention with multiple generations, but does not yet include encryption or transfer to off-site locations. BorgBackup addresses those two requirements in Section 40.3.
40.3 Encrypted Backups to a Separate Server with BorgBackup
40.3.1 Why BorgBackup: Simultaneous Deduplication and Encryption
BorgBackup (commonly abbreviated as Borg) is an open-source backup tool that combines three capabilities in a single repository: data block-level deduplication (not just per-file like --link-dest in Section 40.2), compression, and client-side encryption before data leaves the server. This combination makes Borg ideal for sending backups to a separate server or even third-party storage that is not fully trusted, because data is encrypted prior to departure and the receiving server never sees the actual unencrypted content. This section uses backup01 (192.168.1.50) as the destination server, the same address as the log archive server mentioned in Section 39.4.2, now formalized as the dedicated backup server for this entire series.
40.3.2 Installation and Repository Initialization
Practical Steps
- Install
borgbackupon both sides, main server as well asbackup01, because Borg communicates via SSH by executing aborg serveprocess on the remote side.sudo apt update sudo apt install borgbackup - On
backup01, prepare the directory where the repository will be stored, owned by the usersysadmincreated during initial setup in Chapter 2.sudo mkdir -p /backup/borg-repo sudo chown sysadmin:sysadmin /backup/borg-repo - This backup needs to read
/etcand other system directories where contents are restricted to root, requiring the Borg process on the main server to execute as root. Since the SSH key for the usersysadminin Section 3.2.2 was set up for that user specifically, generate an SSH key for root first.sudo ssh-keygen -t ed25519 -f /root/.ssh/id_ed25519 -N "" - Copy the root public key into
authorized_keysbelonging tosysadminonbackup01. The toolssh-copy-idcannot be used here becausePasswordAuthentication nohas been active since Section 3.2.3 across all servers in this series; thus, the safe method is using the existing trusted SSH session ofsysadminto append the new key.sudo cat /root/.ssh/id_ed25519.pub | ssh [email protected] "cat >> ~/.ssh/authorized_keys" - Initialize the repository from the main server using the
repokey-blake2encryption mode, which stores encryption keys inside the repository itself (encrypted by a passphrase) while utilizing the faster BLAKE2 hash algorithm on modern CPUs.
This command interactively prompts for a new passphrase. Store this passphrase in a secure password manager. A repository encrypted withsudo borg init --encryption=repokey-blake2 [email protected]:/backup/borg-reporepokeycannot be opened without this passphrase, even with full root access to thebackup01server.
Verification and Troubleshooting
- A
Permission denied (publickey)error during initialization usually indicates that appending root's public key toauthorized_keysofsysadminonbackup01failed. Test root's SSH connection tobackup01independently before trying again.sudo ssh -i /root/.ssh/id_ed25519 [email protected] whoami - Immediately after successful initialization, export the repository key to a separate file as an emergency backup, then move this file to a safe location outside both the primary server and
backup01. A repository that loses its key, for example if the primary server disk fails before exporting the key, renders all contained data permanently unrecoverable, even by its owner.sudo borg key export [email protected]:/backup/borg-repo /root/borg-key-backup01.txt
40.3.3 Running Backups and Viewing Archive History
Practical Steps
- To prevent manual passphrase prompts during automated script runs, store credentials in a dedicated file with strict permissions, applying the same principles as database credentials in Section 23.6.1.
sudo nano /etc/borg-backup.envexport BORG_PASSPHRASE='PassphraseSangatRahasia2026' export BORG_REPO='[email protected]:/backup/borg-repo'sudo chmod 600 /etc/borg-backup.env - Execute the first backup, including the same sources as local backups in Section 40.2.2, plus centralized logs from Chapter 39 that were not included in the local backup script.
Thesource /etc/borg-backup.env sudo -E borg create --stats --compression lz4 \ ::'server-utama-{now:%Y-%m-%d_%H%M}' \ /etc /var/www /var/backups/database /var/log/remote::notation prefixing the archive name instructs Borg to use the repository defined inBORG_REPO, eliminating the need to retype the full address. - View all archives currently stored in the repository.
sudo -E borg list
Verification and Troubleshooting
- The
-Eflag withsudois mandatory so thatsudoinherits theBORG_PASSPHRASEandBORG_REPOenvironment variables just loaded viasource. Without this flag, Borg fails to detect them and reverts to asking for interactive passphrase entry. - Execute
sudo -E borg infoto inspect a summary of original data size, compressed size, and unique size after deduplication across the whole repository, metrics valuable for monitoring compression and deduplication efficiency over time.
40.3.4 Restoring from Borg Archives
Practical Steps
- Change to an empty temporary directory for restore testing, as
borg extractrestores the folder tree directly relative to the current working directory, rather than immediately overwriting original file paths.mkdir -p /tmp/restore-test cd /tmp/restore-test source /etc/borg-backup.env sudo -E borg extract ::server-utama-2026-08-28_1000 - Inspect extracted results; folder structures
etc/,var/should appear identical to their source structure, re-rooted at/tmp/restore-test.ls /tmp/restore-test
Verification and Troubleshooting
- The archive name in the example above (
server-utama-2026-08-28_1000) is illustrative. Retrieve the actual archive name fromborg listoutput in Section 40.3.3 before executingextract. - To restore only a specific subdirectory without extracting an entire archive, append specific paths at the end of the command, such as
sudo -E borg extract ::server-utama-2026-08-28_1000 var/backups/database, useful when only a specific dump file was lost. - Never run
borg extractdirectly from root directory/on production servers without prior testing in an isolated directory, as existing system files will be overwritten immediately by archive content.
40.3.5 Automated Retention with borg prune
Without limits, Borg repositories grow indefinitely with each run. borg prune removes older archives according to defined retention rules, while maintaining deduplication references for remaining archives.
Practical Steps
- Run
pruneenforcing retention to retain 7 daily, 4 weekly, and 6 monthly archives.source /etc/borg-backup.env sudo -E borg prune --list --keep-daily=7 --keep-weekly=4 --keep-monthly=6
Verification and Troubleshooting
- Combine the
createstep from Section 40.3.3 andpruneabove into a single script, then schedule it using a.serviceand.timerpair following the exact pattern ofbackup-harian.timerin Section 5.3.1 andbackup-database.timerin Section 23.7.1. - Run
sudo -E borg checkperiodically (weekly or monthly) to verify repository integrity. Without periodic checks, data corruption within repositories might stay hidden until a restore is desperately required and subsequently fails.
40.4 Expanding Backups Off-site with rclone
40.4.1 Why a Single Network Location Is Not Enough
The repository on backup01 in Section 40.3 fulfills the "separate server" condition, but if backup01 shares a physical rack with the main server, a single physical incident like fire or flooding can destroy both machines simultaneously. Cloud provider object storage answers the requirement for true off-site backups, keeping data stored in geographically distinct facilities.
40.4.2 Installation and Configuration of rclone
rclone is a command-line utility operating like rsync, but supporting over 70 cloud storage and object storage providers, including Amazon S3, Backblaze B2, and Google Cloud Storage. Because Borg repositories from Section 40.3 are fully encrypted prior to leaving the main server, any cloud provider can be utilized safely without concerns about cloud providers reading content.
Practical Steps
- Install
rclonefrom official Ubuntu repositories.sudo apt install rclone - Launch the interactive configuration wizard to establish a connection (termed a remote in rclone terminology, not to be confused with remote servers in this series).
This wizard prompts for remote name (e.g.,rclone configbackup-cloud), provider type, and access credentials (access keys and secret keys for S3-compatible endpoints, or OAuth flows for Google Drive). Credential details vary by provider, so exact setup follows officialrclonedocumentation for each provider, with deeper cloud vendor analysis (AWS, Azure, GCP) arriving in Chapter 41.
Verification and Troubleshooting
- Verify remote configuration and connectivity.
rclone listremotes
rclone lsd backup-cloud:
40.4.3 Syncing Borg Repositories to Cloud Storage
Practical Steps
- Copy all contents of the Borg repository from
backup01to cloud storage buckets or containers, executing frombackup01to avoid consuming main server bandwidth.rclone sync /backup/borg-repo backup-cloud:nama-bucket/borg-repo --progress
Verification and Troubleshooting
- Use
rclone syncinstead ofrclone copyspecifically to keep the cloud copy identical to the source repository, including removing old archives pruned viaborg prunein Section 40.3.5. Pay close attention to argument order:syncmakes destination mirror source, so source and destination positions must not be swapped. - Schedule this
rclone synccommand using a separate.timeronbackup01, configured to execute afterborg prunecompletes, guaranteeing cloud copies always follow local repository states.
40.5 Periodically Testing the Restore Process
40.5.1 Why an Untested Backup Is Equivalent to Having No Backup
Section 23.7.1 established a core principle: backups automated via timers must have their restore processes tested regularly, not merely verified by file presence. Reality in production environments often proves the opposite: backup scripts show clean execution logs in journalctl for months, while generated output files are silently corrupted or authentication tokens expired, halting real backups unnoticed. Only when actual disasters occur and restores are required does it become clear that the "safe" backups were entirely unusable.
40.5.2 Writing an Automated Restore Testing Script
Practical Steps
- Create a script that fetches the newest Borg archive, extracts it to temporary space, and verifies a critical component, the database dump from Chapter 23, by restoring it into an actual database instance.
sudo nano /usr/local/bin/uji-restore.sh - Insert the following logic:
This script dynamically selects the latest Borg archive via#!/bin/bash set -euo pipefail source /etc/borg-backup.env TARGET="/tmp/uji-restore-$(date +%s)" mkdir -p "$TARGET" cd "$TARGET" ARCHIVE_TERBARU=$(borg list --last 1 --short) borg extract "::$ARCHIVE_TERBARU" var/backups/database DUMP_TERBARU=$(ls -t "$TARGET"/var/backups/database/postgresql-webapp_db-*.dump | head -n1) sudo -u postgres psql -c "DROP DATABASE IF EXISTS webapp_db_ujirestore;" sudo -u postgres psql -c "CREATE DATABASE webapp_db_ujirestore OWNER webapp_user;" PGPASSFILE=/etc/backup-db/pgpass pg_restore -h 127.0.0.1 -U webapp_user \ -d webapp_db_ujirestore --no-owner "$DUMP_TERBARU" JUMLAH_BARIS=$(PGPASSFILE=/etc/backup-db/pgpass psql -h 127.0.0.1 -U webapp_user \ -d webapp_db_ujirestore -tAc "SELECT count(*) FROM notes;") echo "Restore test completed, dump used: $DUMP_TERBARU" echo "Row count of notes table: $JUMLAH_BARIS" rm -rf "$TARGET"borg list --last 1 --short, extracts/var/backups/database, and locates the latest PostgreSQL dump file inside. Dump file detection uses pattern matchingpostgresql-webapp_db-*.dumprather than static names, because automation scripts in Section 23.6.2 append timestamps to each file name for local retention tracking. The variablePGPASSFILEuses credential files from Section 23.6.1, allowingpg_restoreandpsqlto execute non-interactively without manual password prompts during timer executions. - Make the script executable, then execute it manually once as an initial verification.
sudo chmod +x /usr/local/bin/uji-restore.sh
sudo /usr/local/bin/uji-restore.sh
Verification and Troubleshooting
- The output for
Row count of notes tabledisplayed at the end should match reasonable expectation numbers from production applications. Zero or unexpectedly small numbers indicate restored dumps are outdated or incomplete, despite execution completing without shell errors. - The error
database "webapp_db_ujirestore" is being accessed by other usersduringDROP DATABASEtypically happens when previous runs failed mid-way leaving hanging database connections. Terminate existing connections prior to retrying.sudo -u postgres psql -c "SELECT pg_terminate_backend(pid) FROM pg_stat_activity WHERE datname = 'webapp_db_ujirestore';" - Schedule this script with a dedicated
.serviceand.timerpair running weekly, matching the pattern established forbackup-harian.timerin Section 5.3.1. RouteExecStartoutput tojournalctl -u uji-restore.service, and consider adding failure notifications (email or webhooks) so Sysadmins are immediately alerted when a restore test cycle fails, rather than discovering failures months later. - This procedure intentionally uses a separate database
webapp_db_ujirestoreisolated from productionwebapp_db, ensuring verification activities never alter or overwrite active production application data.
The main server now maintains three data copies across two distinct media types, with one off-site copy in cloud storage, fulfilling every demand of the 3-2-1 rule established in Section 40.1. More importantly, this setup goes beyond looking secure: the restore test script in Section 40.5 proves weekly that stored data can actually be restored, rather than resting passively without verification. Part X of this series concludes here, closing the complementary topics of monitoring, logging, and backups established since Chapter 38. Part XI shifts focus to Ubuntu Server in cloud environments, where Borg repositories synchronized to object storage in Section 40.4 will become immediately relevant as Chapter 41 addresses AWS, Azure, and GCP block storage and snapshot architectures specifically.