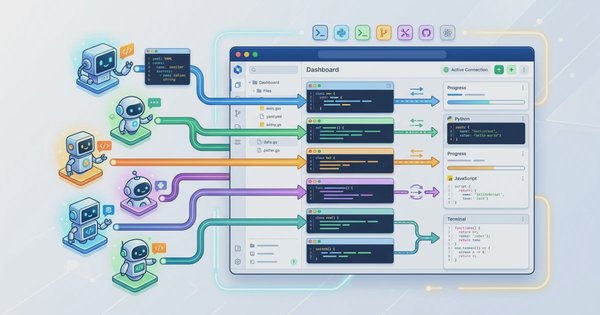
ElysiaJS is a TypeScript-based web framework built specifically on top of Bun, offering high performance and end-to-end type safety without heavy boilerplate. Writing code in Elysia feels lightweight, but moving it to a production server is a different story. A careless build process, unprotected open ports, or environment variables leaked to a public repository can turn into serious incidents once the application receives heavy visitor traffic. This article covers the comprehensive Elysia deployment pipeline, from server preparation, containerization options, VPS, and PaaS platforms, to essential security and monitoring layers required before going live.
1. Prerequisites Before Deployment
Before touching a production server, several steps must be prepared in advance. Skipping this phase often becomes the root cause of issues that only surface when live traffic arrives.
1.1 Runtime and Repository
The production server requires Bun to be installed if running the application directly from source code, or at least the compiled binary if choosing the approach discussed in Section 1.3. Ensure that the code resides in a structured Git repository, with a .gitignore file excluding the node_modules folder and the .env file. Developers who forget to exclude .env risk exposing database credentials or API keys publicly, especially if the repository is public or pushed to a public fork.
1.2 Environment Variables Configuration
Bun reads the .env file automatically without requiring additional packages such as dotenv. Variables inside it are immediately accessible via process.env once the process starts. For production, set NODE_ENV=production so Elysia and other dependencies reading this variable can disable verbose logs or debugging features that should not run in a live environment.
# .env.production
NODE_ENV=production
PORT=3000
DATABASE_URL=postgres://user:pass@localhost:5432/db
Never place a .env file containing real credentials inside a Docker image or commit it to Git. Most PaaS platforms like Fly.io and Render provide dedicated secret mechanisms to store sensitive variables outside the codebase.
1.3 Build Optimization via Binary Compilation
Rather than running TypeScript source code directly in production, official Elysia documentation recommends compiling the application into a single executable binary using Bun built-in features. This method can reduce memory usage by 2 to 3 times compared to running in a development environment.
bun build \
  --compile \
  --minify-whitespace \
  --minify-syntax \
  --target bun \
  --outfile server \
  src/index.ts
The output is a server file that can be executed directly (./server) without requiring Bun installed on the target server. If the deployment target uses a different architecture from the development machine, such as compiling on macOS ARM for a Linux x64 production server, specify an explicit target via flags like --target bun-linux-x64-musl. One important note: if the application uses OpenTelemetry for tracing, avoid full --minify flags because it can truncate function names into single characters, making traces difficult to analyze. Use a combination of --minify-whitespace and --minify-syntax instead, as shown in the example above.
2. Deploy with Docker
Docker is a popular choice due to consistency: applications running in local containers exhibit identical behavior when moved to any VPS or cloud platform. Elysia and Bun provide a concise multi-stage build pattern for this purpose.
FROM oven/bun AS build
WORKDIR /app
COPY package.json bun.lock .
RUN bun install
COPY ./src ./src
ENV NODE_ENV=production
RUN bun build \
  --compile \
  --minify-whitespace \
  --minify-syntax \
  --outfile server \
  src/index.ts

FROM gcr.io/distroless/base
WORKDIR /app
COPY --from=build /app/server server
ENV NODE_ENV=production
CMD ["./server"]
EXPOSE 3000
The first stage uses the official oven/bun image to install dependencies and compile the binary. The second stage uses a distroless base image from Google, which excludes shells, package managers, or extra tools. If an attacker successfully exploits the application, no shell is available inside the container for further exploitation.
- Build the image from the Dockerfile above:
docker build -t elysia-app . - Run the container and map port 3000 to the host port:
docker run -d -p 3000:3000 --name elysia-app elysia-app - Check the logs to verify that the application is running normally:
docker logs -f elysia-app
For projects using OpenTelemetry, exclude instrumented libraries from bundling using the --external flag (such as --external pg for PostgreSQL drivers) so that monkey-patching mechanisms continue to function, then install production dependencies in the final image via bun install --production.
3. Deploy to VPS
When managing a VPS directly without Docker, the application requires a process manager to enable automatic restarts upon crashes or server reboots. The two most common options in the Linux ecosystem are PM2 and systemd.
3.1 Bun Installation on VPS
- Log in to the VPS via SSH, then install Bun using the official installer:
curl -fsSL https://bun.com/install | bash - Ensure the
unzippackage is installed on Ubuntu/Debian, as the Bun installer requires it:sudo apt install unzip - Verify the installation:
bun --version - Clone the application repository and install dependencies:
git clone https://github.com/username/repo.git
cd repo
bun install --production
3.2 Running with PM2
PM2 offers native support for Bun via the --interpreter flag. System administrators familiar with PM2 from Node.js projects can apply the exact same workflow.
pm2 start index.js --interpreter bunFor a structured configuration, define the application in an ecosystem.config.js file:
module.exports = {
  apps: [{
    name: "elysia-app",
    script: "./src/index.ts",
    interpreter: "bun"
  }]
}
To run the application across multiple CPU cores simultaneously (cluster mode), Bun version 1.1.25 and above supports cluster mode via:
bunx --bun pm2 start app.ts -i maxPM2 retains the runtime specified when its daemon first started. If PM2 was previously running under a Node.js interpreter, execute pm2 kill before restarting with the Bun interpreter to prevent runtime conflicts.
3.3 Running with Systemd
An alternative without additional dependencies is using systemd, the default service manager built into modern Linux distributions, including Ubuntu Server. Create a new unit file:
- Create
/etc/systemd/system/elysia-app.servicewith the following content:[Unit] Description=Elysia Production Server After=network.target [Service] Type=simple User=www-data WorkingDirectory=/var/www/elysia-app ExecStart=/var/www/elysia-app/server Restart=on-failure Environment=NODE_ENV=production [Install] WantedBy=multi-user.targetExecStartpoints to the compiled binary from Section 1.3. If executing directly from source code, update that line toExecStart=/usr/local/bin/bun run /var/www/elysia-app/src/index.ts. - Reload the systemd configuration:
sudo systemctl daemon-reload - Enable the service to start automatically on boot, then start it:
sudo systemctl enable --now elysia-app - Check status and logs:
sudo systemctl status elysia-app
journalctl -u elysia-app -f
PM2 is suitable for teams comfortable with the Node.js ecosystem needing out-of-the-box monitoring features. Systemd is lightweight as it adds no extra server dependencies, making it a native choice for system administrators managing Linux services.
4. Deploy on Fly.io and Render
For teams seeking to avoid manual server management, PaaS platforms offer streamlined deployment pipelines via direct Git integration.
4.1 Fly.io
Fly.io supports Dockerfile-based deployments natively. If the Dockerfile from Section 2 is located at the project root, Fly detects it automatically and uses it as the base image build.
- Install the
flyCLI and log in to the Fly.io account. - Execute from the project root to generate the initial configuration:
This command generates afly launchfly.tomlconfiguration file and uses the existing Dockerfile without attempting framework scanning. - Deploy the application:
fly deploy
4.2 Render
Render currently does not offer a native Bun environment like Node.js or Python. The standard approach is selecting the Docker environment when creating a new Web Service, utilizing the Dockerfile from Section 2.
Platforms like Fly.io, Render, and Railway assign ports dynamically using the PORT environment variable. Ensure that the Elysia server listener reads this variable:
import { Elysia } from "elysia"

new Elysia()
  .get("/", () => "OK")
  .listen(process.env.PORT ?? 3000)
Elysia binds the hostname to 0.0.0.0 by default, ensuring full compatibility with container traffic routing on these platforms.
5. Reverse Proxy and SSL
Running Elysia directly on port 80/443 as the root user is not recommended. A standard deployment pattern runs Elysia on an internal port (such as 3000) behind a reverse proxy handling domain routing and SSL termination.
5.1 Nginx Configuration
Nginx is the standard reverse proxy choice for Linux systems. Create a server block configuration directing domain traffic to the Elysia application port:
server {
    listen 80;
    server_name example.com;

    location / {
        proxy_pass http://127.0.0.1:3000;
        proxy_http_version 1.1;
        proxy_set_header Upgrade $http_upgrade;
        proxy_set_header Connection "upgrade";
        proxy_set_header Host $host;
        proxy_set_header X-Real-IP $remote_addr;
    }
}
The Upgrade and Connection headers are required if the Elysia application handles WebSocket connections. Save the configuration in /etc/nginx/sites-available/, symlink it to sites-enabled, and reload Nginx using sudo systemctl reload nginx. Alternatively, Caddy can handle reverse proxy routing and automatic SSL provisioning with minimal Caddyfile setup.
5.2 SSL Installation with Certbot
Let's Encrypt provides free SSL certificates via the official Certbot client.
- Install Certbot via snap (recommended by official documentation):
sudo snap install --classic certbot sudo ln -s /snap/bin/certbot /usr/local/bin/certbot - Execute Certbot with the Nginx plugin to obtain and install certificates automatically:
sudo certbot --nginx - Verify automatic renewal functionality:
sudo certbot renew --dry-run
Let's Encrypt certificates remain valid for 90 days. Certbot configures automatic renewal via cron or systemd timers during installation.
6. Production Security and Monitoring
Live servers face automated scan attempts from bot networks continuously. Essential security layers must be established before public launch.
6.1 Restricting CORS
The official @elysia/cors plugin configures CORS (Cross-Origin Resource Sharing) headers, restricting browser API access to specified origins.
bun add @elysia/corsimport { Elysia } from "elysia"
import { cors } from "@elysia/cors"
new Elysia()
.use(cors({
origin: ["https://app.example.com"],
methods: ["GET", "POST", "PUT", "DELETE"],
credentials: true
}))
.listen(3000)By default, the plugin accepts any origin (origin: true), which works for public APIs without session cookies. For APIs using browser session cookies, set explicit origin values as demonstrated above.
6.2 Rate Limiting and Security Headers
Elysia does not provide an official core plugin for rate limiting. Community packages such as elysia-rate-limit are commonly used, but maintainer activity and recent releases should be verified prior to production usage. Rate limiting can also be enforced at the Nginx level via the limit_req_zone directive or through PaaS infrastructure controls.
Security headers like X-Content-Type-Options or Strict-Transport-Security can be set manually in Elysia via onAfterHandle or configured directly within Nginx reverse proxy headers.
6.3 Monitoring and Logging
The @elysia/opentelemetry plugin enables detailed request tracing, execution duration, and database query analysis. As noted in Section 1.3, avoid full --minify flags during compilation to maintain readable function traces. Observability data can be exported to tools like Grafana or third-party APM platforms for metrics analysis.
7. Conclusion
Deploying Elysia to production requires more than running bun run on a remote server. Docker guarantees environment consistency, VPS deployments with PM2 or systemd provide granular resource control, and platform options like Fly.io and Render minimize operational overhead. Reverse proxying, SSL setup, CORS rules, and rate limiting are critical components for securing public endpoints.
Implementing CI/CD pipelines (such as GitHub Actions) can automate binary compilation, container image builds, and deployment tasks upon pushing to production branches, eliminating manual deployment errors.