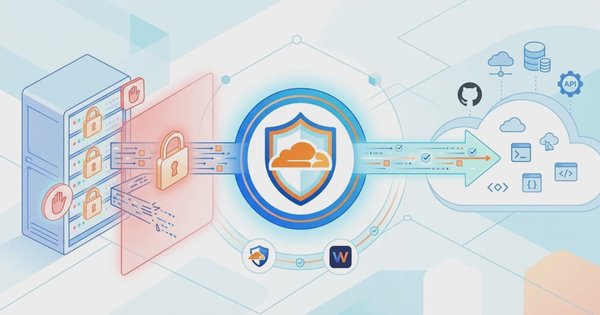
SSH via port 22 open to the public internet is always an easy target for attackers. Simply running nmap against any IP range will instantly reveal open port 22, exposing it to relentless brute-force login attempts. Tailscale offers a different approach: the server only accepts SSH connections from a WireGuard-based private network, while the SSH port on the public interface is tightly closed via a firewall. Sysadmins and developers can still remote in whenever needed, but through a path that is vastly harder for external attackers to breach.
Risks of Publicly Exposed SSH
A server with port 22 open to the internet faces three classic problems. First, brute-force attacks that automatically try thousands of username and password combinations. Second, massive port scanning conducted by bots and attackers to map which servers have open SSH to target next. Third, SSH key management, which becomes increasingly cumbersome as the number of servers and developers needing access grows, because every access grant or revocation requires editing the authorized_keys file on multiple machines simultaneously.
Common solutions like changing the default SSH port or installing fail2ban do help, but they only treat the symptoms rather than eliminating the root cause: the SSH port remains exposed to the internet. Tailscale takes another approach by moving access verification to the tailnet identity layer, then closing public access entirely via the firewall.
Tailscale as a Mesh VPN
Tailscale is a mesh VPN built on top of the WireGuard protocol, connecting servers and client devices through a private network called a tailnet. Unlike traditional VPNs that require a single central server as a gateway, the mesh architecture allows every device within the tailnet to connect directly to one another (peer-to-peer) without passing through an intermediary server, as long as network conditions permit. If a direct connection is blocked by strict NAT or firewalls, Tailscale automatically relays traffic through its own relay servers (DERP).
Because it operates over this private network, the server does not need any port forwarding on router or public firewall to be accessible. Sysadmins simply install the Tailscale agent on the Linux server and on each client device (laptop or PC) requiring access, and both automatically discover each other once on the same tailnet.
Installation Prerequisites
Before getting started, make sure the following requirements are met:
- A Linux server with
sudoorrootaccess. - A client device (Linux, macOS, or Windows) that also has administrative access to install software.
- An active Tailscale account. Registration can be done using an existing GitHub, Google, or Microsoft account without creating a dedicated Tailscale password.
Installing Tailscale on the Client
The client is the device used by sysadmins or developers to access the server via SSH. The installation process varies slightly depending on the operating system.
If the client runs Linux, execute the official installation script in the terminal, just as on the server side:
curl -fsSL https://tailscale.com/install.sh | shProceed by connecting the device to the tailnet:
sudo tailscale upThis command outputs an authentication URL that needs to be opened in a browser to log in using the previously registered account.
If the client uses macOS, Windows, iOS, or Android, download the official installer for your operating system from the Tailscale download page and install it like any standard application. Once installed, open the Tailscale application and authenticate through the GUI using the same account.
After successful login via either method, the client device automatically appears on the Machines page in the Tailscale admin console.
Installing Tailscale on the Server
Once the client is ready, the next step is installing the Tailscale agent on the Linux server to be secured. Tailscale provides a single official installation script that automatically detects the operating system distribution and version, then adds the appropriate package repository. This script works on almost all popular Linux distributions, avoiding separate manual steps for each distro.
- Run the official Tailscale installation script:
This script adds the Tailscale package repository, installs thecurl -fsSL https://tailscale.com/install.sh | shtailscalebinary, and enables thetailscaledservice to start automatically on boot. - Connect the server to the tailnet:
sudo tailscale up - Open the authentication URL displayed in the terminal and log in with the same Tailscale account used on the client.
If the server distro is not supported by this script, or if the sysadmin prefers manual installation via official repositories per distro, full instructions are available on the Tailscale Linux download page.
Configuring SSH Access
Servers and clients connected to the same tailnet can automatically reach each other via private Tailscale IP addresses, without additional network configuration.
Checking the Server Tailscale IP
Every device in a tailnet gets a unique private IP address within the 100.x.y.z range (CGNAT range). Check this address on the server using the command:
tailscale ip -4This command returns the server Tailscale IP, for example 100.101.102.103. This IP remains fixed as long as the device is not removed from the tailnet, making it safe to use as a permanent address for subsequent SSH connections.
Testing SSH Connection via Tailscale
From the client device, attempt to connect to the server using the Tailscale IP obtained earlier, rather than the public IP of the server:
ssh [email protected]If the connection succeeds, the SSH path through the tailnet is functional and ready for use as the primary access route to the server.
Tailscale SSH without Manual Keys
In addition to conventional SSH over Tailscale IPs, Tailscale offers a Tailscale SSH feature that takes over authentication and authorization for port 22 connections from fellow tailnet members, without modifying the server /etc/ssh/sshd_config configuration.
It works differently from standard SSH. Once an incoming connection arrives on the tailscale0 interface, tailscaled on the server intercepts traffic to port 22 before it reaches sshd. Because the identity of the caller is already known via WireGuard keys during the tailnet handshake, the server does not need to prompt for additional credentials like passwords or SSH public keys; the session is authorized directly based on active ACL policies. The SSH host key itself is generated automatically by Tailscale when the feature is first enabled and does not require manual management.
Enable this feature on the server with:
sudo tailscale set --sshOn the client side, no special command is required. Simply use the standard ssh command as before, using the Tailscale IP or device hostname in the tailnet:
ssh [email protected]Tailscale automatically recognizes that the connection comes from a fellow tailnet member and verifies whether the user is authorized to log in based on ACL policies before handing off the session to sshd.
Once enabled, who is allowed to log in and as which user is managed through Access Controls (ACL) in the Tailscale admin console, rather than via authorized_keys. Here is an example ACL rule allowing specific users to log in as root or a non-root user on devices tagged as tag:prod:
"ssh": [
  {
    "action": "accept",
    "src":    ["autogroup:member"],
    "dst":    ["tag:prod"],
    "users":  ["autogroup:nonroot", "root"]
  }
]
The key benefit of this approach: revoking access for a developer requires only updating the ACL policy, and that change takes effect across all active SSH sessions within seconds, without having to log into every single server to remove keys.
To check which servers have this feature enabled, open the Machines page in the admin console, then filter by Property and select Tailscale SSH, or enter property:tailscale-ssh directly into the search bar. The resulting list shows all devices in the tailnet currently accepting connections via Tailscale SSH.
If you ever need to disable this feature on a server, such as when returning to manual SSH key authentication, run:
sudo tailscale set --ssh=falseEnsure another functional SSH access method remains available on the server before disabling Tailscale SSH, such as a manual key already configured in authorized_keys or access via a cloud provider console. Otherwise, sysadmins risk being locked out of the server immediately upon running this command.
Restricting SSH Access via Firewall
Once installed, Tailscale automatically adds several rules to Linux iptables under dedicated chains named ts-input and ts-forward. Inspecting them with sudo iptables -L shows something similar to:
Chain INPUT (policy ACCEPT)
target     prot opt source               destination
ts-input   all  --  anywhere             anywhere

Chain ts-input (1 references)
target     prot opt source               destination
ACCEPT     all  --  anywhere             anywhere
DROP       all  --  100.64.0.0/10        anywhere
These default rules serve only two purposes: accepting incoming traffic on the tailscale0 interface, and dropping packets claiming to originate from the tailnet IP range (100.64.0.0/10) coming in on other interfaces as anti-spoofing protection. These rules do not restrict any service, including SSH. Because the default INPUT policy above remains ACCEPT, the public SSH port remains accessible to anyone on the internet until explicit custom rules are added.
To restrict SSH access solely to traffic coming from the tailnet, explicit firewall rules must be added. The following examples use the default SSH port 22; replace this number with your custom port if the server is configured to use a non-default SSH port via Port in /etc/ssh/sshd_config. Choose one method matching the active firewall on your server: iptables, UFW, or firewalld.
Iptables
Add the following rules to INPUT after Tailscale default rules. Order matters: allow traffic from tailscale0 first, then block the SSH port on other interfaces, ensuring you do not lock yourself out when rules take effect.
- Allow all incoming traffic on the Tailscale interface:
sudo iptables -A INPUT -i tailscale0 -j ACCEPT - Block new connections to the SSH port on any interface except
tailscale0:sudo iptables -A INPUT -p tcp --dport 22 ! -i tailscale0 -j DROP - Save rules so they persist across reboots. Method varies by distro, such as using the
iptables-persistentpackage on Debian/Ubuntu oriptables-serviceson RHEL-family systems not running firewalld:sudo iptables-save > /etc/iptables/rules.v4
Verify active rules with sudo iptables -L INPUT -v -n. These additional rules safely coexist alongside Tailscale default ts-input and ts-forward chains, as they operate in separate chains without overlap.
UFW
- Ensure UFW is active and default policy denies all incoming traffic:
sudo ufw default deny incoming sudo ufw default allow outgoing sudo ufw enable - Allow all incoming traffic on the Tailscale interface:
sudo ufw allow in on tailscale0 - Delete any rule allowing public SSH on that port (if previously added):
sudo ufw delete allow 22/tcp - Reload UFW:
sudo ufw reload
After these steps, sudo ufw status should no longer list 22/tcp ALLOW Anywhere, but will show permission for the tailscale0 interface.
Firewalld
The simplest approach in firewalld is moving the tailscale0 interface to the trusted zone (where all incoming and outgoing traffic is allowed), then removing SSH permission from the public zone assigned to the public network interface:
- Move
tailscale0to thetrustedzone permanently:sudo firewall-cmd --zone=trusted --change-interface=tailscale0 --permanent - Remove SSH permission from the public zone. If using default port, remove by service name:
If using a custom port previously opened manually, remove by port number, for example for portsudo firewall-cmd --zone=public --remove-service=ssh --permanent2222:sudo firewall-cmd --zone=public --remove-port=2222/tcp --permanent - Reload firewalld to apply changes:
sudo firewall-cmd --reload
Some user reports note that shifting zones on the tailscale0 interface caused temporary interface dropouts under specific combinations of firewalld and Tailscale versions. Sysadmins should test these changes during off-peak hours and maintain alternative console access (such as via cloud provider console) as an emergency backup in case of firewall misconfiguration.
Testing and Access Validation
After installation, Tailscale SSH configuration, and firewall hardening are complete, re-validate from both ends to ensure everything functions as intended.
- Verify Tailscale status on both client and server shows connected:
Active devices will show status astailscale statusonlinealong with their respective Tailscale IP addresses. - Attempt to SSH into the server using its Tailscale IP from a client enrolled in the same tailnet. Connection should succeed without requesting passwords or manual SSH keys if Tailscale SSH is enabled.
- Attempt logging in with a user not permitted by ACL policy, such as
rooton a server whose policy allows onlyautogroup:nonroot. The connection should be rejected, confirming access policies are actively enforced rather than merely validating WireGuard identity. - Attempt to SSH into the server via its public IP (if assigned), rather than its Tailscale IP. The connection should fail with connection timed out, confirming the firewall rejects SSH traffic from outside the
tailscale0interface.
If the fourth step still connects successfully, the firewall rules were not applied correctly. Recheck iptables, UFW, or firewalld command sequences from previous steps, ensuring no legacy rule permits SSH port access from all IP addresses. If step two or three produces unexpected results, recheck Tailscale SSH status with tailscale status --peers=false or review ACL policies under Access Controls in the admin console.
Conclusion
Tailscale shifts the SSH trust boundary from public IP addresses and static SSH keys to WireGuard identities verified through a tailnet and authorized via centralized ACL policies. However, this model is only fully secure when paired with explicit firewall rules on the server, as Tailscale default rules do not automatically block public SSH access. Once both layers are active, authorized sysadmins and developers retain seamless encrypted access over a private network at any time, while unauthorized external attackers find no open vectors. Tailscale SSH adds further convenience by streamlining access management through ACL policies without manual SSH key distribution across servers. After deployment, regularly monitor connected devices via the admin console, revoke unused endpoints, and keep both Tailscale and server OS packages updated to maintain defense-in-depth security.